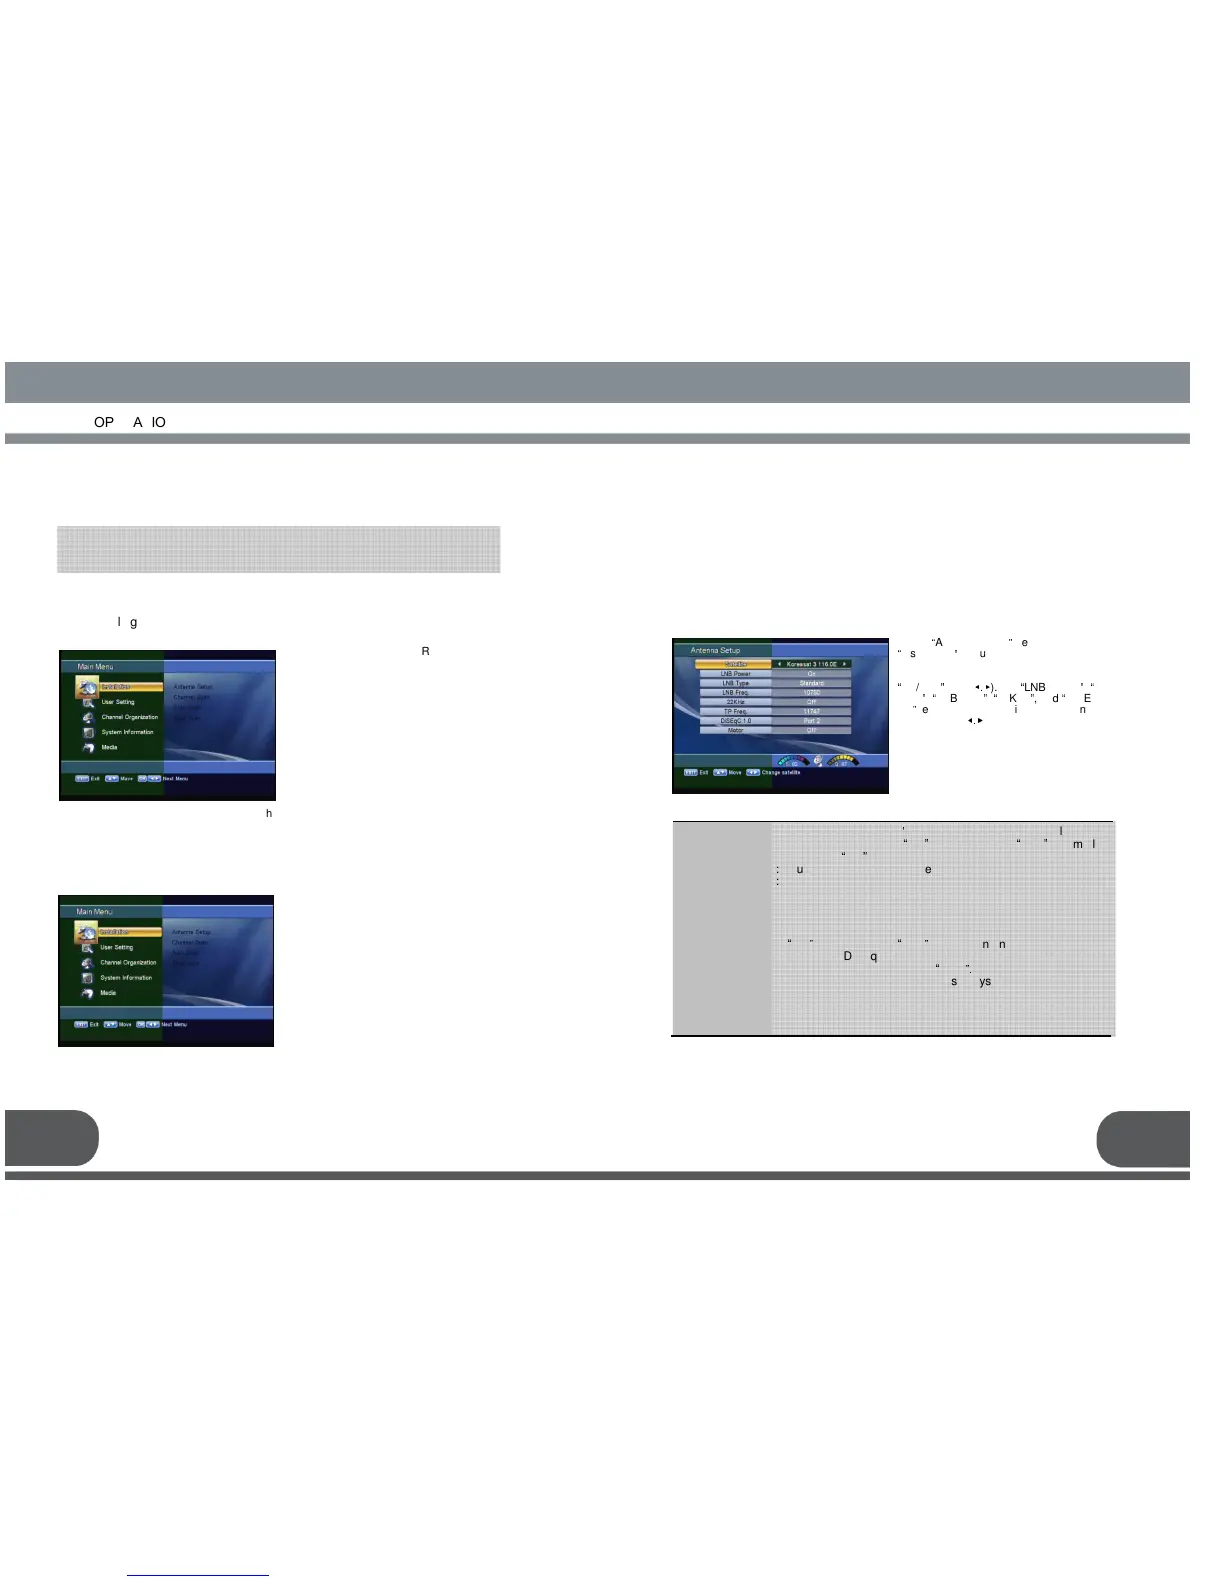
“
Installation
”
menu and the following screen
Select the desired satellite using the
“
left/right
”
keys(
◀.▶
). Set
“
LNB Power
”
,
“
LNB
Type
”
,
“
LNB
Freq
”
,
“
22KHz
”
, and
“
DiSEqC
1.0
”
fields to the
appropriate value using the
left/right keys(
◀.▶
) at
each field.
MENU OPERATION
MENU OPERATIONMENU OPERATION
MENU OPERATION
15
After installing your dish system and receiver with appropriate connectors, plug in
the AC main power and turn on the receiver.
The main menu is classified into several sub menus which will carry out the
various operation individually.
Press the MENU key of the RCU. You
will see the “Main Menu”on the TV
screen as follow.
Please note that the “Common
Interface”menu will be displayed for the
CI Model.
You can move into the desired submenu
using the “up/down”keys(▲·▼) or
numeric keys.
Press “OK”key to confirm your selection.
If the “Main Menu”is locked, note that
you should enter the PIN code in order
to move into the corresponding submenu
“Installation”menu helps you to
setup a variety of parameters
necessary for receiving signal, add
new service, upgrade the new
software and reset the channel
data.
Select “Installation”menu in main
menu, and you will be asked to
enter your PIN code.
You can find the following
“Installation”screen by entering it.
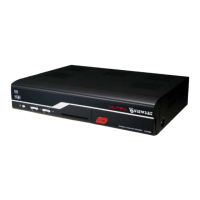
Your receiver includes the preprogrammed information of transponders contained in
various satellites.
You can update the transponder list preprogrammed for a satellite by adding a new
transponder to it or modifying the information of the existing transponder. (Refer to the
Channel Scan described in section 1.B)
LNB Type
LNB Freq.
22KHz
DiSEqC 1.0
Motor
s antenna LNB, you can su
LNB power by setting
“
ON
”
or not by setting
“
OFF
”
. Normally
set this to
“
ON
”
.
: You can select the LNB type.
: You can select the predefined LNB frequency or manually
enter a specific frequency in MHz unit by pressing numeric
keys.
: In case you are using two antennas connected to a 22KHz
tone switch box, you can supply either 22KHz by setting
“
ON
”
or off by setting
“
OFF
”
to select antenna.
: If you have DiSEqC box, you can choose port by selecting port
number. Otherwise, choose
“
none
”.
: If you have a DiSEqC 1.2 motorised system, then you can take
advantage of the DiSEqC 1.2 functions available. Choose
Installer as Motor and press “OK” key.
After that, adjust antenna direction using browse keys.
The default factory PIN code is
Press the “menu”key or “exit”key to return to previous menu.