12
4. Operation
NOTE: The control button described in this section
is mainly on the remote control unless
specied otherwise.
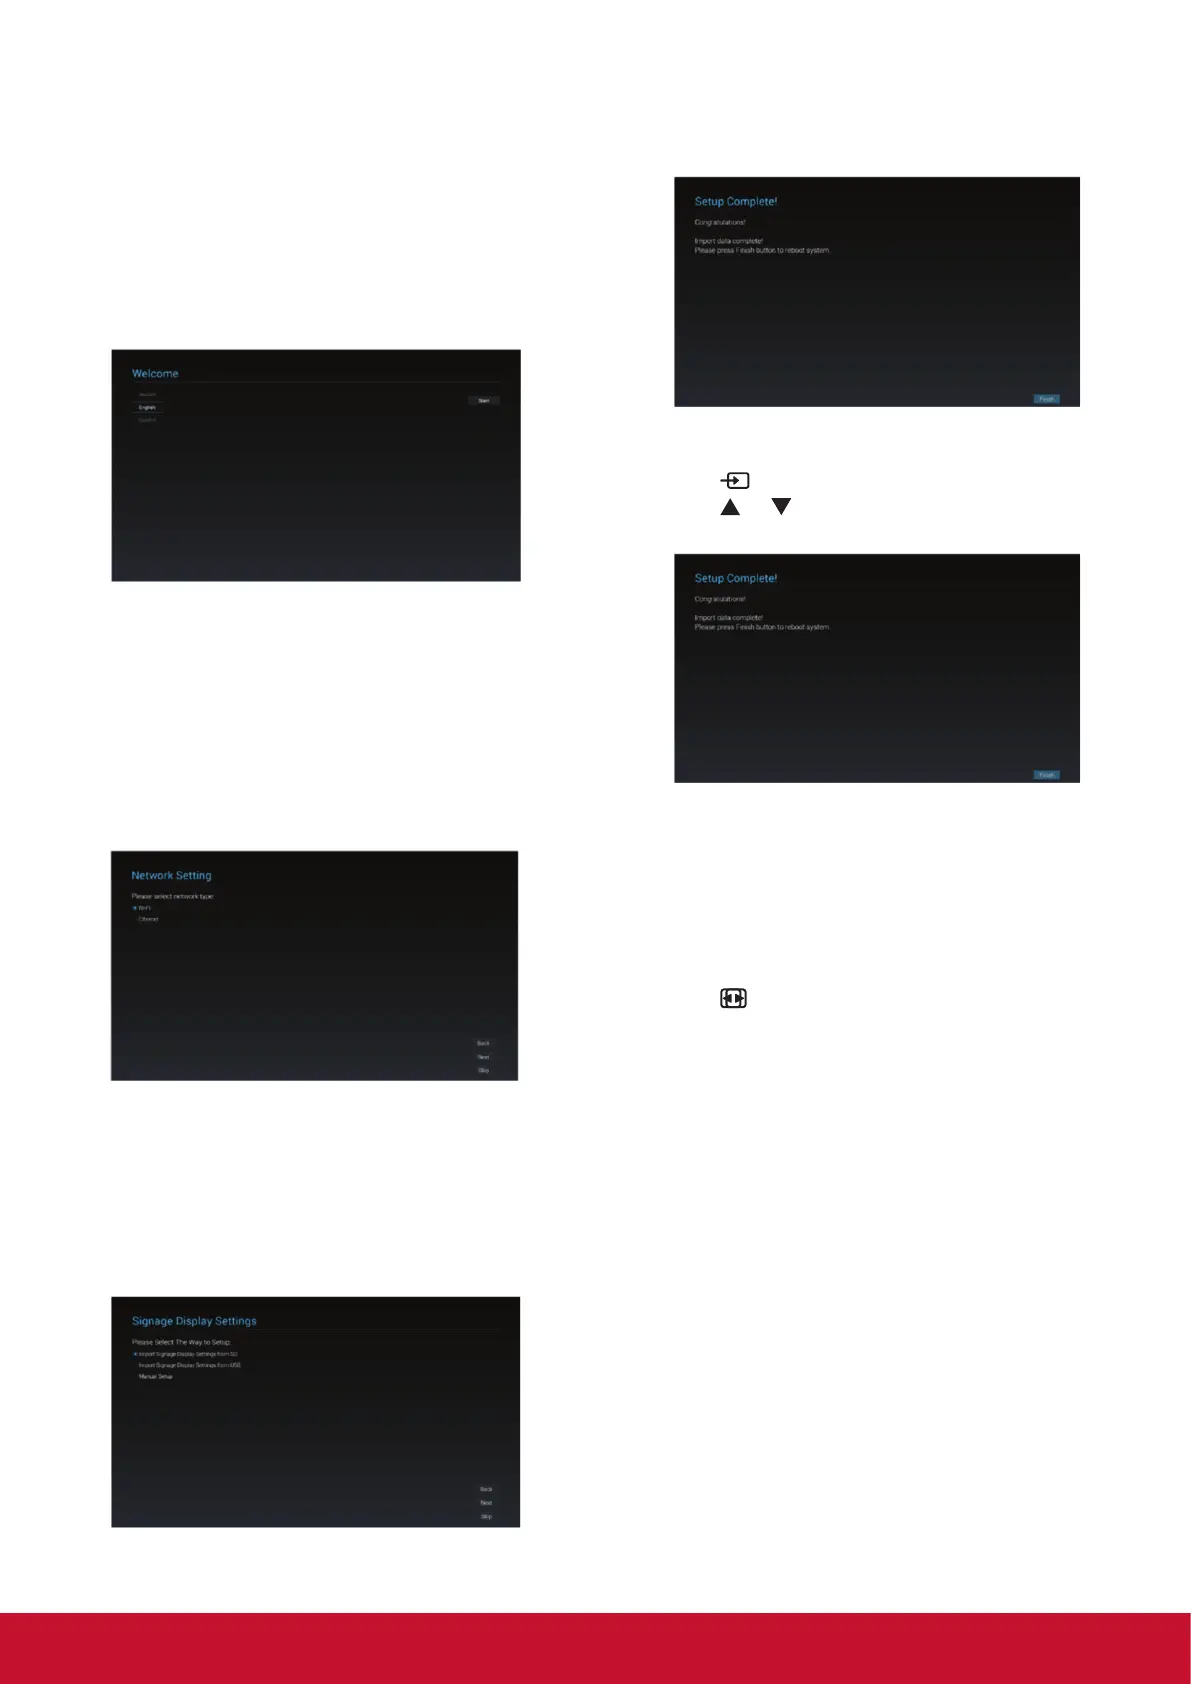
4.1. Start-up and initial Setting
4.1.1. Welcome
Select your language and tap “Start”.
4.1.2. Network Setting
Tape “Next” button to next page and it will show.
1. Connection Type : DHCP / Static IP
2. IP Address
3. Netmask
4. DNS Address
5. Gateway
You also can tape “Skip” to congure later
4.1.3. Signage Display Settings
User can import the setting le from SD, USB or
manual setting. User also can tape “Skip”.
Note: The setting le should be put on viewsonic
folder in SD or USB and the le name is settings.
db.
4.1.4. Setup Complete
The initial settings are completed. Press “Finish”
and display will reboot automatically.
4.2. Watch the Connected Video Source
1. Press
SOURCE button.
2. Press
or button to select a device, then
press OK button.
4.3. Change Picture Format
You can change the picture format to suit the video
source. Each video source has its available picture
formats.
The available picture formats depend on the video
source:
1. Press
FORMAT button to choose a picture
format.
• PC mode: {Full} / {4:3} / {Real} / {21:9}/
{Custom}.
• Video mode: {Full} / {4:3} / {Real} / {21:9}/
{Custom}