EasyManua.ls Logo

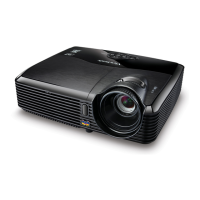
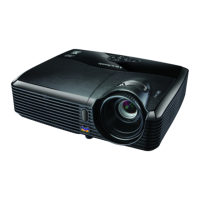
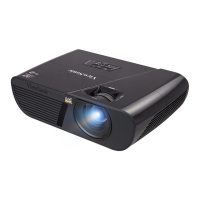
ViewSonic PJD5126 User Manual

ViewSonic PJD5126
89 pages
To Next Page IconTo Next Page
Page #1 background imageLoading...
Page #1 background image
PJD5126_PJD5226_
PJD5226w_PJD6223_
PJD6253_PJD6353_PJD6383_
PJD6553w_PJD6653w_
PJD6683w
DLP Projector
User Guide
IMPORTANT: Please read this User Guide to obtain important information on installing
and using your product in a safe manner, as well as registering your product for future
service. Warranty information contained in this User Guide will describe your limited
coverage from ViewSonic Corporation, which is also found on our web site at http://www.

the upper right corner of our website. “Antes de operar su equipo lea cu idadosamente
las instrucciones en este manual”
/ VS14555/VS14553/VS14195/VS14554/VS14550
Model No. VS14295/VS14551/VS14552/VS14191/VS14193

Table of Contents

Other manuals for ViewSonic PJD5126

Questions and Answers:

ViewSonic PJD5126 Specifications

General IconGeneral
Native aspect ratio16:9
Projection distance1.2 - 10 m
Vertical scan range50 - 120 Hz
Projection technologyDLP
Supported aspect ratios4:3, 16:9
Contrast ratio (dynamic)15000:1
Contrast ratio (typical)-
Screen size compatibility30 - 300 \
Projector native resolutionSVGA (800x600)
FocusManual
Throw ratio1.86 - 2.04:1
Zoom capabilityYes
Focal length range- mm
Lamp power180 W
Light source typeLamp
Service life of light source5000 h
Service life of light source (economic mode)6000 h
Supported video modes1080i, 1080p, 480i, 480p, 576i, 576p, 720p
Analog signal format systemNTSC, SECAM
RMS rated power2 W
Number of built-in speakers1
Built-in displayNo
HDMI ports quantity0
Serial interface typeRS-232
USB 2.0 ports quantityUSB 2.0 ports have a data transmission speed of 480 Mbps, and are backwards compatible with USB 1.1 ports. You can connect all kinds of peripheral devices to them.
VGA (D-Sub) ports quantity3
Component video (YPbPr/YCbCr) in2
Connectivity technologyWired
Noise level32 dB
CertificationCB, UL, cUL, FCC (including ICES-003), CE, UL-Argentina, NOM, GS, GOST-R, SASO, Ukraine, PSB, C-Tick, Korean-KC, CCC, CECP, WEEE
Noise level (economic mode)29 dB
Product colorBlack
Market positioningPresentation
Cable lock slot typeKensington
Power sourceAC
AC input voltage100 - 240 V
AC input frequency50 - 60 Hz
Power consumption (standby)1 W
Power consumption (typical)243 W
Operating altitude1800 - 3048 m
Storage temperature (T-T)0 - 40 °C
Operating relative humidity (H-H)10 - 90 %
Sustainability certificatesRoHS, ENERGY STAR
Weight and Dimensions IconWeight and Dimensions
Depth242 mm
Width294 mm
Height84 mm
Weight2600 g
Package depth192 mm
Package width380 mm
Package height345 mm
Package weight4100 g

Summary

Important Safety Instructions

Introduction

Controls and functions

Overview of the projector's buttons, indicators, and their functions.

Projector exterior view

Controls and functions

Projector

Details the specific buttons and indicator lights on the projector unit.

Remote control

Positioning your projector

Choosing a location

Guidance on selecting the optimal placement for the projector.

Projection dimensions

Connection

Connecting a computer or monitor

Connecting Video source devices

Connecting an HDMI device

Connecting a Component Video source device

Connecting an S-Video source device

Connecting a composite Video source device

Operation

Starting up the projector

Step-by-step instructions for powering on the projector.

Using the menus

Utilizing the password function

Entering the password recall procedure

Changing the password

Disabling the password function

Switching input signal

Adjusting the projected image

Adjusting the projection angle

Uses projector feet to adjust the projection angle and height.

Correcting keystone

Selecting the aspect ratio

Optimizing the image

Selecting a picture mode

Guides on choosing preset picture modes for various signals.

Image Adjustment Settings

Color Management

Setting the presentation timer

Locking control keys

Controlling the projector through a LAN environment

Configuring the LAN Control Settings

Steps to set up network control in a DHCP environment.

If you are in a non-DHCP environment

Controlling the projector through a web browser

Shutting down the projector

Menu operation

Menu system

Lists available On-Screen Display (OSD) menu items and options.

Description of each menu

3. SOURCE menu

4. SYSTEM SETUP: Basic menu

5. SYSTEM SETUP: Advanced menu

Maintenance

Lamp information

Timing of replacing the lamp

Replacing the lamp

Resetting the lamp timer

Indicators

Troubleshooting

Specifications

Projector specifications

Lists technical details including resolution, lamp, power, and weight.

Input terminal

Output terminal

Control terminal

Ceiling mount installation

Timing chart

Customer Support

Limited Warranty

Related product manuals