7602030
19
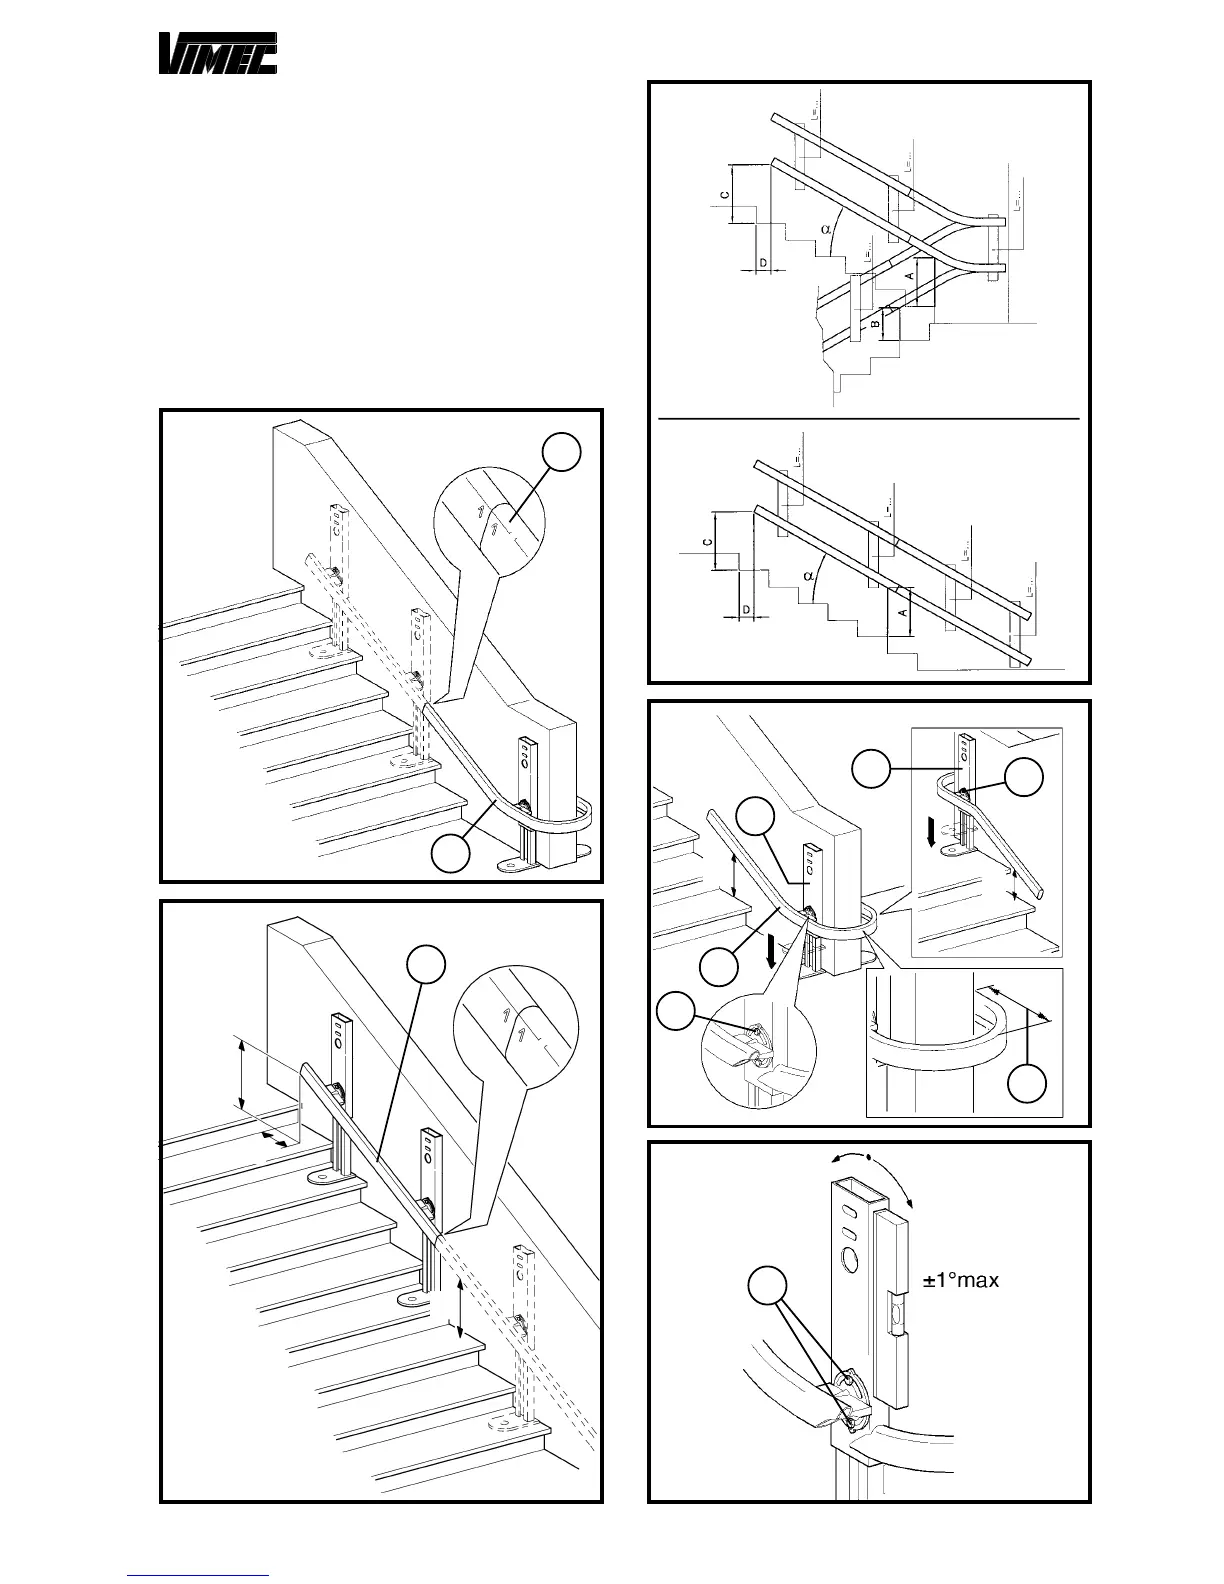
2) INSTALLING THE LOWER RAIL
- Using the proper assembly punching (Fig. 3/b), locate
the first guide section in which is the curve (Fig. 3/a)
starting from the high plan.
NOTE: If there are no curves, locate the first rectilinear
section (Fig. 4/a) always starting from above.
- Position the curve in the installation point (Fig. 6/c).
- Taking as reference the values in the assembly diagram
(example Fig. 5) slide-off the feet and lightly tighten
just one screw (Fig. 6/a) of each connection device
(Fig. 6/d).
NOTE: Make sure the outer side of the guide stands at
FIG.7
a
FIG.5
FIG.3
FIG.4
FIG.6
a
b
d
a
b
a
d
c
A
B
160
C
D
A
a