36
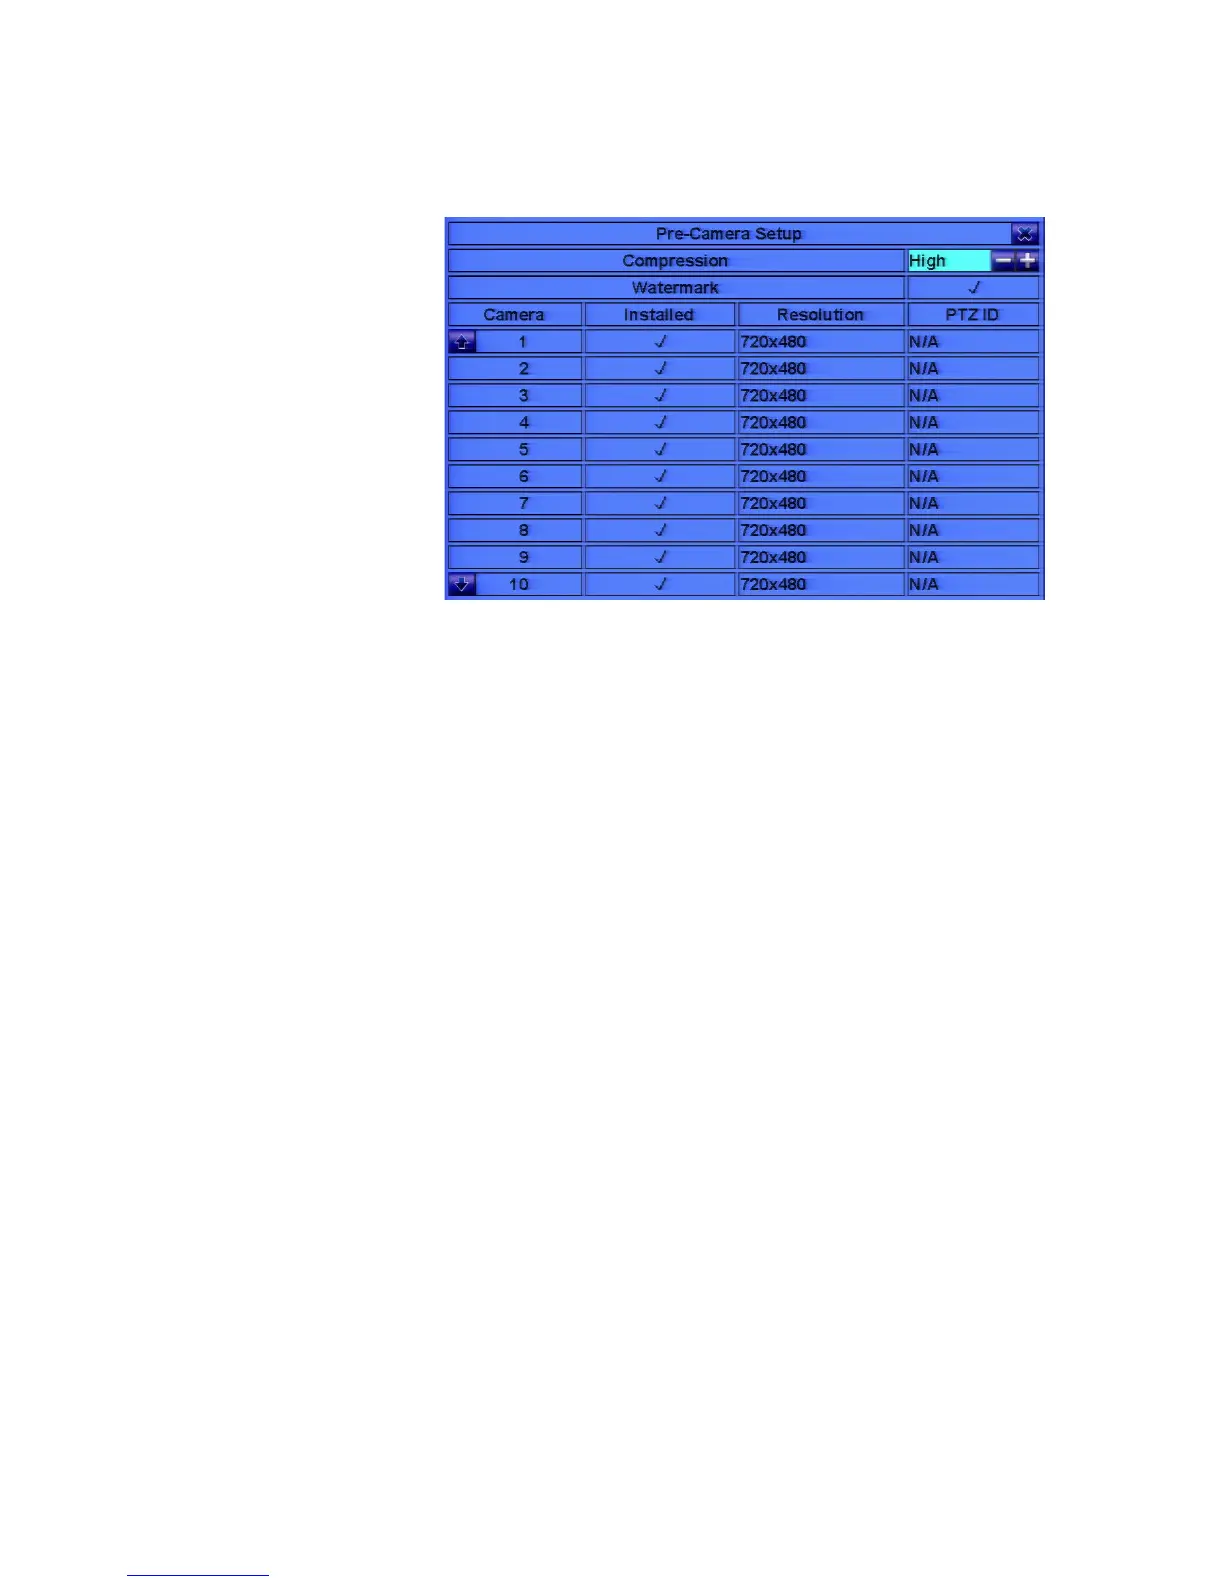
6.1 Pre-Camera Setup
In Setup Menu
display, press
▲▼◄► to change
the highlighted
option to
Pre-Camera, and
then press ENTER
(Mouse: Left click)
to call up
Pre-Camera Setup
display.
There are up to 16
cameras which can be connected to the system. The Pre-Camera Setup allows the
administrator to define some fundamental attributes, which may relate one camera to
the others, for all the installed cameras.
The general operations are as below:
! ▲▼◄►
Press these buttons to select the items. The display will scroll up/down if the
selected item is not shown on the screen.
! Numeric (ENTER)
Press these buttons to select the camera.
! ESC (Mouse: Right Click)
Press this button to escape from this screen, and return to Setup Menu display. If
the contents have been modified, a Save dialog will be shown to ask the user to
save the changes, press ENTER to exit and save, ESC to exit without saving.
Following is a brief description for each item and its specific operations:
! Resolution – the record resolution for the camera. For NTSC, it can be 960x480,
720x480, 960x240, 720x240, 480x240, or 360x240; for PAL, 960x576, 720x576,
960x288, 720x288, 480x288, or 360x288. Press +/- buttons to select the
resolution.
! Compression – Compression ratio of Normal or High. High compression ratio
will result in smaller storage size, and hence longer recording time; but the
Normal Record IPS will always be the same as Event Record IPS in Camera
Setup, and Dual Streaming will always be used for network video. Press +/-