Example Jobs 129
© 2015 Vision Engraving Systems
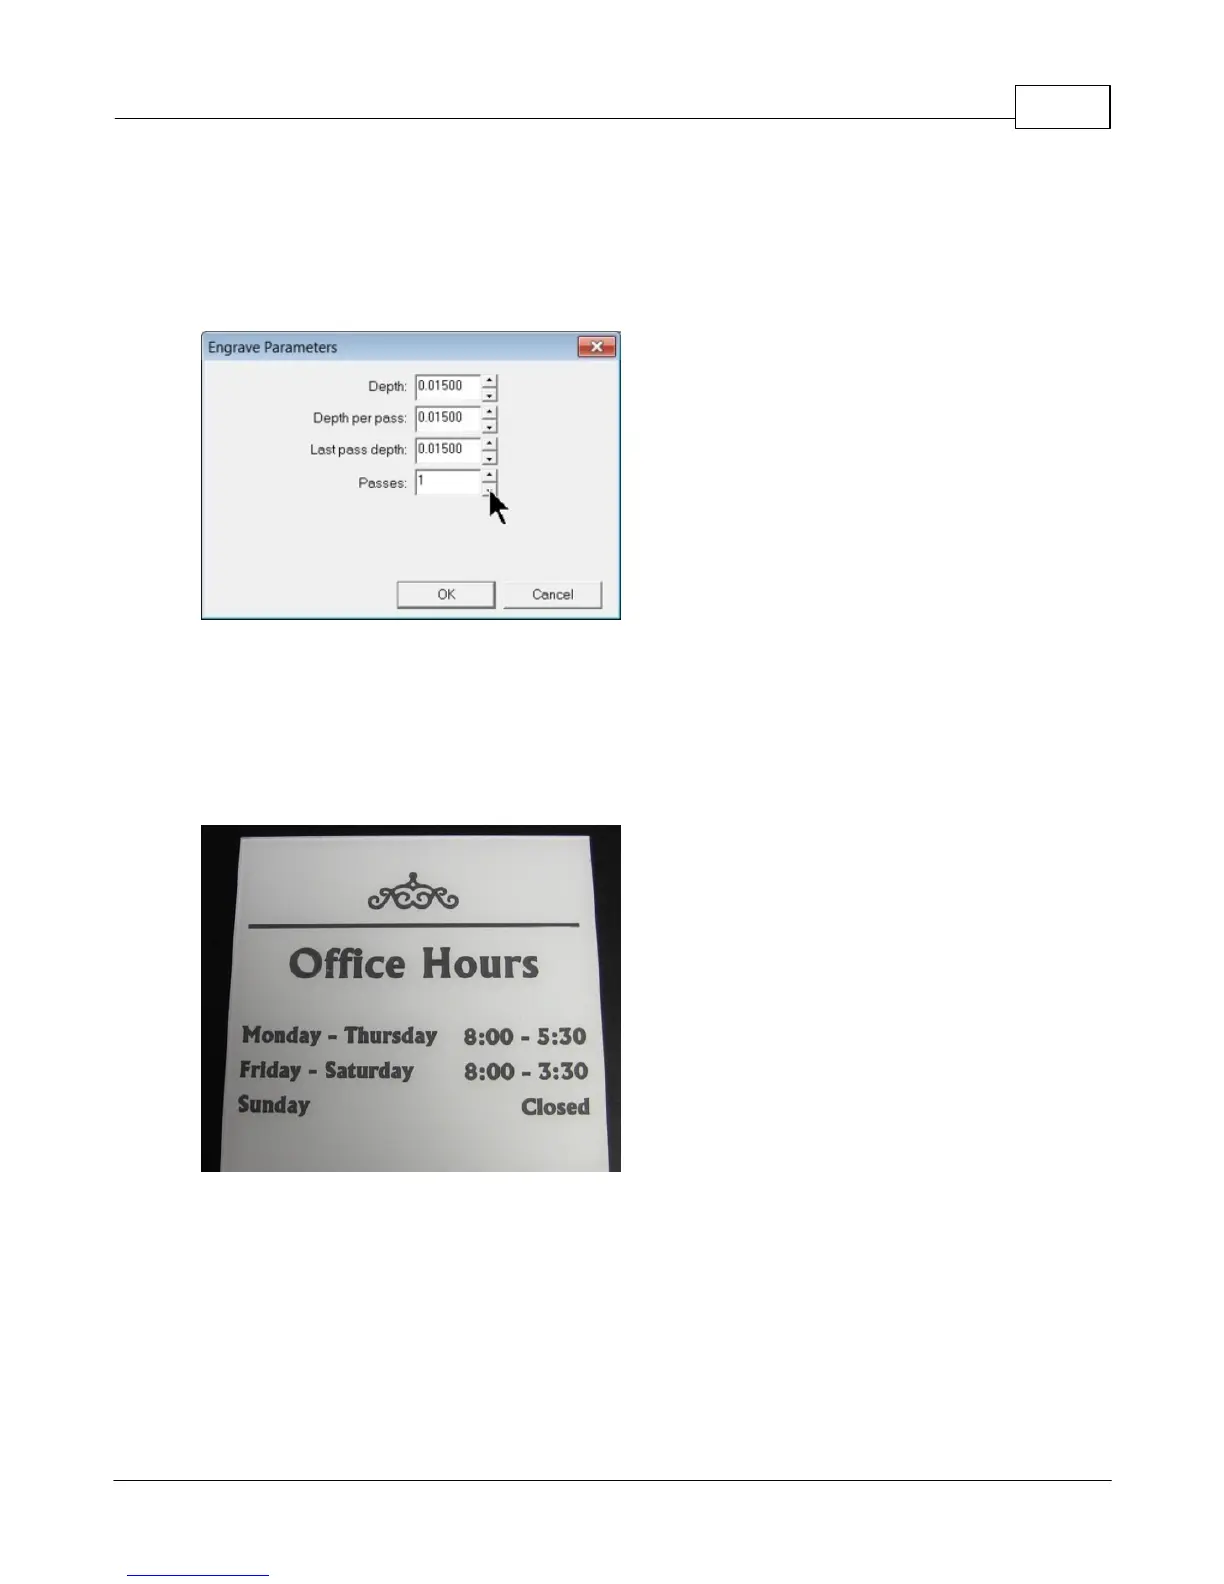
The Engrave Parameters window will appear. Generally, the number of passes will depend on the
desired total depth, cutting tool used and material. In this example, a single pass will be used. A rule of
thumb is to not engrave any individual pass deeper than the cutting tool tip diameter - although this
varies with each tool type. To make sure only one pass is run, select the "down" arrow next to the
Passes field until the number of passes equals 1. Select OK to close this window.
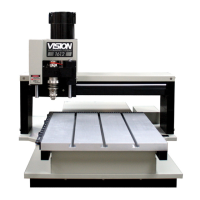
Select OK to close the Fill window and create the fill pattern.
At this point, the file is ready to be sent to the engraver. Place the reverse engraver's plastic material
(clear side down) on the t-slot table on top of Multi Mat. Set the engraving depth to slightly more than the
cap layer for your material. In this case, the engraving depth was set to 0.015 inches (15 clicks). Send
the job to the engraver using the Engravers Plastic material setting, hook up your vacuum chip removal
system and start the job. In the picture below, the material was flipped over to view from the front side.