Example Jobs 133
© 2015 Vision Engraving Systems
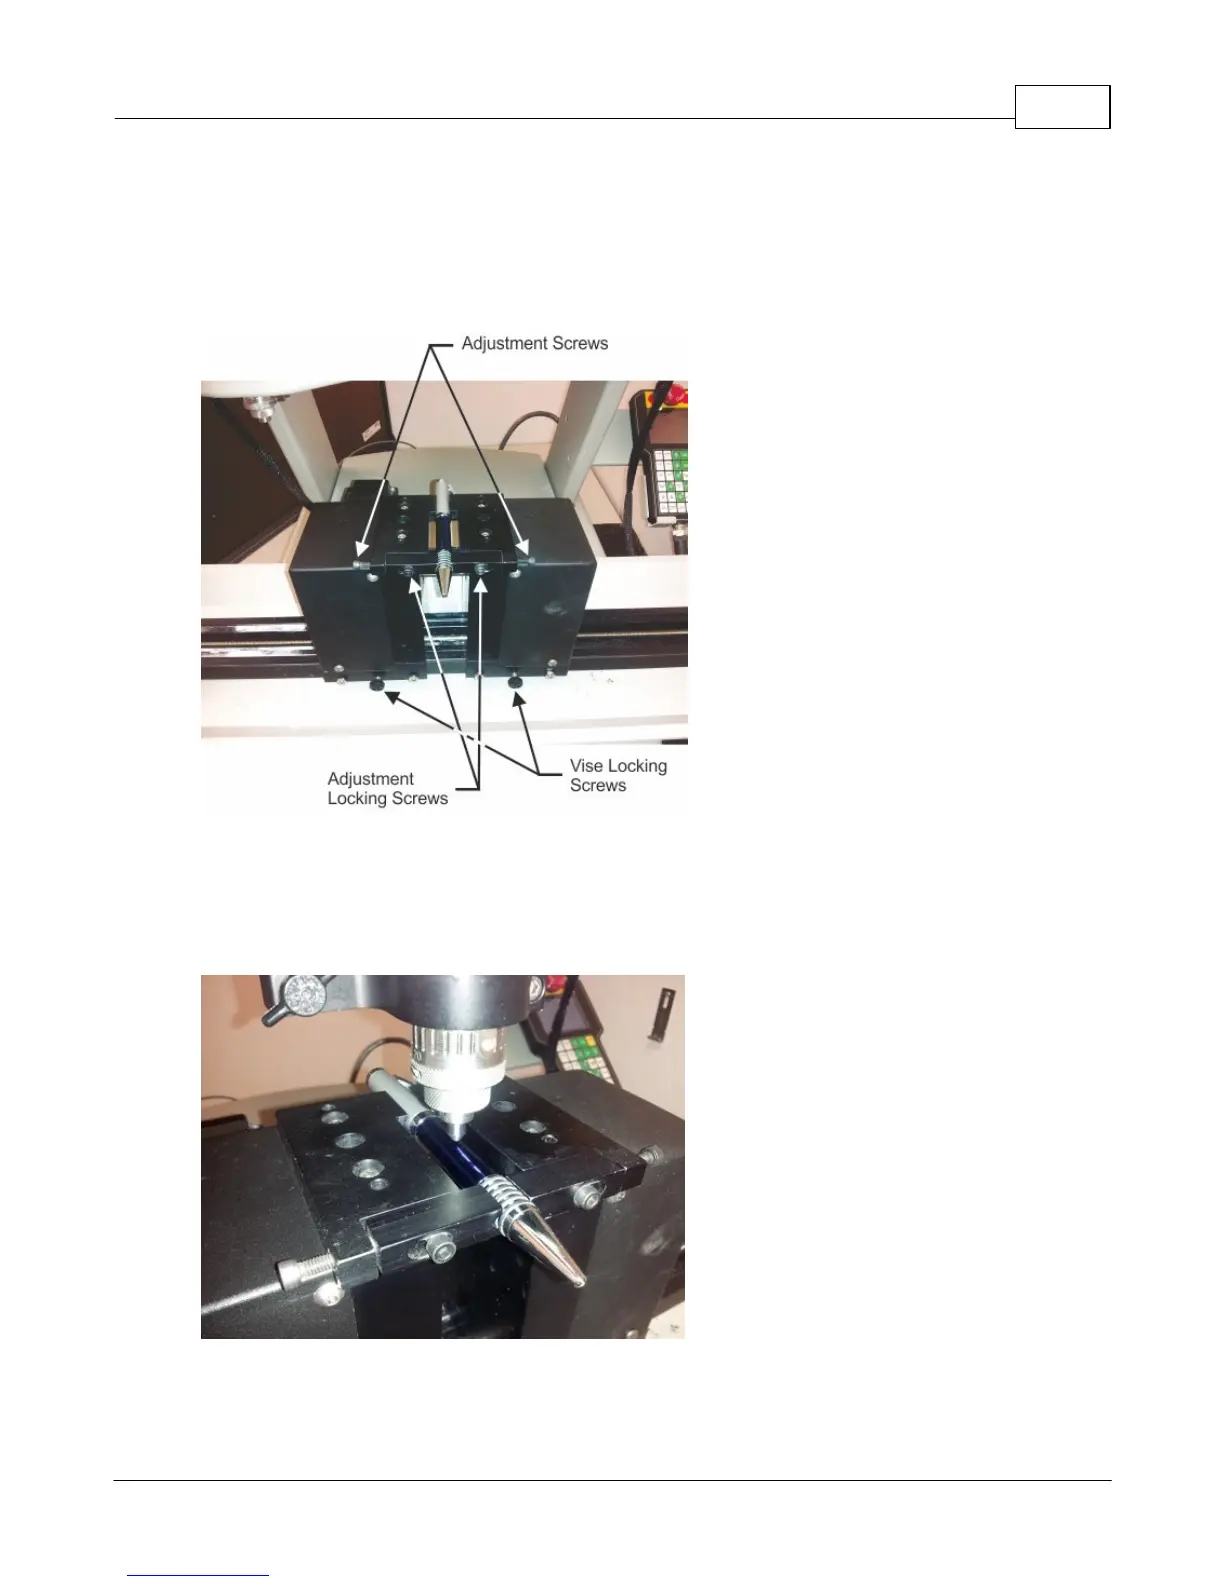
Install the pen so that the non-adjustable part of the fixture is securing the pen cap, then slide the
adjustable portion of the fixture toward the pen barrel and turn the adjustment screws to hold the center
the pen in the fixture and hold the pen in place. Secure the slides with the adjustment locking screws,
then lock the vise with the vise locking screws. NOTE: The pen fixture can be installed in two directions,
with the adjustment slides either toward the user, or towards the rear of the machine.
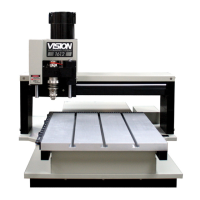
Install a non-rotating diamond drag cutter into the machine's spindle and adjust the cutter so that the tip
extends below the bottom of the spindle approximately 1/4". Using the X and Y buttons on the Pendant,
move the spindle over to the center of the area where you want to engrave the pen. Lower the cutter tip
with the Z down button on the Pendant, so that it is just above the pen's top surface, then visually check
and adjust the position of the cutter to the center of the area to be engraved.