22
Troubleshooting
Review the information in the table below to troubleshoot operating problems.
Power cord connection is not reliable
Glass cuvettes used in UV Range
The concentration of sample is too high
Power Supply Voltage Low or not
Stable
Lamp damage or lamp life maturity
Dark Current Error when self-
check
The lid of the compartment is open
during self-check
Something block the Light path
Remove it, calibrate again
Cuvettes were contaminated
Samples were contaminated
Worse matching of the cuvettes
Improve the matching of the cuvettes
Repair and maintenance
Daily Maintain
Check the compartment
After measurement, the cuvettes with sample solutions should be taken out of the compartment in time. Or the
volatilization of the solution would make the mirror go moldy. Users must pay more attention to the corrosive
sample and liquid easy to volatilize. Any solution remains in the compartment should be wipe off immediately.
Surface clean
The cover of the instrument is with paint. Please use wet towel to wipe off the drips on the surface immediately.
Organic solution is forbidden to be used to clean the cover. Please wipe off the dirt on the cover timely.
Clean the cuvettes
After every test or after a solution change, the cuvettes should be cleaned carefully, or the remains on the surface
would cause measuring error.
Spare Parts Replacement
Replace the fuse
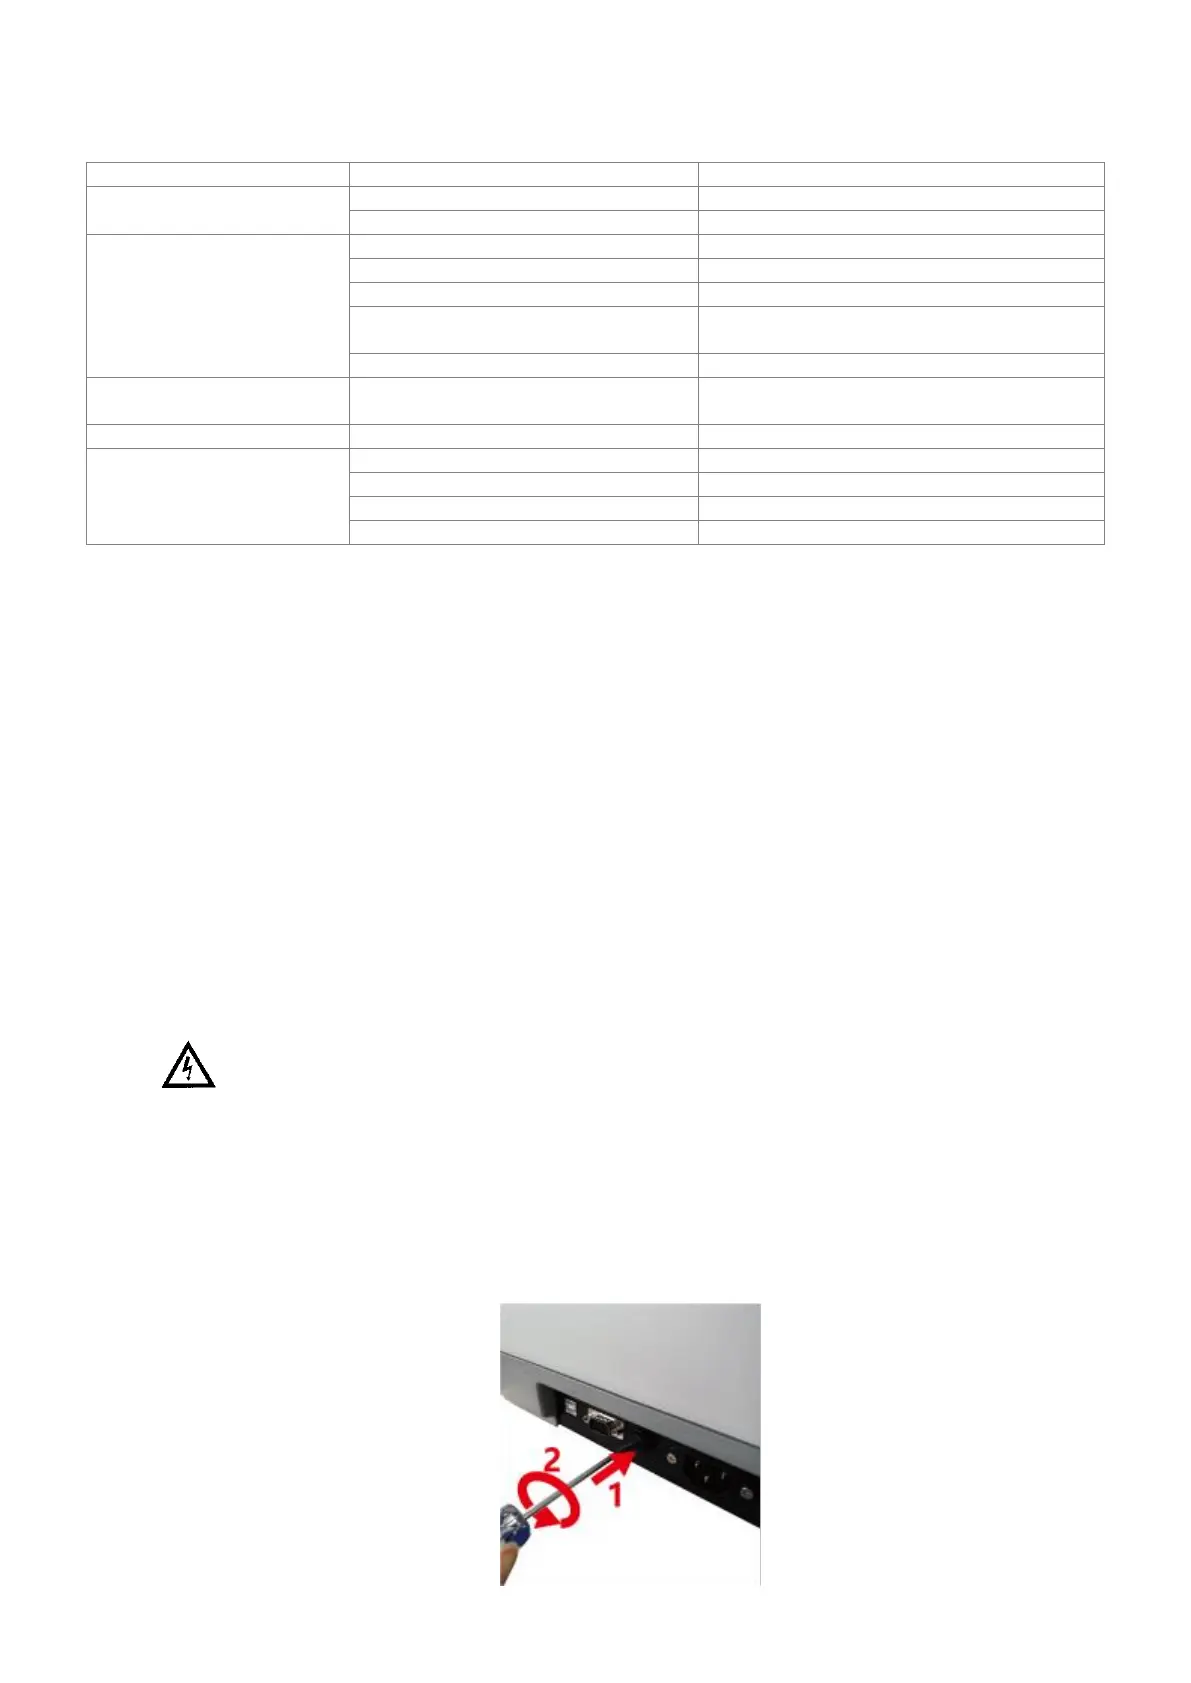
Danger! Be sure to switch off the power and unplug the socket before replacement!
1. Tools preparation
Prepare a 3×75 Flat Blade screwdriver.
2. Switch Off the power supply
Switch off the power supply, and unplug the socket.
3. Take out the Fuse Seat
Push the fuse case by using the screwdriver, and turn it counterclockwise, the fuse seat will pop out when
released.