E 2200, E 3000ES Burner Setup
wc_tx001669gb.fm 87
Continued from the previous page.
4. Tighten the hex head screw.
5. Tighten the splined nut.
6. Reconnect the oil connector tube.
Result
The “Z” distance has now been set.
Continue by setting the head position adjusting plate.
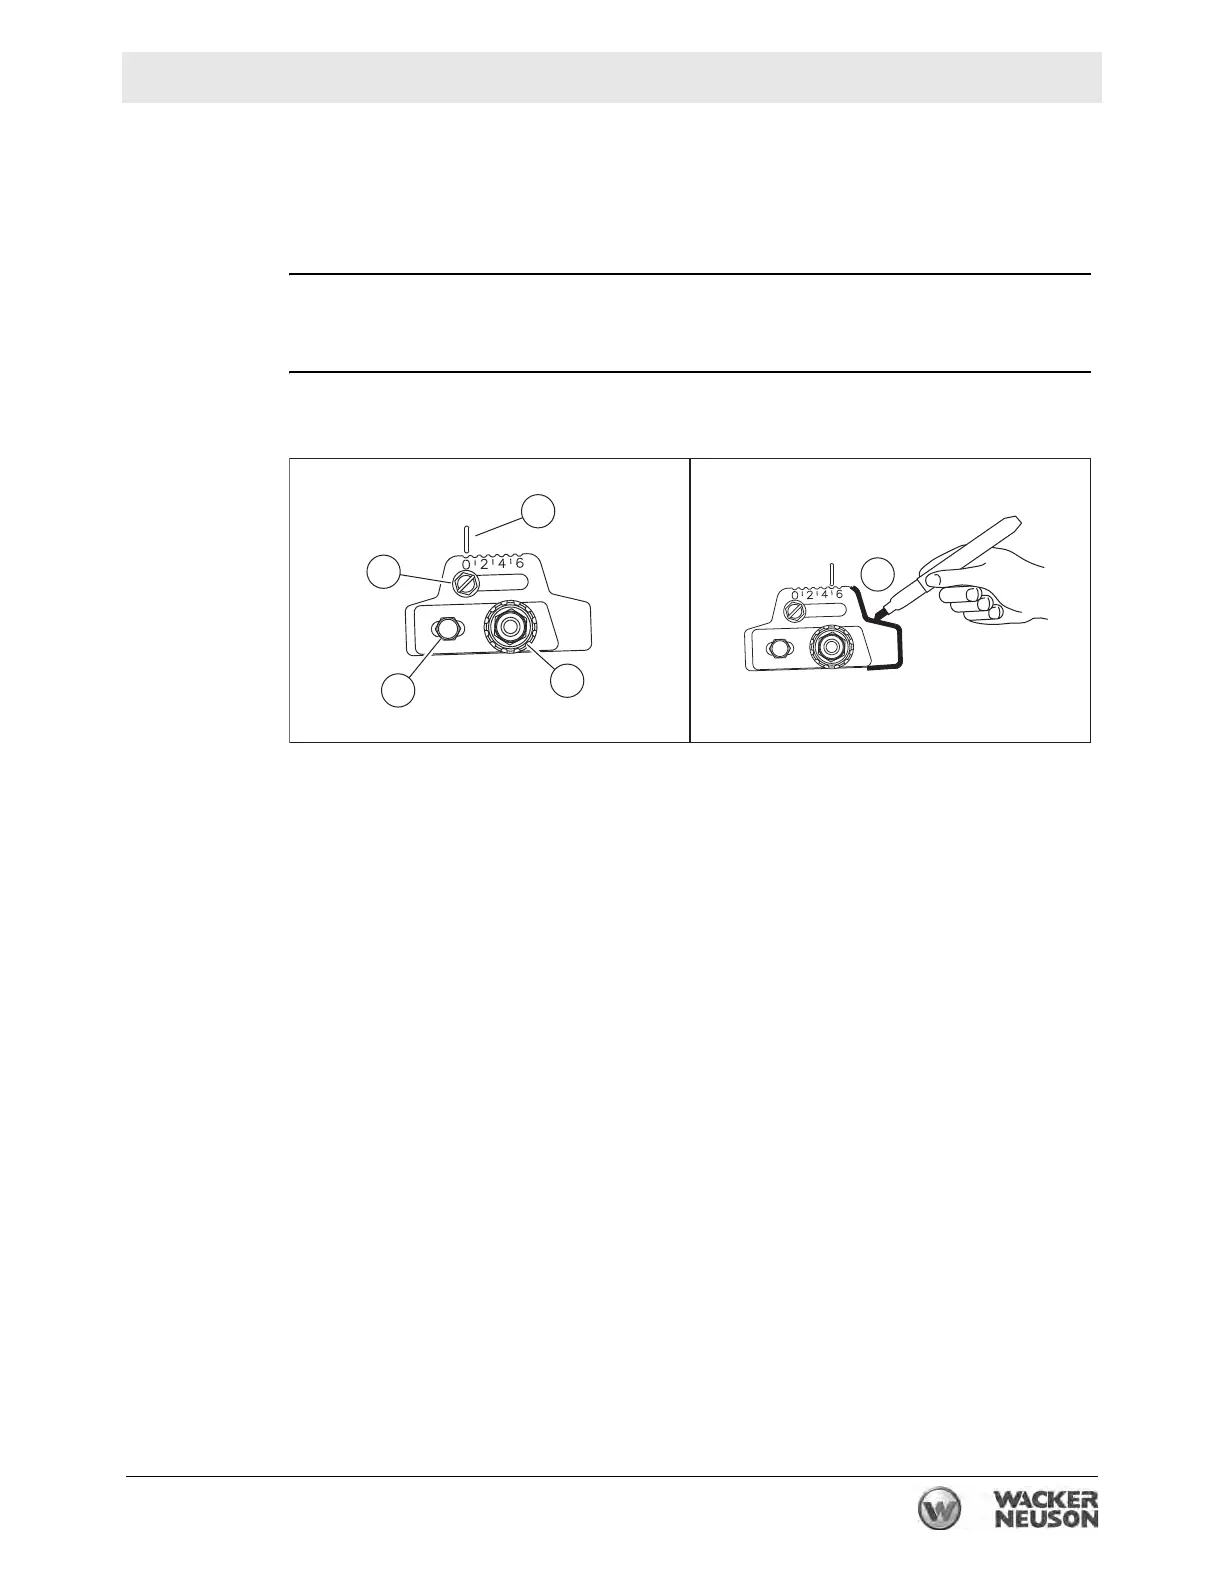
Set the head
position
Perform the procedure below to set the head position adjusting plate.
1. Loosen the hex head screw (b).
2. Loosen the splined nut (a). Do not loosen acorn nut (c).
3. Move the nozzle assembly until the burner reference indicator (d) lines up with
the number listed in the Factory Settings chart in topic Burner Setup.
4. Tighten both the hex head screw and the splined nut.
5. Mark (x) the head position adjusting plate for future reference.
a
c
b
d
wc_gr008106
x