Maintenance Instructions CLEANING
66
Donaldson Radialseal™ Air Cleaner
A remote mounted Donaldson Radialseal™ air
cleaner provides the air ltering function. The paper
lter element slides over an outlet tube inside the air
cleaner canister with radial sealing action, reducing
the possibility of dust leaks due to improper lter
installation. Intake design, internal baing, and a
dust ejection valve provide dust separation and
auto matic precleaning action. Daily or frequent ser-
vicing of the air cleaner is not required. Use the air
lter re striction gauge on the air cleaner outlet to
indicate when the air lter needs servicing–a yellow
indicator will show when the lter is overly restricting
airow into the engine.
IMPORTANT: Use only Donaldson air lter ele-
ments for replacement (Donaldson P822686 or
Walker 5090-1). Aftermarket lters may not seal
properly or lter eciently.
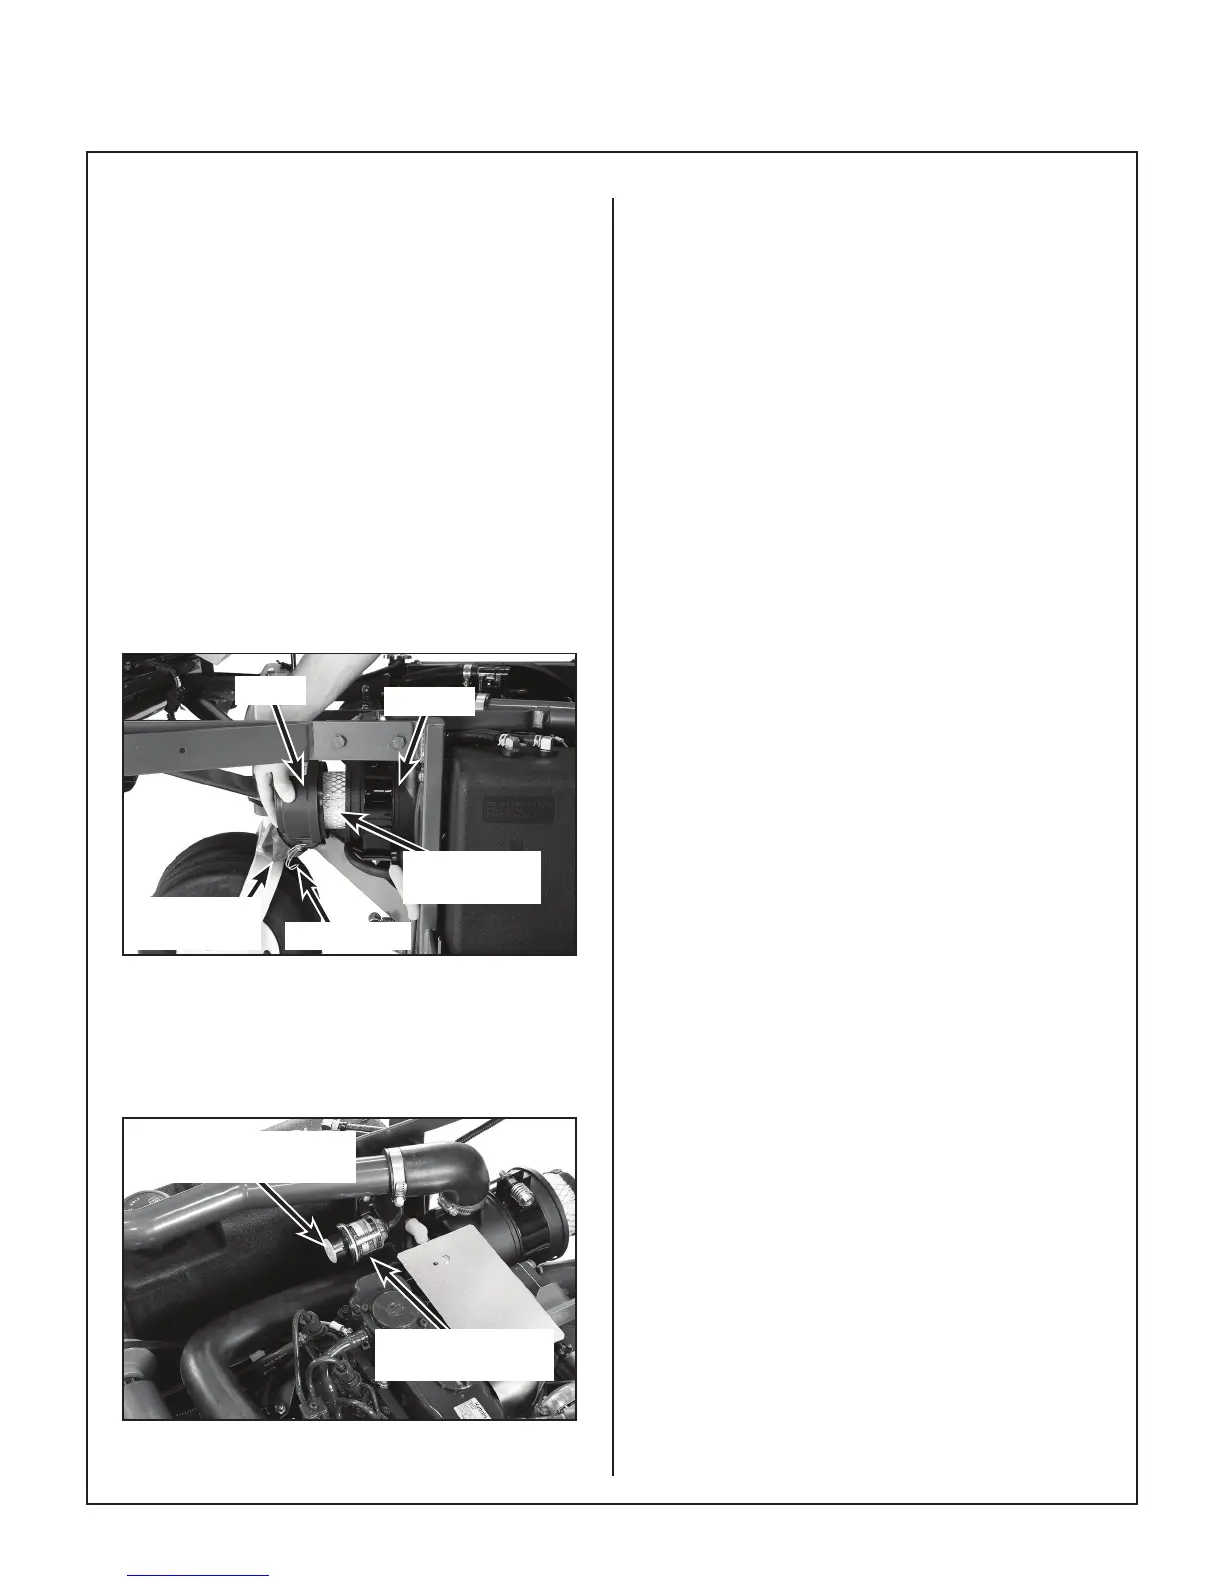
Dust Ejection
Valve
Cover Latch
Primary
Filter Element
Canister
Cover
Air Cleaner Components
(Shown with Cover Being Removed)
IMPORTANT: The Donaldson air cleaner uses a dry
paper-type lter element. NEVER apply oil to the
paper element.
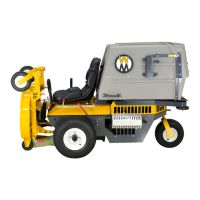
Air Filter
Restriction Gauge
Push Button to Reset
Indicator After Service
Air Filter Restriction Gauge Location
Inspect the paper element after every 100 hours of
service and replace the element and safety lter
yearly (or when dirty or damaged). More frequent
replacement may be required when operating in ex-
tremely dusty con ditions as indicated by the air lter
restriction gauge. Ser vice the air cleaner as fol-
lows:
1. Release the top and bottom cover latches and
remove the air cleaner cover. Wash the cover
and dust ejection valve. Check that these com-
ponents are in good condition. The dust ejec-
tion valve is subject to wear and deterioration
and should be inspected carefully and replaced
yearly or when damaged. The lips of the valve
should close and t together; any cracks, defor-
mation, or wear in the valve is cause for re-
placement.
2. Remove the lter element by pulling it out of the
canister. There will be some initial resistance
as the lter seal breaks loose and slides o of
the outlet tube. Gently move the end of the
lter up and down and side to side or twist to
loosen the seal. Use gentle action to minimize
the amount of dust dislodged as the lter is re-
moved.
3. Discard the lter element if excessive air ow
restriction has been indicated by the air lter
restriction gauge and proceed to Step 6. Clean
the lter element by gently tapping on a at,
hard surface. If excessive restriction still exists
after cleaning the element, it should be re-
placed.
NOTE: Use care when cleaning the lter ele-
ment. The lter element and/or seal surface
may be damaged by tapping too hard or hitting
on an uneven surface or sharp edge. Washing
the element in water or cleaning solution is not
recommended. Do not try to clean the element
with compressed air. Remember, replacing a
lter is less expensive than replacing a dusted
engine.
4. Use a bright light inside the element to inspect
for damage. Check the element very carefully
for pin holes or other damage that will allow
dirt to leak through the paper media. Replace
lter element if dirty or damaged.
5. Check the condition and resilience of the radial
sealing surface (inside of the open end) of the
lter. Replace the lter if any cracks, tears, or
other damage to the sealing surface are noted.