Maintenance Instructions CLEANING
67
6. Without removing, visually inspect the condition
of the safety lter for damage or holes. The
safety lter should only be removed for yearly
replacement (or when dirty or damaged).
IMPORTANT: Prior to removing the safety lter,
make sure the inside surface of the air cleaner
canister is clean. This will minimize the risk of
dirt entering the outlet tube which can cause pre-
mature engine wear.
7. After removing the safety lter, use a clean,
damp cloth and wipe the interior of the air clean-
er canister clean. Use special care to clean
both the inside and outside surfaces of the
outlet tube.
IMPORTANT: Any dust left on the inside of the
outlet tube will go into the engine and cause
wear.
8. Check the outside surface of the outlet tube for
smoothness and cleanness (this is the sealing
surface).
9. Insert and seat the safety lter and primary lter
element carefully into the canister, applying
pressure at the outer rim of the lter; not at the
exible center. Make sure the lter element is
completely in place before installing the cover.
IMPORTANT: DO NOT use the cover latches
to force the lter into the canister–the cover
should t on with no extra force.
NOTE: DO NOT use petroleum based lubri-
cants on the sealing surfaces of the lter; use
tal cum powder or dry silicone lubricants if re-
quired for lter installation.
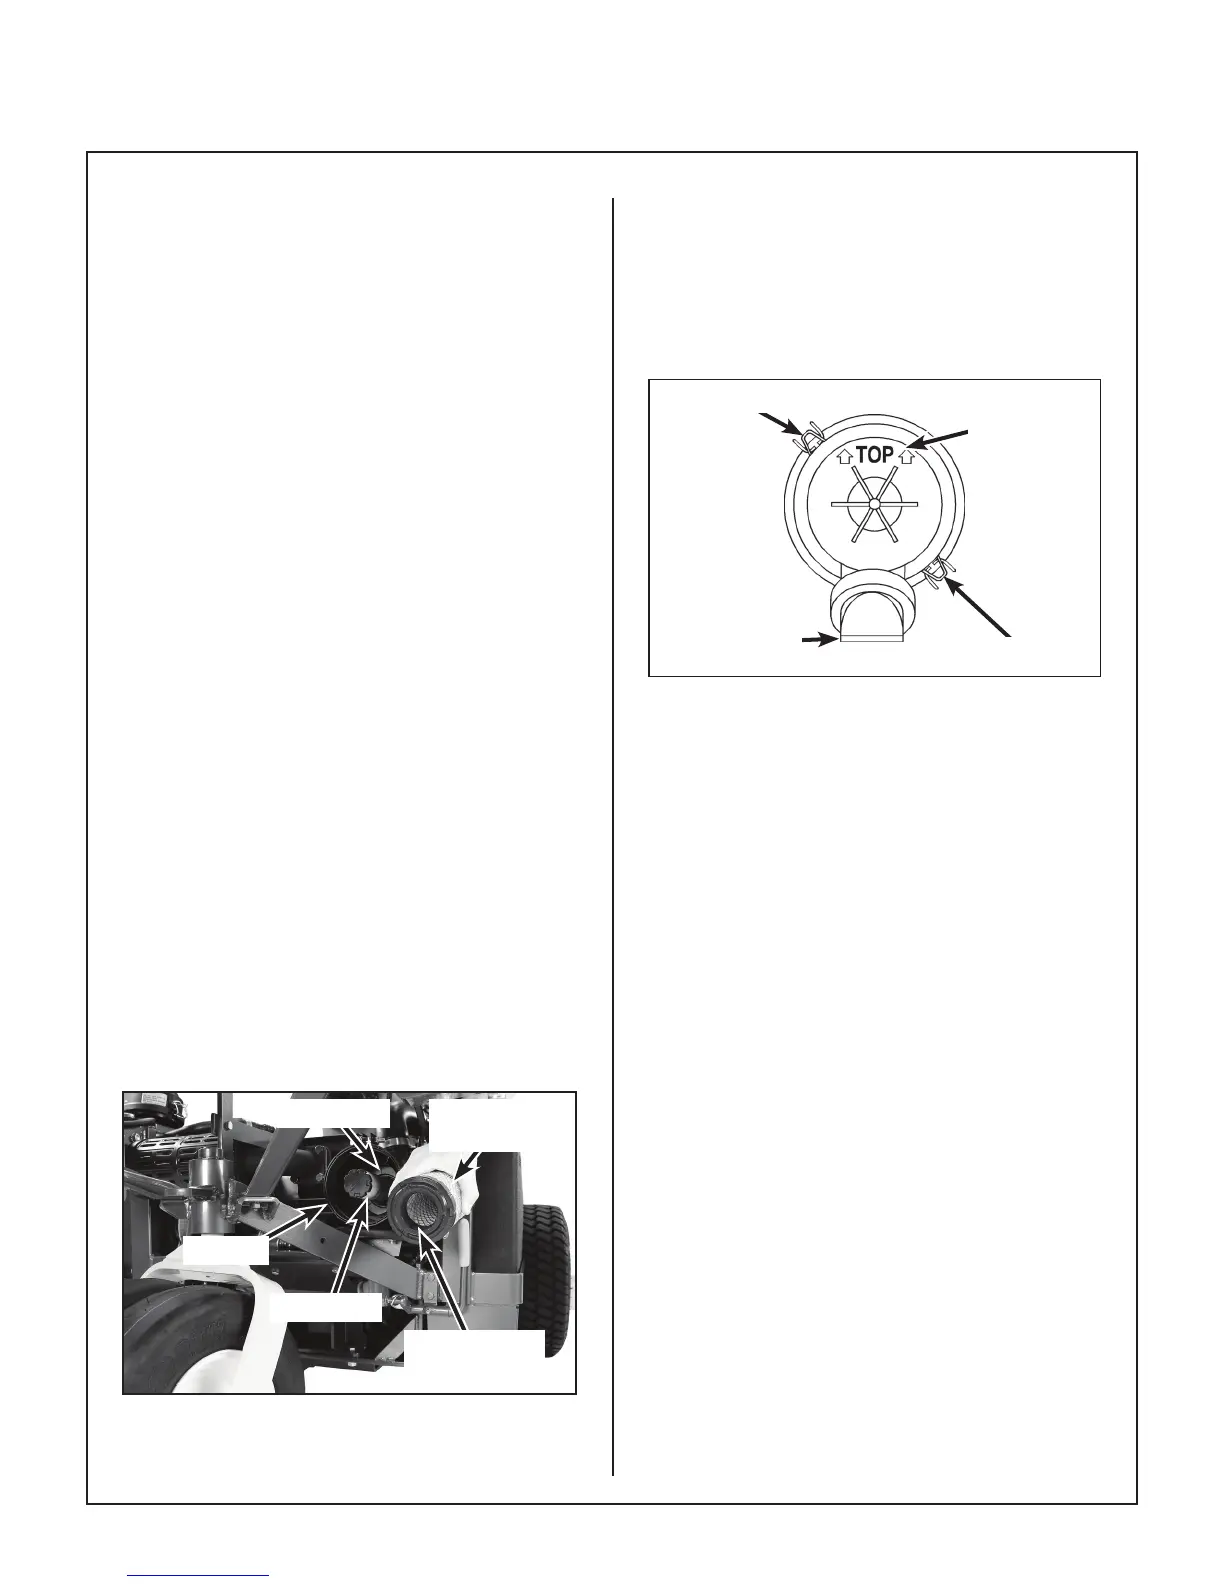
Radial Sealing
Surface
Primary
Filter Element
Canister
Safety Filter
Outlet Tube
Air Filter Element Replacement
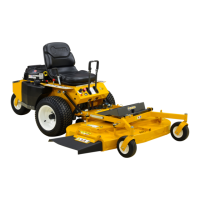
10. Install the cover with the word “TOP” properly
oriented to the top of the canister. Give the
cover a slight twist as it reaches the canister to
make sure the tab inside the cover goes into a
slot, otherwise the cover will not t properly.
Make sure both the top and bottom cover
latches are securing the cover in place.
Dust Ejection
Valve
Cover Latch
Cover Latch
Orient to Top
of Canister
Proper Orientation of Air Cleaner Cover
11. Check the air intake hose for cuts, nicks, cracks,
etc., and the hose clamps for tightness.
12. Reset the air lter restriction gauge (press but-
ton on the end of the indicator).
Engine Cooling System
Radiator Screen and Cooling Fins
To prevent the engine from overheating and possi-
ble engine damage, clean grass clippings, cha,
and dirt from the ne mesh radiator intake screen
daily. In certain mowing conditions (dry grass,
leaves, tree “cotton”, etc.), it may be necessary to
check and clean the screen several times during use
to prevent engine overheating.
1. Lift to remove the screen. To clean the screen,
wash with soapy water or blow out with com-
pressed air.
2. Inspect the radiator cooling ns for material
lodged in this area which would restrict cooling
airow. Use pressurized air or water to clean.
DO NOT use any tool, like a screwdriver or
knife, to clean material out of the ns as this
may damage the cooling ns. DO NOT use cold
water on a hot radiator.