Table 2–2: Legend (continued)
Identifier Description Length Material
F1 Stainless steel (gold-
plated) fitting with
short flats and two-
piece stainless steel
ferrule
N/A SST (gold-plated
screw)
F2 Dual-threaded fitting
with locking cap nut
N/A SST
F3 10-32 one-piece
PEEK fitting
N/A PEEK
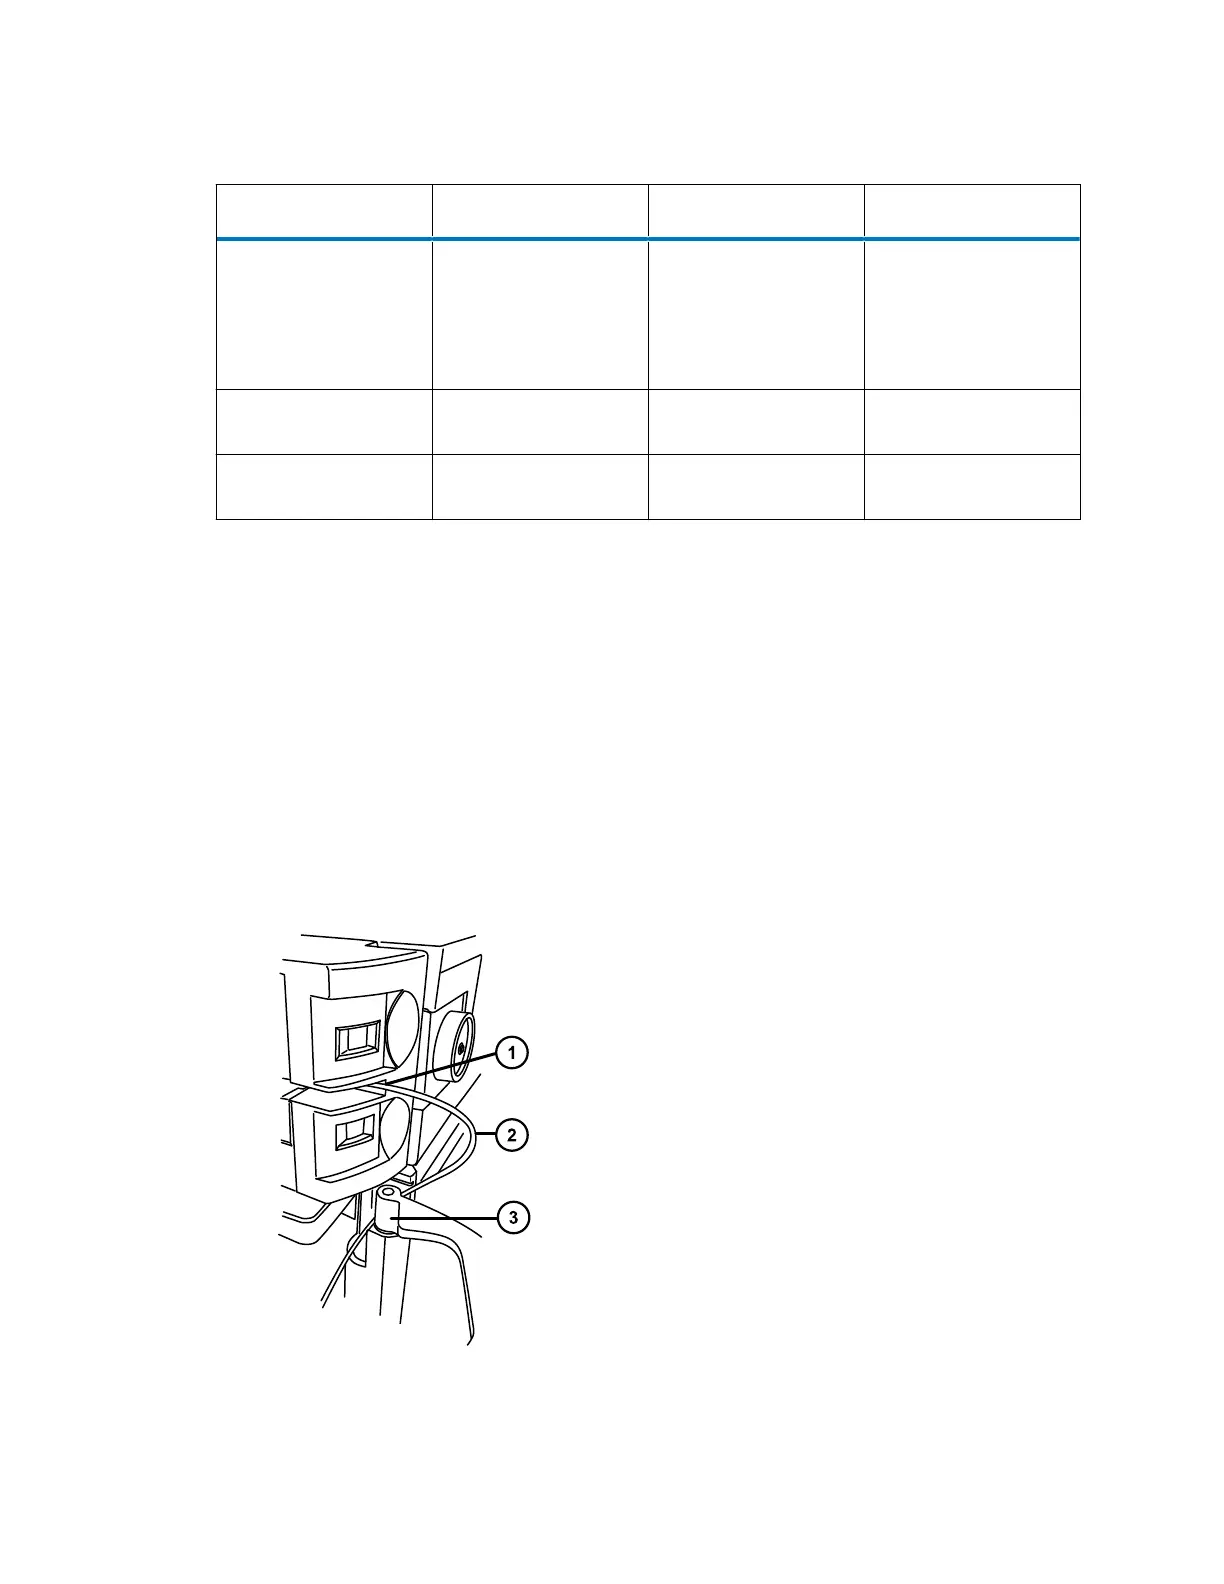
To install the APH assembly:
1. Unpack the new APH assembly.
2. Open the column compartment door
3. Open the fluidics compartment door of the sample manager.
4. Remove the O-ring retainer from the inlet end of the APH inlet tubing and connect the inlet
tubing to port 6 of the sample manager injection valve.
Note: For installation instructions, see Assembling new fittings.
5. Route the APH inlet tubing behind the hinge of the fluidics compartment door in the sample
manager and into the slot that leads to the column trough.
Figure 2–35: Routing the APH inlet tubing
December 4, 2019, 715005052 Version 02 (previously released as Rev.B)
Page 51