Cool Top Trail 20/24 7
215
mm
1002 mm
25-85
mm
557 mm
Fig. 03: Installation measures (side view)
566 mm
43 mm
536 mm
Fig. 04: Installation measures (front view)
4.5 Roof reinforcement / power supply
Fig. 05: Roof reinforcement
The cut-out shall be reinforced with a wooden frame
using wooden bars which are at least 20mm wide. In-
sulation material may have to be removed beforehand.
This reinforcement frame is to ensure that the roof will
not crush from the installation bolts and that air con-
ditioned air does not enter the ceiling space.
1. Roof
2. Wooden bars
≥ 20 mm ≥ 20 mm
2333
1
Fig. 06: Cut-out with wooden reinforcement
1. Cut-out
2. Insulation in roof
3. Wooden bars
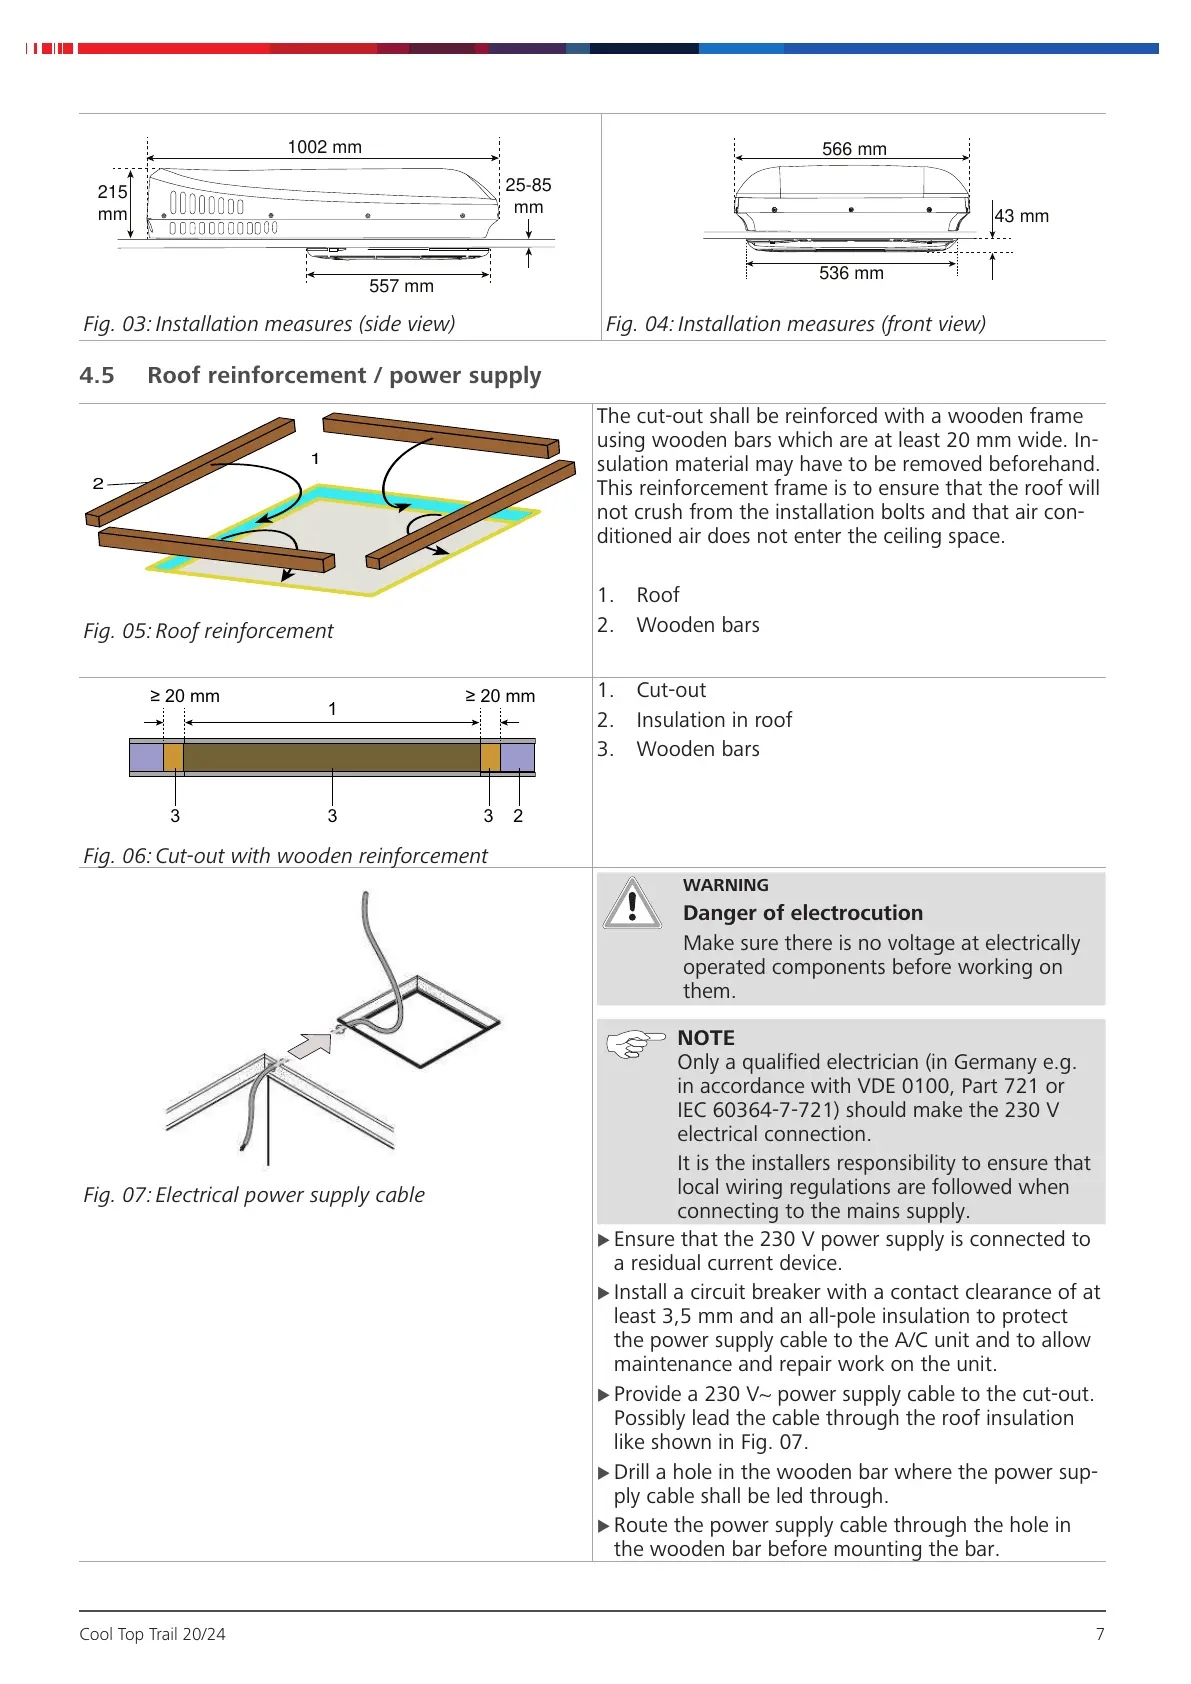
Fig. 07: Electrical power supply cable
WARNING
Danger of electrocution
Make sure there is no voltage at electrically
operated components before working on
them.
NOTE
Only a qualified electrician (in Germany e.g.
in accordance with VDE 0100, Part 721 or
IEC 60364-7-721) should make the 230V
electrical connection.
It is the installers responsibility to ensure that
local wiring regulations are followed when
connecting to the mains supply.
X Ensure that the 230V power supply is connected to
a residual current device.
X Install a circuit breaker with a contact clearance of at
least 3,5mm and an all-pole insulation to protect
the power supply cable to the A/C unit and to allow
maintenance and repair work on the unit.
X Provide a 230V~ power supply cable to the cut-out.
Possibly lead the cable through the roof insulation
like shown in Fig. 07.
X Drill a hole in the wooden bar where the power sup-
ply cable shall be led through.
X Route the power supply cable through the hole in
the wooden bar before mounting the bar.
More information https://www.caravansplus.com.au

 Loading...