Cool Top Trail 20/24 8
X Attach and lay the cables so that they cannot be
tripped over or damaged.
X Use cable ducts to route cables through walls with
sharp edges.
X Respect minimum cross sections of the cable corre-
sponding to the current draw of the unit.
X Do not lay the 230V cables and 12/24V cables to-
gether in the same cable duct.
X Do not lay cables which are loose or bent next to
electrically conductive material (metal).
4.6 Installation of the adaptor frame
“This side up”
This side up
Fig. 08: Orientation of the adaptor frame
X Make sure the roof is clean, dry and free from oil or
grease.
X Insert the adaptor frame into the cut-out to check if
the power supply cable is interfering with the frame.
If so, cut or drill an opening into the bottom side of
the frame so that the cable can be led through.
X Confirm orientation by starting with the “This side
up” label upwards.
400 x 400
360 x 360
Fig. 09: Sealant paths
X Turn the part over and on the reverse side of “This
side up”, apply silicone sealant uniformly over the
path shown.
Fig. 10: Forming an effective seal
X Turn the part over again and make sure “This side
up” is up. Press down firmly over the installation
hole and remove any sealant that has squeezed out.
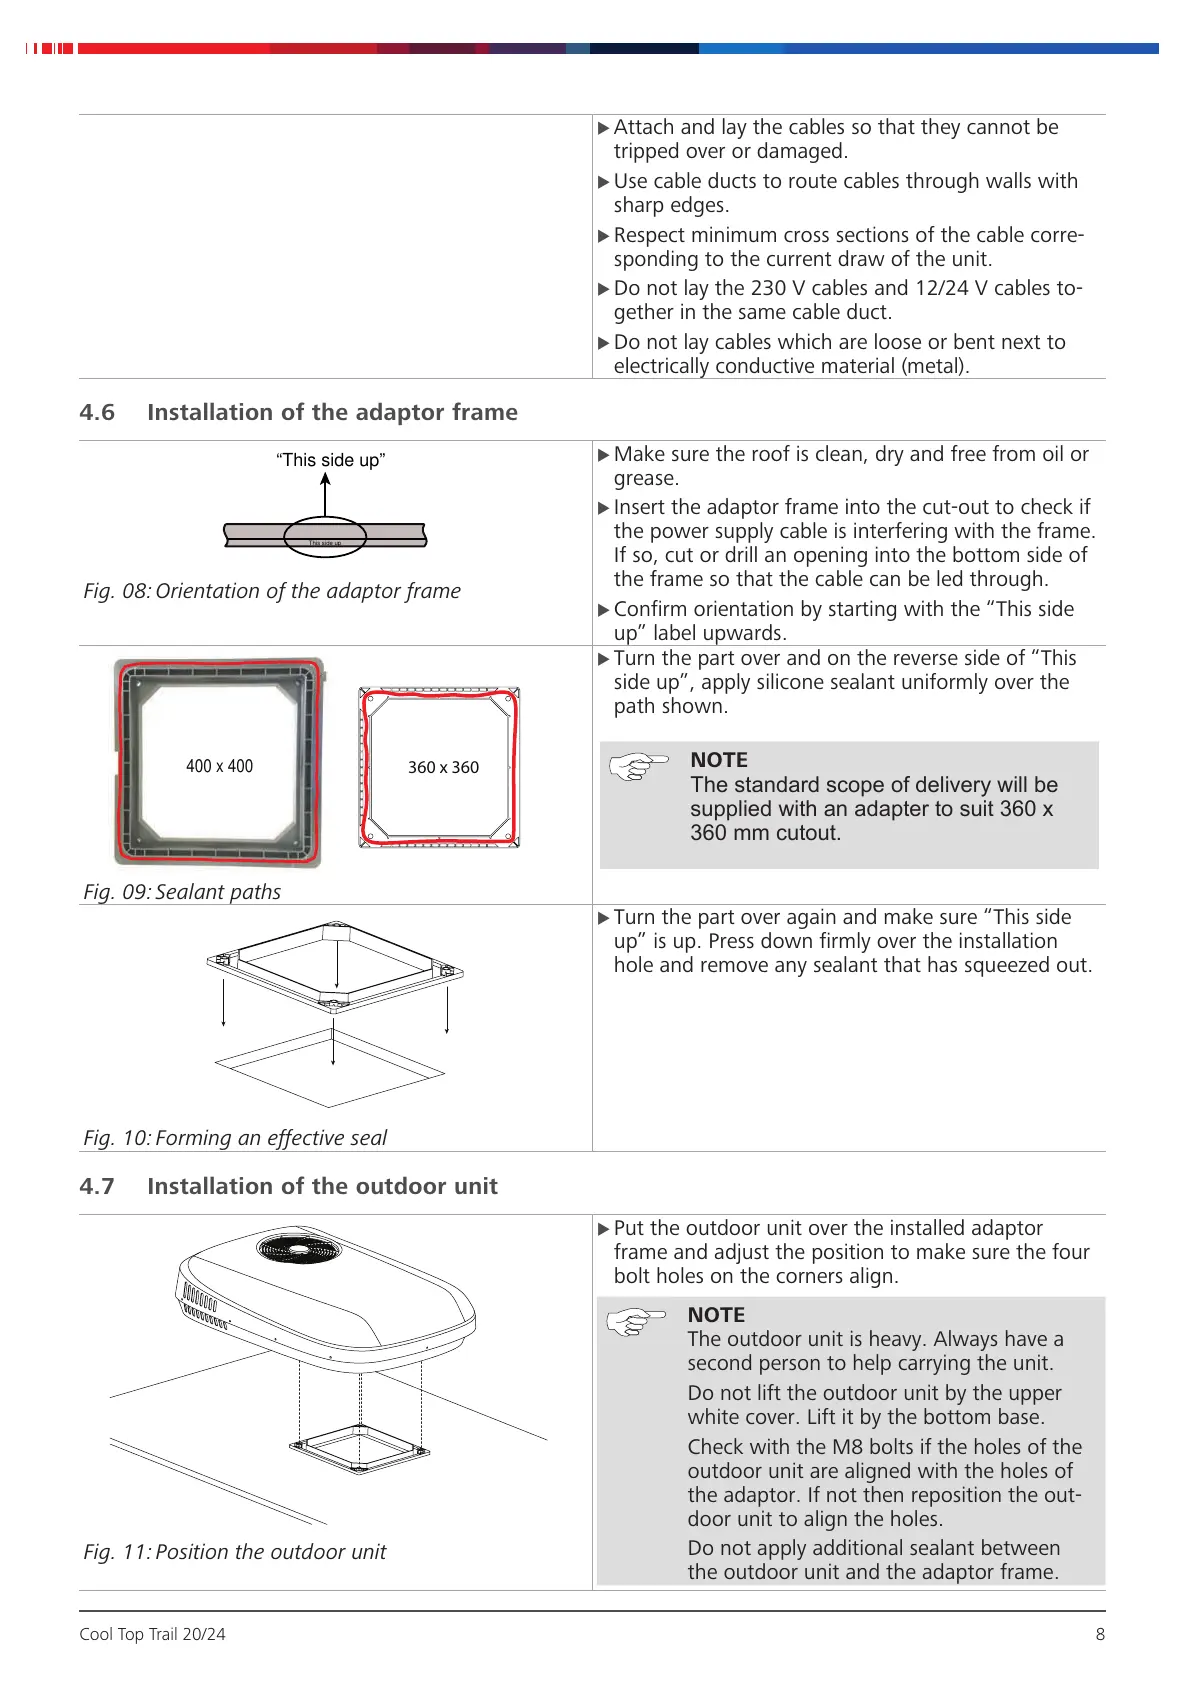
4.7 Installation of the outdoor unit
Fig. 11: Position the outdoor unit
X Put the outdoor unit over the installed adaptor
frame and adjust the position to make sure the four
bolt holes on the corners align.
NOTE
The outdoor unit is heavy. Always have a
second person to help carrying the unit.
Do not lift the outdoor unit by the upper
white cover. Lift it by the bottom base.
Check with the M8 bolts if the holes of the
outdoor unit are aligned with the holes of
the adaptor. If not then reposition the out-
door unit to align the holes.
Do not apply additional sealant between
the outdoor unit and the adaptor frame.
NOTE
The standard scope of delivery will be
supplied with an adapter to suit 360 x
360 mm cutout.
More information https://www.caravansplus.com.au

 Loading...