14
Step 11
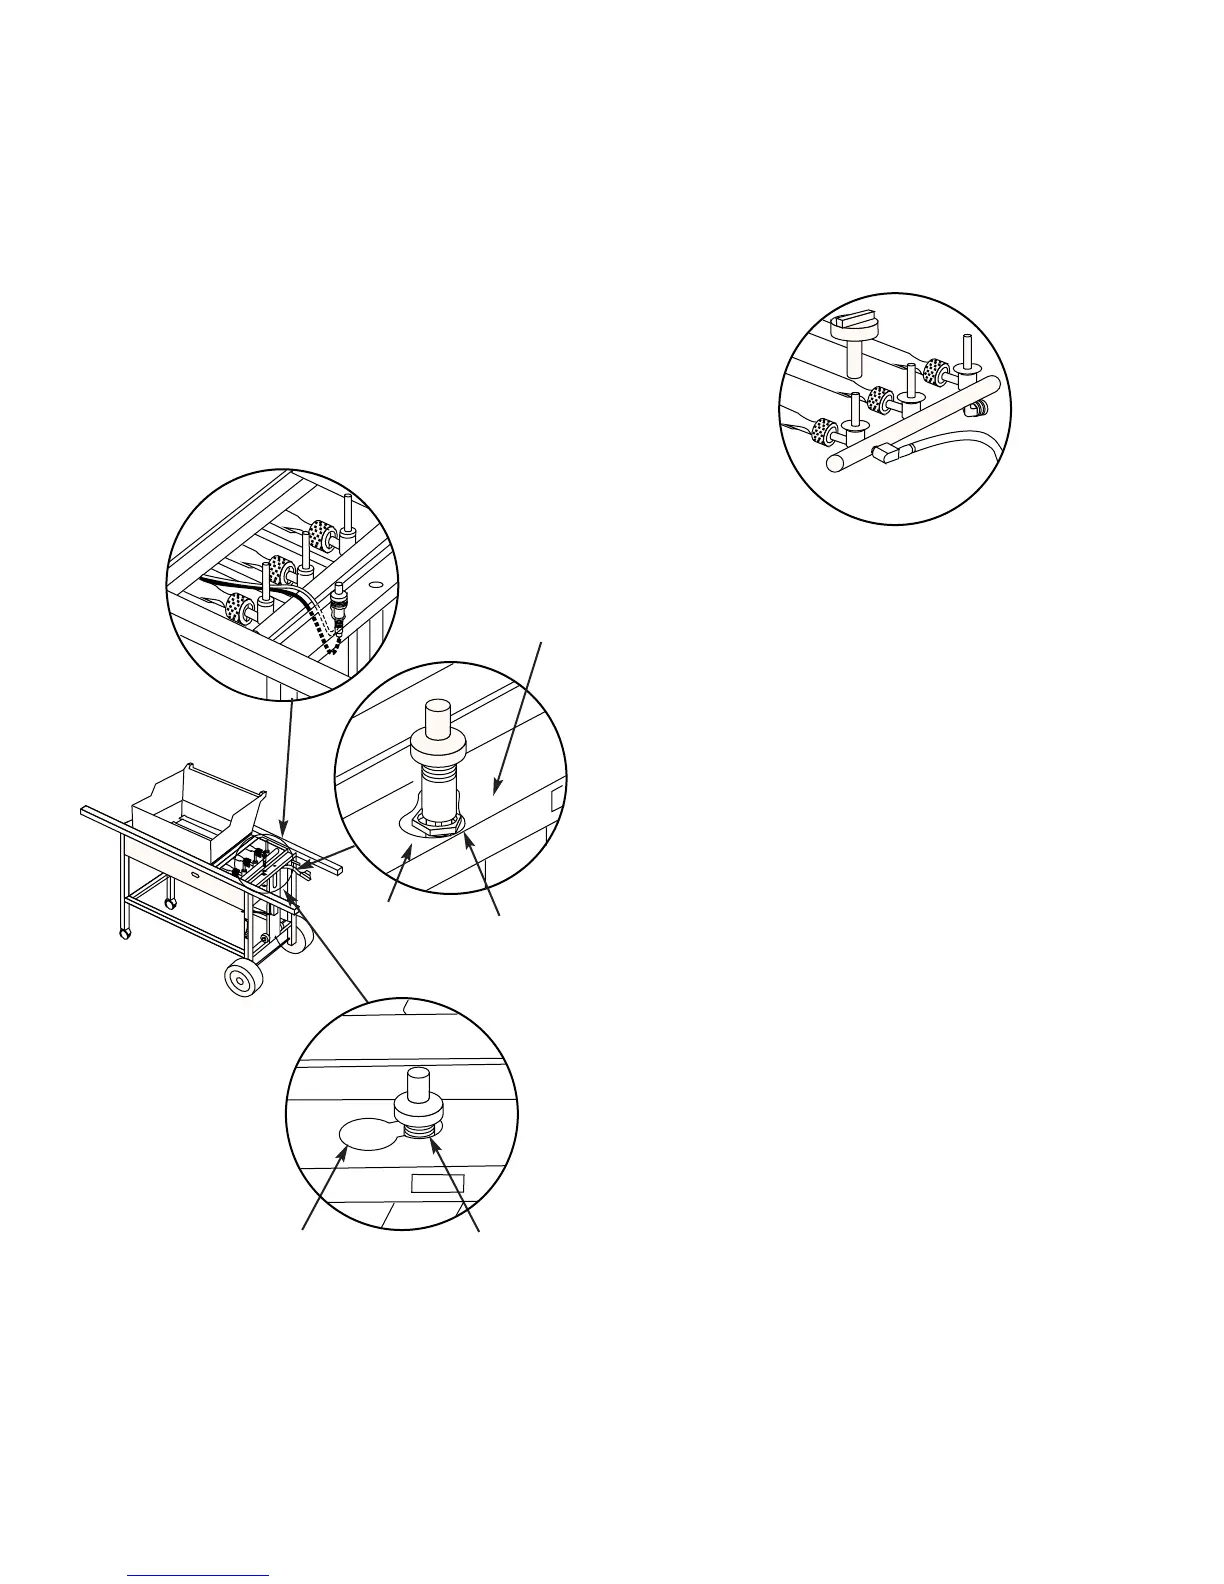
Install igniter
Note - The igniter wires are already attached to the Gas
Catcher Ignition Chamber and the igniter. This was done to
factory test the ignition system.
The igniter lock nut is on the igniter.
Insert the top of the igniter up through the large part of
the keyhole in the frame brace. Figure 12 (b). Loosen the
igniter lock nut and slide the igniter into the small part of
the keyhole. Figure 12 (c). Tighten the igniter lock nut.
Figure 12.
Note - If the igniter works loose, carefully tighten the igniter
lock nut with an adjustable wrench or pliers.
Figure 12
Igniter lock nut
Keyhole in
frame brace
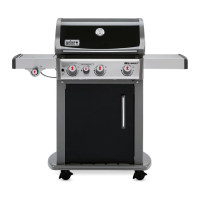
Step 12
Check that all burner valves are off
You will need: one burner control knob.
(Valves are shipped in the OFF position, but you should
check to be sure.) Put the knob on each valve. Check by
pushing down and turning clockwise. If they do not turn,
they are off, proceed to the next step. Figure 13.
Figure 13
Small part of
keyhole in
frame brace
Frame brace
Frame brace
(a)
(b)
(c)