7
GAS INSTRUCTIONS
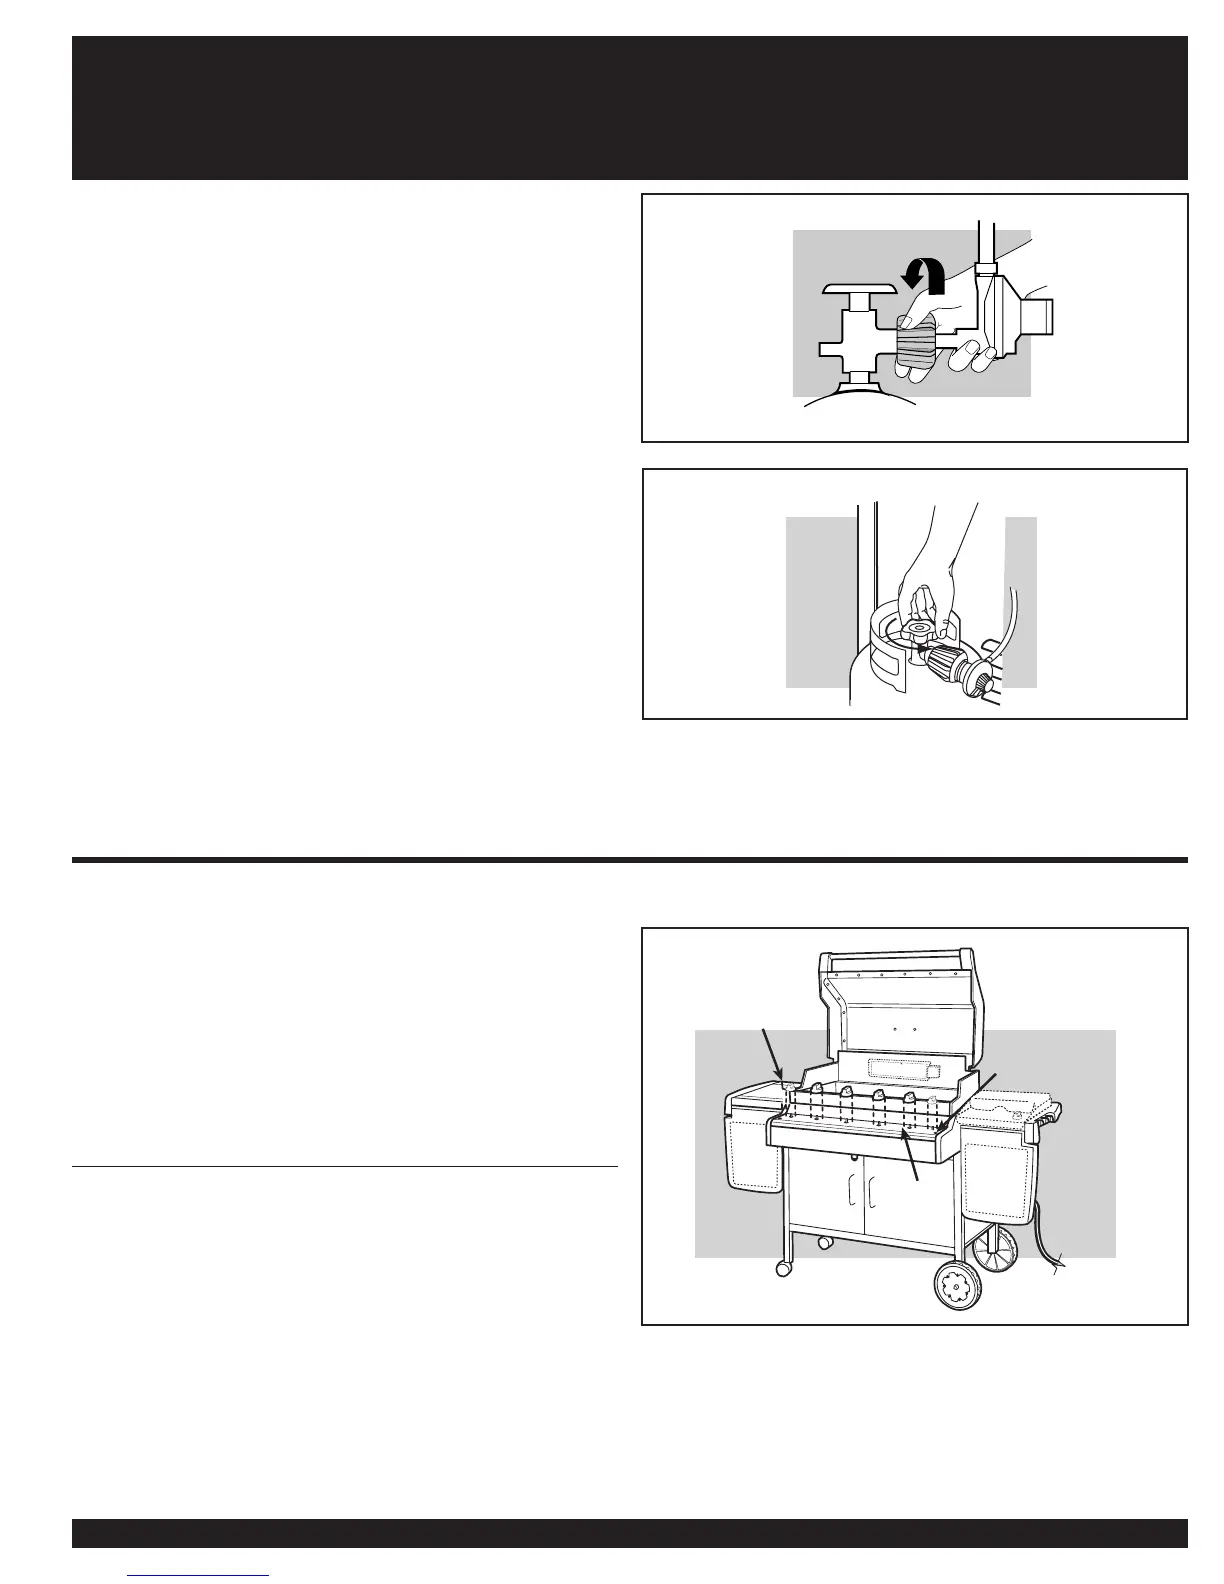
Note: This connection tightens clockwise and will not allow gas to fl ow unless
the connection is tight. The connection requires tightening by hand only.
WARNING: Do not use a wrench to tighten the
connection. Using a wrench could damage the
regulator coupling and could cause a leak.
5) Mix soap and water.
6) Turn on the cylinder valve.
7) Check for leaks by wetting the fi tting with the soap and water solution
and watching for bubbles. If bubbles form, or if a bubble grows, there is
a leak.
If there is a leak, turn off the gas and tighten the fi tting. Turn the gas back on
and recheck with the soap and water solution.
If leak does not stop, Contact the Customer Service at 1-800-446-1071
or locate the Customer Service Representative in your area using the
contact information on our web site. Log onto www.weber.com
®
. Do not
use the barbecue.
8) When leak checking is complete, turn gas supply OFF at the source
and rinse connections with water.
CHECK FOR GAS LEAKS
WARNING : The gas connections of your Summit
®
gas grill have been factory tested. We do however
recommend that you leak check all gas connections
before operating your Summit
®
gas grill.
REMOVE CONTROL PANEL
Part required: Phillips Screwdriver.
Remove the burner control knobs (1). The screws (2) need to be removed
from the control panel (3) before the control panel is removed from the grill.
(1)
(2)
(3)