www.weg.net
11866576 Installation, Operation and Maintenance Manual – Synchronous Motors – S Line – Brushless – Horizontal l 45
The lifespan of the bearings depends on their operating
conditions, on the motor operating conditions and on the
maintenance procedures.
Proceed according to the following directions:
The oil selected for the application must have the proper
viscosity for the bearing operating temperature. The type of
oil recommended by WEG already considers these criteria;
Insufficient quantity of oil may damage the bearing;
The minimum recommended oil level is reached when the
lubricant can be seen in the lower part of the oil sight glass
with the motor stopped.
TTENTION
The oil level must be inspected daily and must
remain in the middle of the oil sight glass.
7.10.2.4
Bearing operation
The system start, as well as the first hours of operation,
must be monitored carefully.
Before starting, check:
If the oil used complies with the specification on the
nameplate;
The lubricant characteristics;
The oil level;
The alarm and trip temperatures set for the bearing.
During the first start, it is necessary to stay alert for unusual
vibrations or noises. If the bearing does not operate in a
silently and smooth way, the motor must be shut down
immediately.
The motor must operate for some hours until the bearing
temperatures stabilize. In case of overheating of the bearings,
the motor must be shut down for inspection of the bearings
and temperature sensors.
Check if there is no oil leak through the plugs, gaskets or
shaft end.
7.10.2.5
Bearing disassembly
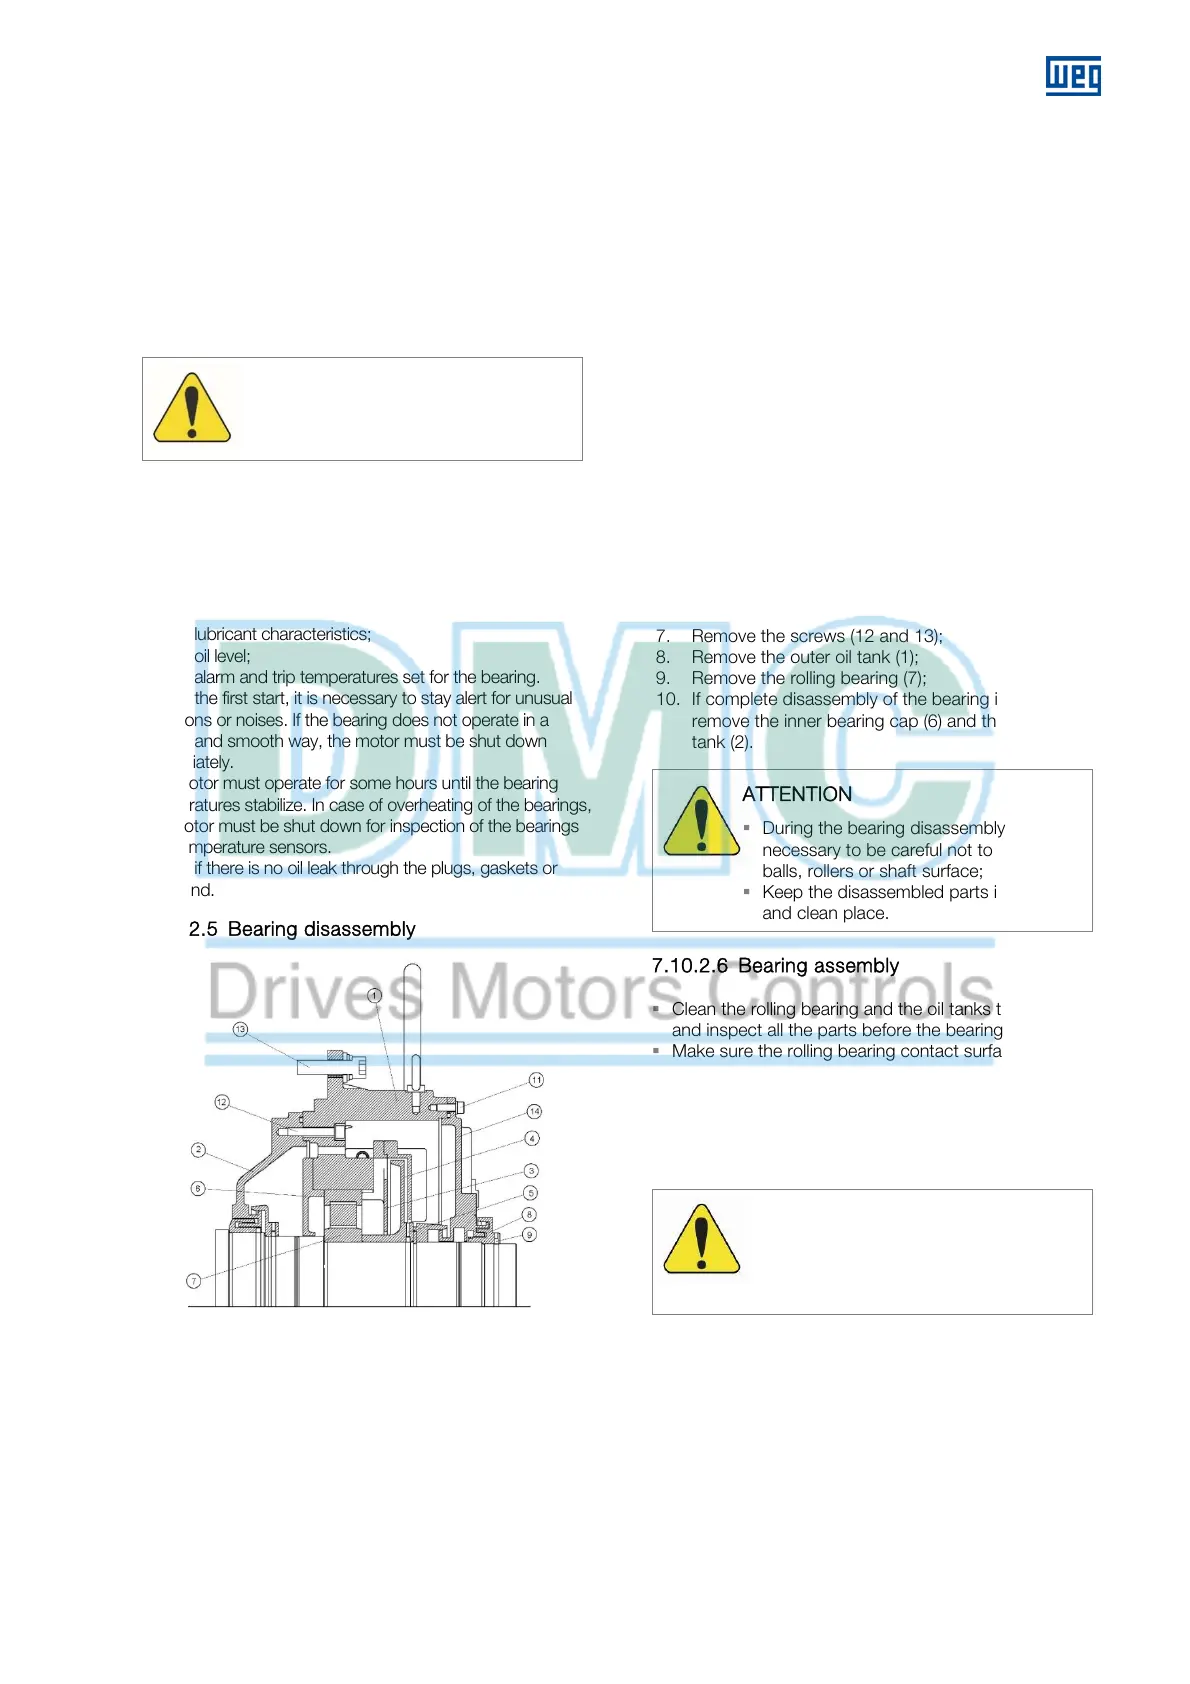
Figure 7.5: Parts of the oil-lubricated rolling bearing
Figure 7.5 Legend:
1. Outer oil tank
2. Inner oil tank
3. Outer bearing cap
4. Oil flinger
5. Screw
6. Inner bearing cap
7. Rolling bearing
8. Labyrinth taconite seal
9. Screw
10. Breather
11. Outer tank fastening screw
12. Inner tank fastening screw
13. End shield fastening screw
14. Bearing protection cover
Before disassembling:
Clean the whole bearing externally;
Remove the oil completely from the bearing;
Remove the temperature sensor from the bearing;
Remove the grounding brush (if any);
Provide a support for the shaft in order to hold the rotor
during the disassembly.
Disassembly:
In order to disassemble the bearing, proceed according to
the following guidelines:
1. Remove the screw (9) that fastens the labyrinth
taconite seal (8);
2. Remove the labyrinth taconite seal (8);
3. Remove the screws (11) that fasten the bearing
protection cover (14);
4. Remove the protection cover (14);
5. Remove the screws (5) that fasten the oil flinger (4)
and remove it;
6. Remove the bolts that fix the external bearing cap (3)
and remove it;
7. Remove the screws (12 and 13);
8. Remove the outer oil tank (1);
9. Remove the rolling bearing (7);
10. If complete disassembly of the bearing is necessary,
remove the inner bearing cap (6) and the inner oil
tank (2).
TTENTION
During the bearing disassembly, it is
necessary to be careful not to damage the
balls, rollers or shaft surface;
Keep the disassembled parts in a safe
and clean place.
7.10.2.6
Bearing assembly
Clean the rolling bearing and the oil tanks thoroughly,
and inspect all the parts before the bearing assembly.
Make sure the rolling bearing contact surfaces are
smooth and free of signs of scratches or corrosion;
Before inserting the rolling bearing onto the shaft, heat it
up to a temperature between 50 to 100 ºC;
For the complete assembly of the bearing, follow the
disassembly instructions in the reverse order.
TTENTION
During the bearing assembly, apply sealant
(e.g. Curil T) in order to seal the surfaces of
the oil tank.
 Loading...