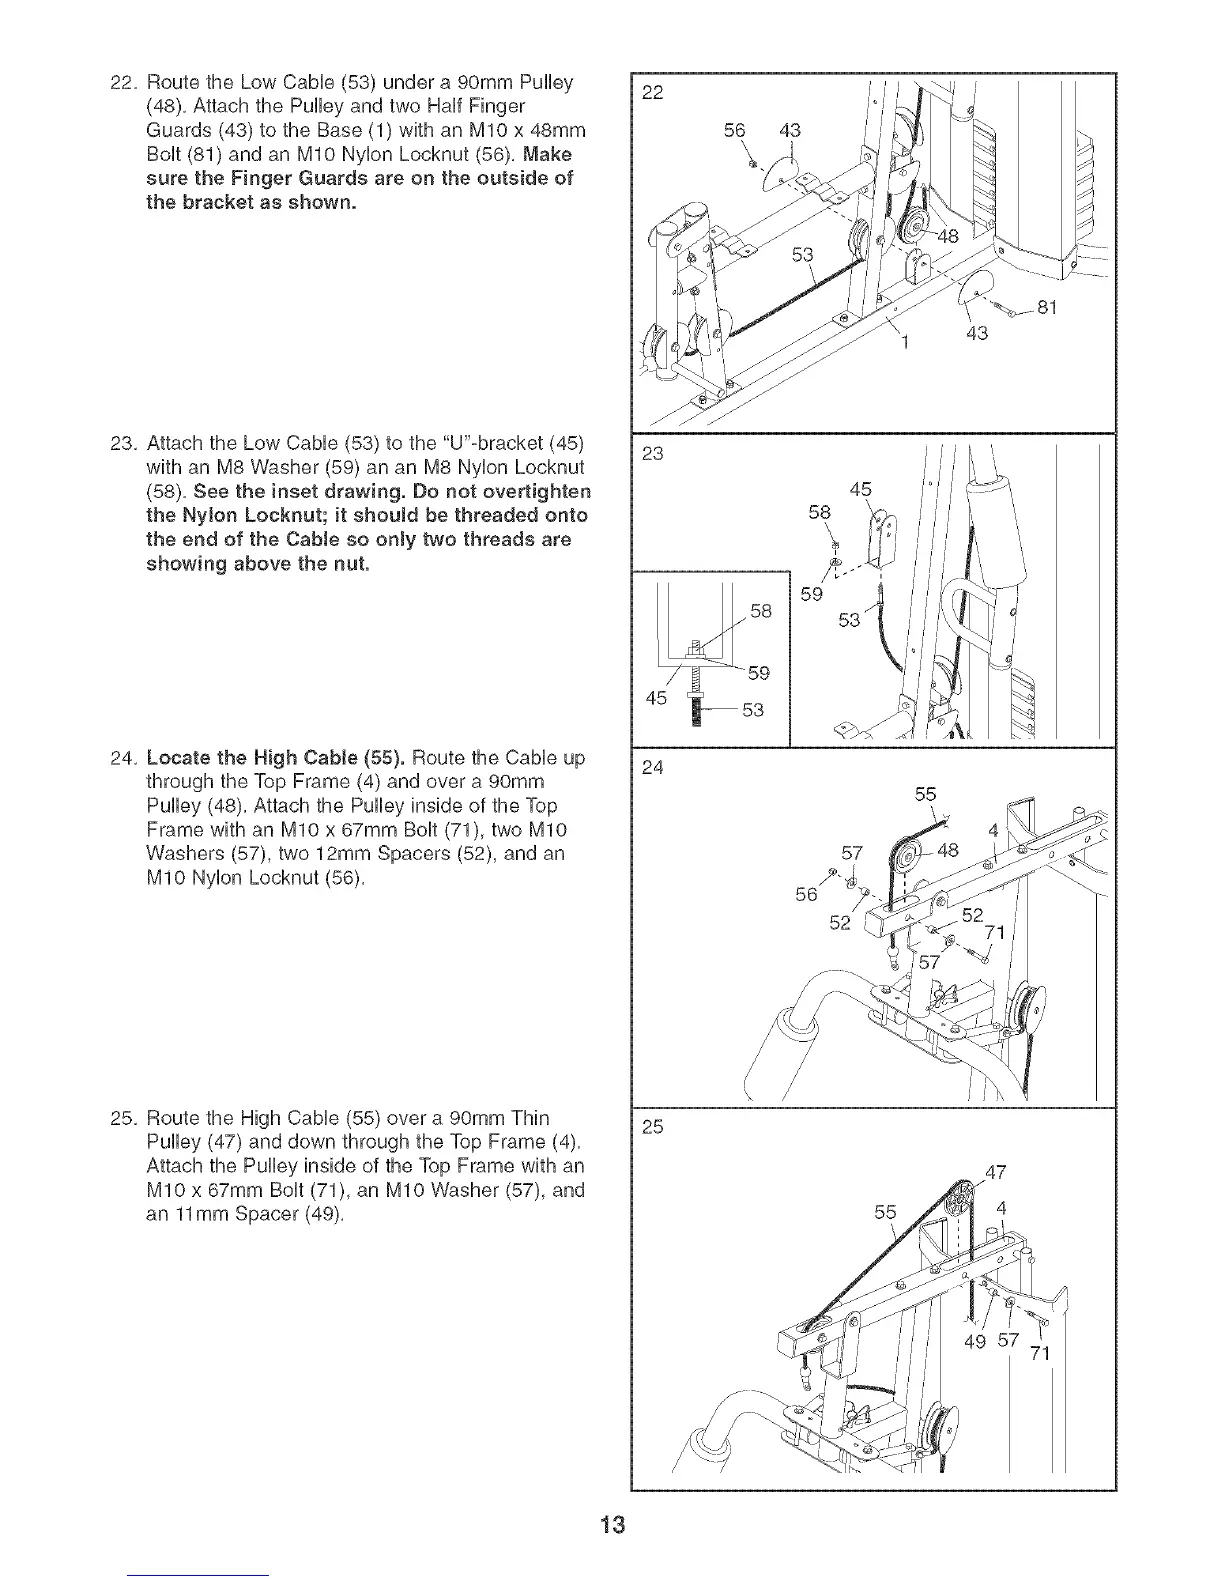
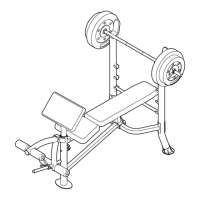
22, Route the Low CaMe (53) under a 90mm Pulley
(48), Attach the Pulley and two HaUlFinger
Guards (43) to the Base (1) with an MIO x 48mm
BoUt(81) and an MIO NyUonLocknut (56), Make
sure the Finger Guards are on the outside of
the bracket as shown.
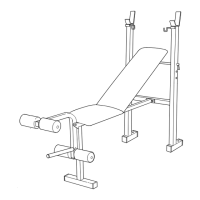
23, Attach the Low CaMe (53) to the "U"-bracket (45)
with an M8 VVasher (59) an an M8 NyUonLocknut
(58), See the inset drawing. Do not overtighten
the Nylon Locknut; it should be threaded onto
the end of the CabJe so only two threads are
showing above the nut.
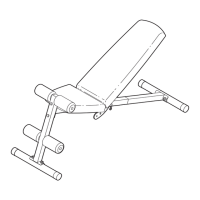
24, Locate the High Cable (55}. Route the CaMe up
through the Top Frame (4) and over a 90mm
Pulley (48), Attach the Pulley inside of the Top
Frame with an MIO x 67mm BoUt(71), two MIO
Washers (57), two 12mm Spacers (52), and an
MIO NyUonLocknut (56),
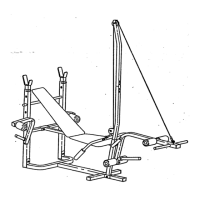
25, Route the High CaMe (55) over a 90mm Thin
Pulley (47) and down through the Top Frame (4),
Attach the Pulley inside of the Top Frame with an
MIO x 67mm BoUt(71), an MIO Washer (57), and
an 11mm Spacer (49),
22
56 43
\
1 43
23
45
58
59
24
57
56
52
55
25
47
55 4
49 57
13