TIGHTENING THE CABLES
Woven cable, the type of cable used on the weight
system, can stretch slightlywhen itis firstused. If there
is slack in the cables before resistance isfelt, the
cables shouldbe tightened.
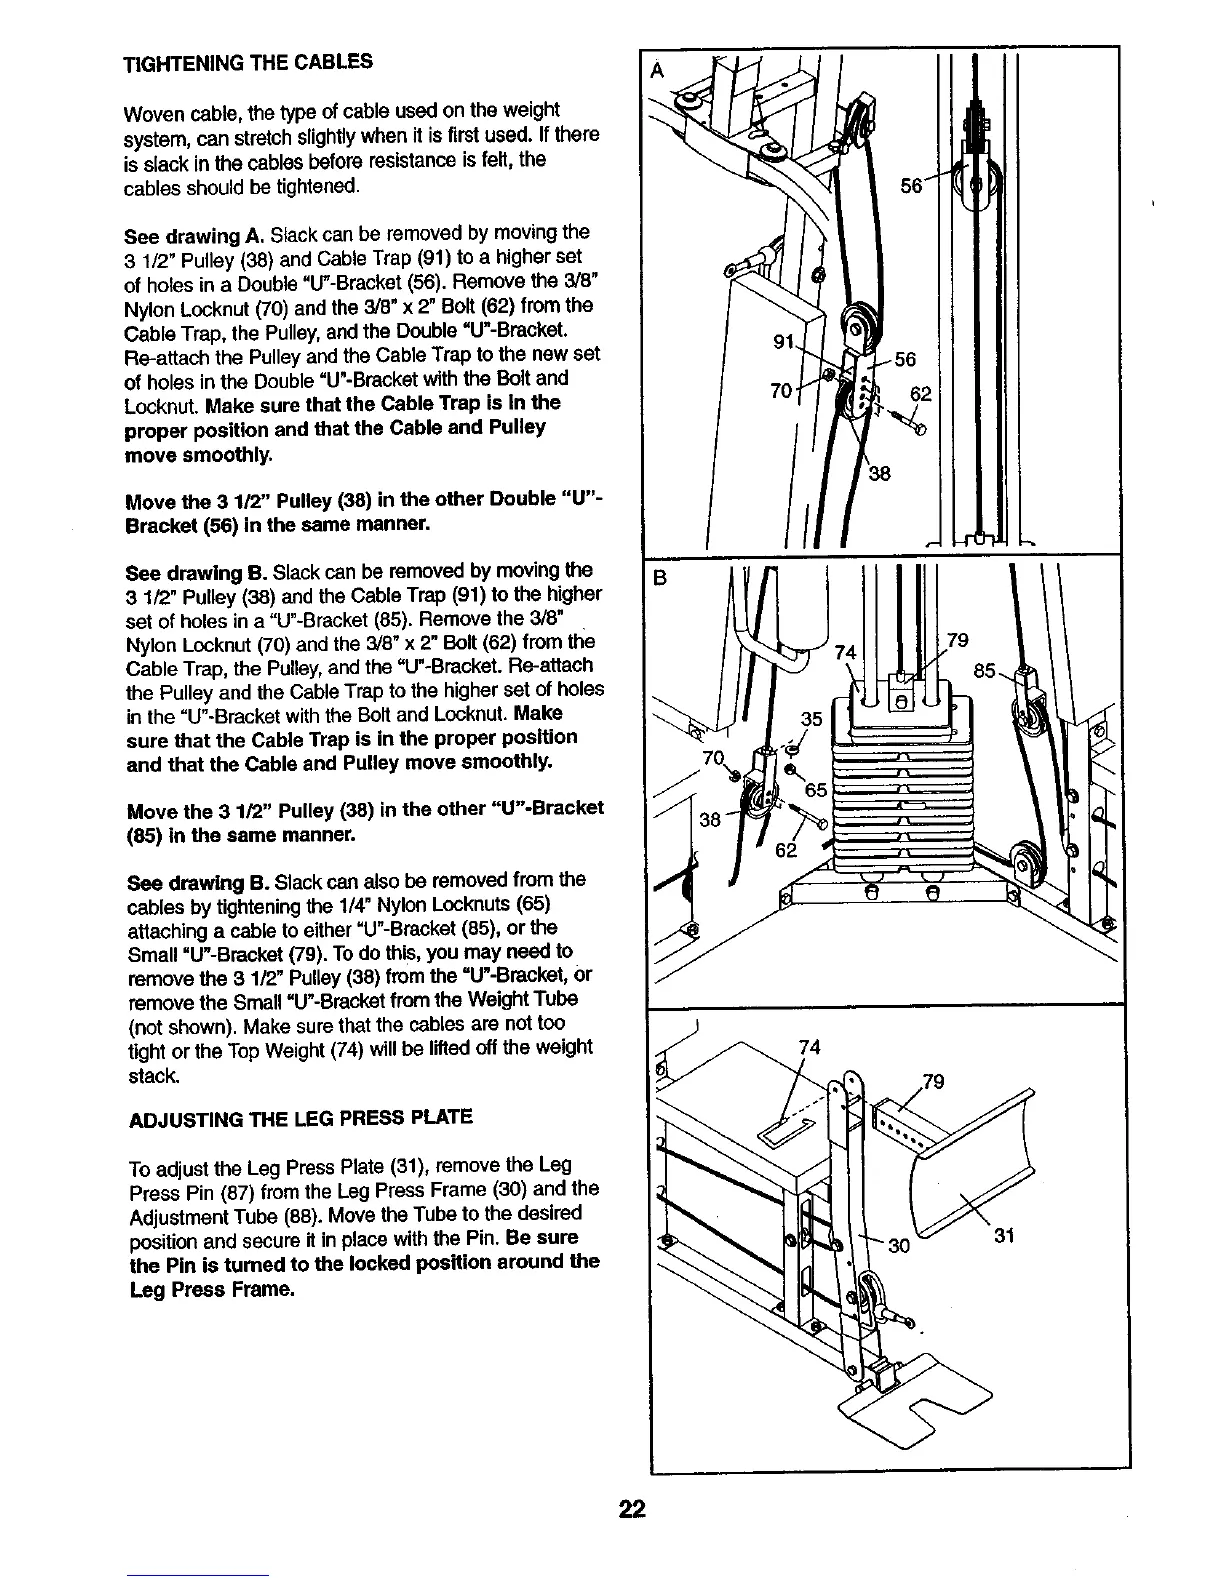
See drawing A. Slack can be removed by movingthe
3 1/2" Pulley (38) and Cable Trap (91) to a higher set
of holes in a Double "tY-Bracket (56). Remove the 3/6"
Nylon Locknut (70) and the 3/8" x 2" Bolt (62) from the
Cable Trap, the Pulley,and the Double "U"-Bracket.
Re-attach the Pulleyand the Cable Trap to the new set
of holes in the Double "U"-Bracketwith the Bolt and
Locknut. Make sure that the Cable Trap is In the
proper position and that the Cable and Pulley
move smoothly.
Move the 3 1/2" Pulley (38) in the other Double "U"-
Bracket (56) in the same manner.
See drawing B. Slack can be removed by moving the
3 1/2" Pulley (38) and the Cable Trap (91) to the higher
set of holes in a "U"-Brecket (85). Remove the 3/8"
Nylon Locknut(70) and the 3/8" x 2" Bolt (62) from the
Cable Trap, the Pulley,and the =U"-Bracket. Re-attach
the Pulley and the Cable Trap to the higher set of holes
in the =U"-Bracket with the Bolt and Locknut. Make
sure that the Cable Trap is in the proper position
and that the Cable and Pulley move smoothly.
Move the 3 1/2" Pulley (38) in the other "U"-Bracket
(85) in the same manner.
See drawing B. Slack can also be removedfrom the
cables by tightening the 1/4" Nylon Locknuts(65)
attaching a cable to either"U"-Bracket (85), or the
Small "U"-Bracket (79). To do this, you may need to
remove the 3 1/2" Pulley (38) from the "U"-Bracket, or
remove the Small "U"-Bracket from the Weight Tube
(not shown). Make sure that the cables are not too
tight or the Top Weight (74) willbe liftedoffthe weight
stack.
ADJUSTING THE LEG PRESS PLATE
To adjust the Leg Press Plate (31), remove the Leg
Press Pin (87) from the Leg Press Frame (30) and the
Adjustment Tube (88). Move the Tube to the desired
positionand secure it in place with the Pin. Be sure
the Pin is turned to the locked position around the
Leg Press Frame.
74
31
22