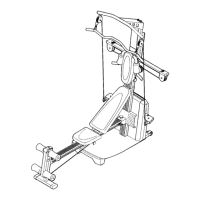
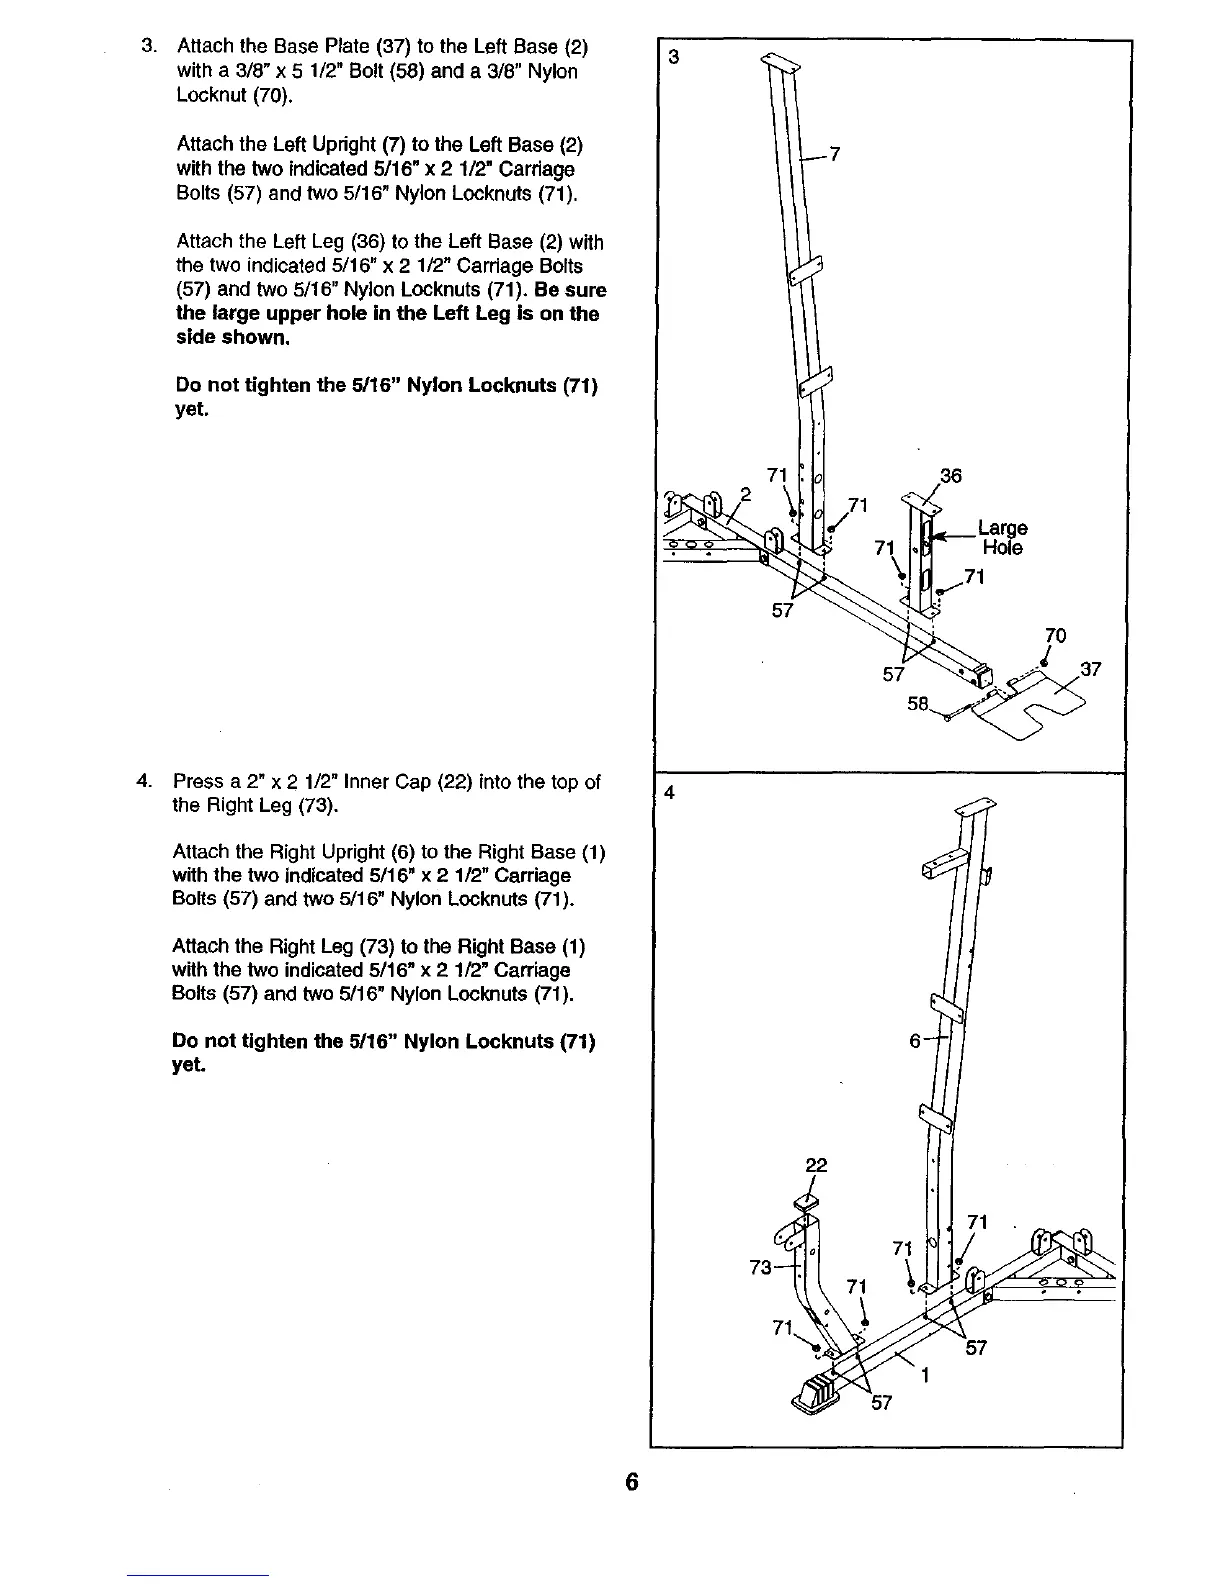
3.
4.
Attach the Base Plate (37) to the Left Base (2)
with a 3/8" x 5 1/2" Bolt (58) and a 3/8" Nylon
Locknut (70).
Attach the Left Upright (7) to the Left Base (2)
with the two indicated 5/16" x 2 1/2" Carriage
Bolts (57) and two 5/16" Nylon Locknuts (71).
Attach the Left Leg (36) to the Left Base (2) with
the two indicated 5/16" x 2 1/2" Carriage Bolts
(57) and two 5/16" Nylon Locknuts (71). Be sure
the large upper hole in the Left Leg is on the
side shown.
Do not tighten the 5/16" Nylon Locknuts (71)
yet.
Press a 2" x 2 1/2" Inner Cap (22) into the top of
the Right Leg (73).
Attach the Right Upright (6) to the Right Base (1)
with the two indicated 5/16" x 2 1/2" Carriage
Bolts (57) and two 5/16" Nylon Locknuts (71).
Attach the Right Leg (73) to the Right Base (1)
with the two indicated 5/16" x 2 1!2" Carriage
Bolts (57) and two 5/16" Nylon Lock,nuts (71).
Do not tighten the 5/16" Nylon Locknuts (71)
yet.
3
4
71 36
57
22
71
71
71
57
1
57
7O
6