172967530000/00/06.2023
Setting up the printer
6.6 Inserting the transfer ribbon
► Clean the printhead before inserting the trans-
fer ribbon, see chapter 8.
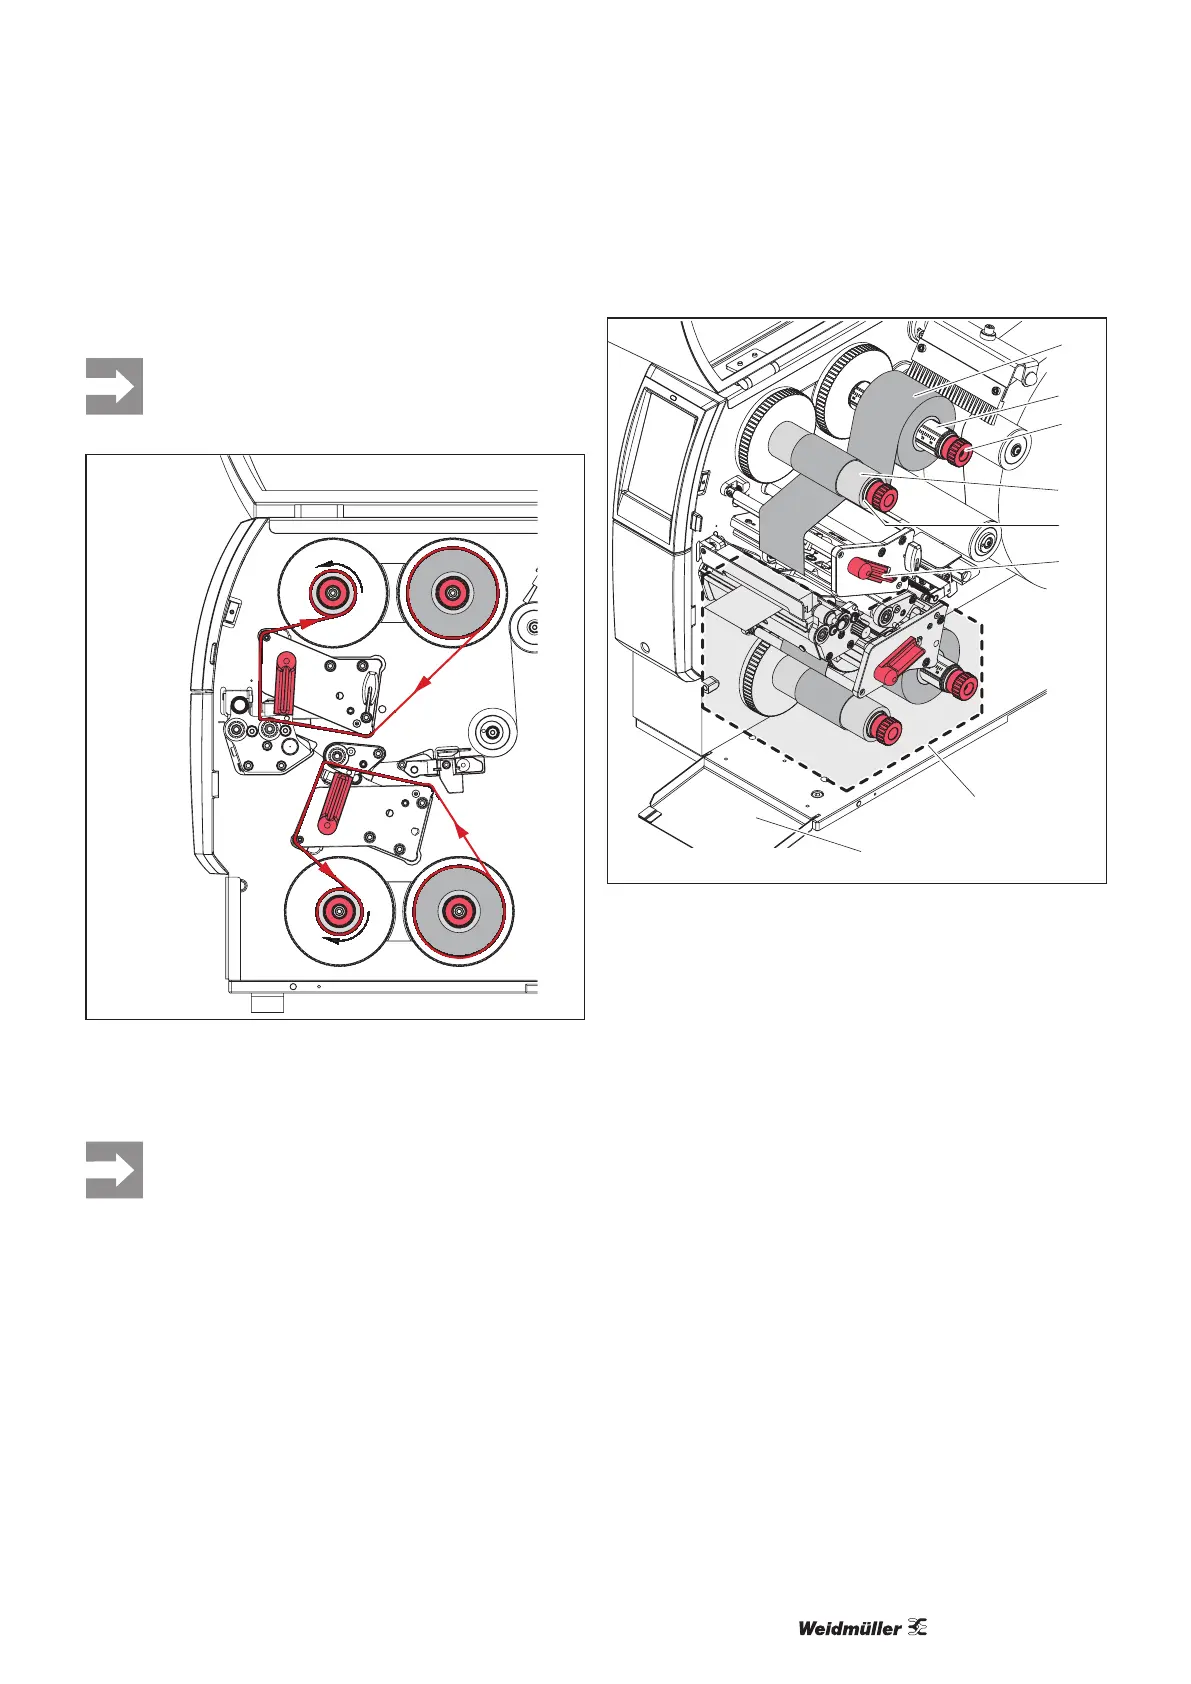
Figure 6.8 Transfer ribbon run
The ribbon run applies to ribbons with the coating side
wound on the outside.
Use a core with a width between the lm width
and 115 mm for winding the transfer ribbon.
6
1
2
3
4
5
7
8
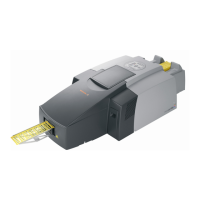
Figure 6.9 Insert the transfer ribbon
► Turn the lever (6) counter-clockwise to release the top
printhead.
► Slide the transfer ribbon reel (1) onto the unwinder (2)
so that the colour coating on the ribbon points down dur-
ing unwinding.
► Position the transfer ribbon reel (1) on the unwinder so
that the scale values on both sides of the reel are identi-
cal.
► Hold the unwinder (2) tight and turn the rotary knob on
the unwinder (3) counter-clockwise until the transfer rib-
bon reel is fastened in place.
► Slide a suitable transfer ribbon core (4) onto the transfer
ribbon winder (5) and fasten it in the same manner.
► Guide the transfer ribbon through the print assembly,
see Figure 6.8.
► Fasten the start of the transfer ribbon on the transfer rib-
bon core (4) with an adhesive strip. Make sure that the
transfer ribbon winder rotates counter-clockwise.
► Turn the transfer ribbon winder (5) counter-clockwise to
smooth the transfer ribbon run.
► Turn the lever (6) clockwise to lock the printhead.
► If you want to print on both sides of the material, insert a
transfer ribbon reel in the same way in the bottom print
unit (7).