16 Repairs: Information and Instructions
9.3 Closing the device
Tools and equipment required:
• Phillips screwdriver size 2
1. Carefully put the front and rear case elements
together again.
2. Screw the case together again, making sure
that the silicone sealing cord is correctly
inserted and is not jammed or otherwise
damaged.
3. Perform a function check (see ”7.2 Performing
the function check“ on page 10).
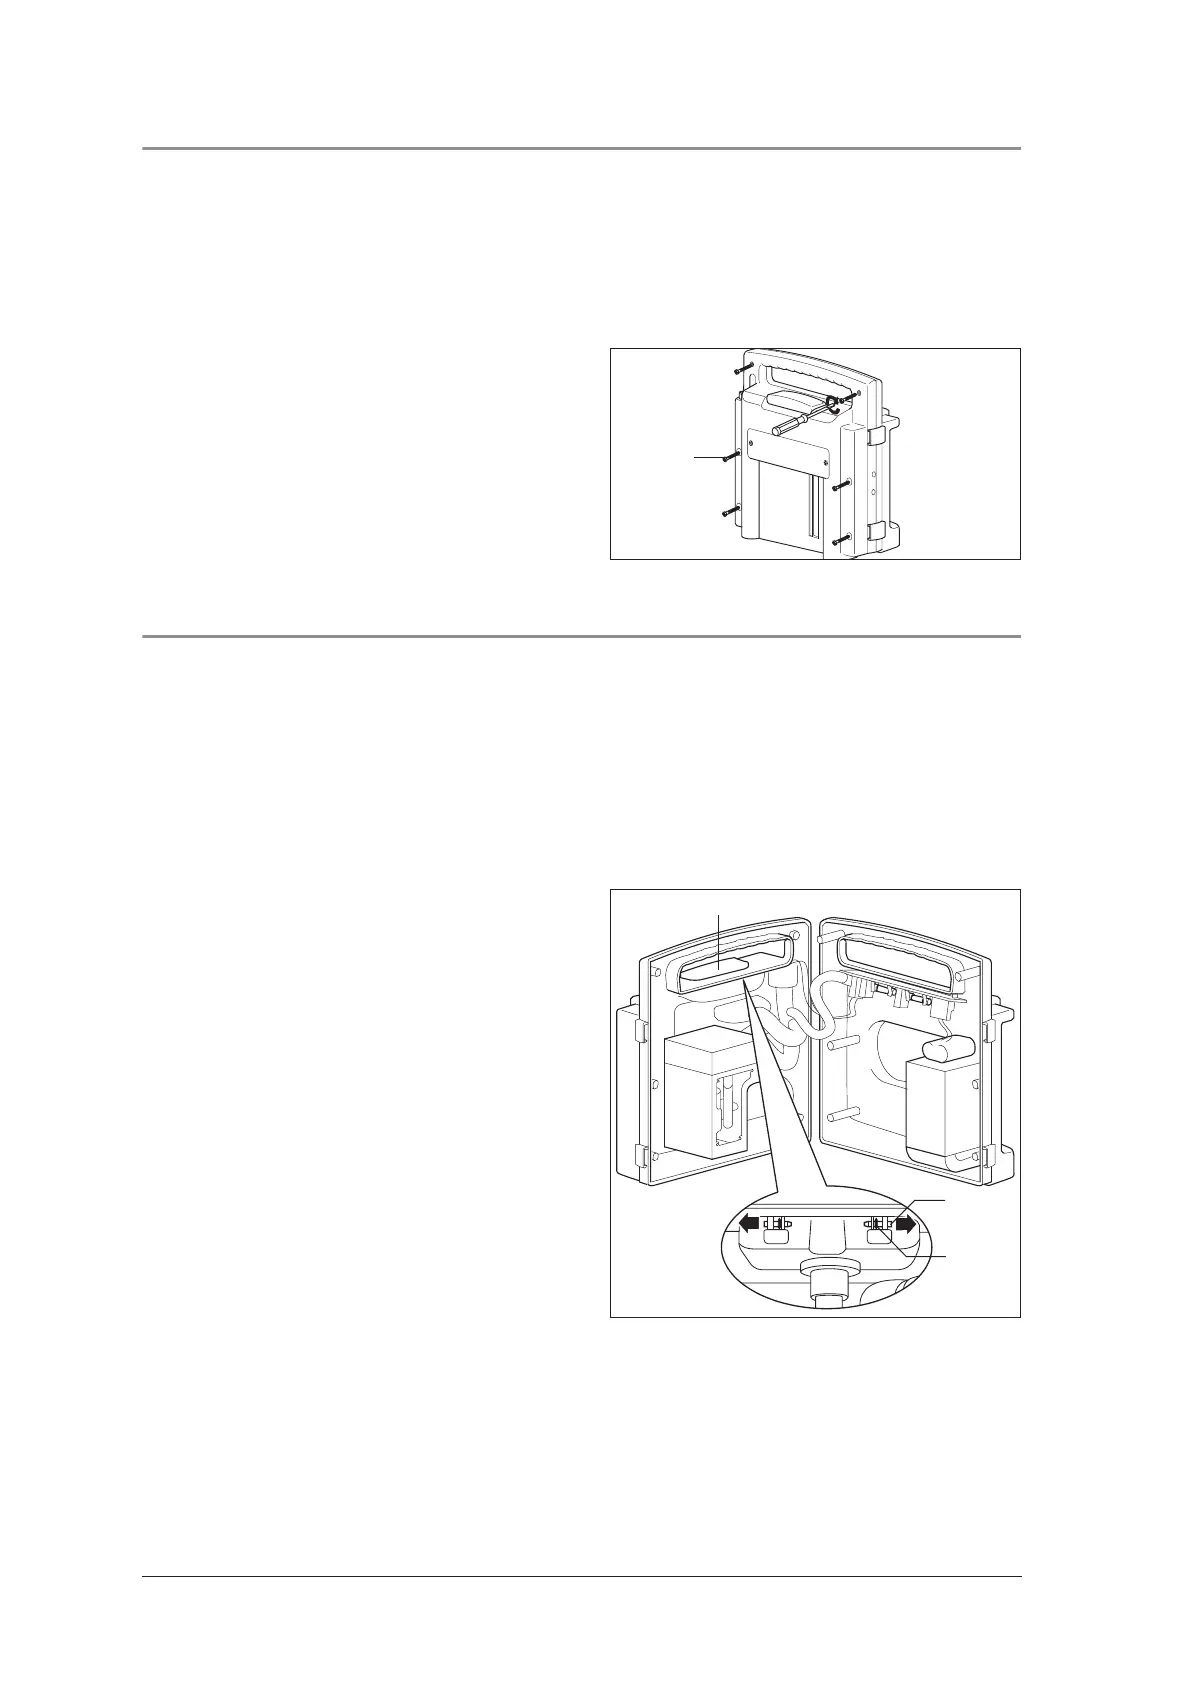
9.4 Replacing release catch
Tools and equipment required:
• Phillips screwdriver size 2;
• Screwdriver, size 1;
• Flat or pointed pliers.
1. Open the device (see ”9.2 Opening the de-
vice“ on page 15).
2. Place the ACCUVAC Rescue on its front.
3. Push out retaining pins 63 from release catch
62 and remove them.
4. Remove the old or defective release catch 62.
To do so, use a flat / blunt object to press
down snap lock 65, which is located below
release catch 62.
5. Take the new release catch 62 and insert it in
the rear wall of the case.
6. Take O-ring 64 and locate it in the rear wall of
the case between the loops of the release
catch and the rear wall attachment point.
7. Take the retaining pins 63 and insert them in
the bushing from outside to inside until you
hear them click into place.
8. Close the device (see ”9.3 Closing the de-
vice“ on page 16).
9. Perform a function check (see ”7.2 Performing
the function check“ on page 10).
46
63
64
62
 Loading...