14
ADJUSTMENTS
MAINTENANCE
WARNING: For your own safety, turn the switch OFF and remove the plug from the electrical outlet
before performing maintenance or lubricating the band saw.
1. Remove the sawdust from the inside of the housing and the sawdust collection drawer. Blow out the sawdust
from the motor.
2. Clean off the pitch which accumulates on the table, blade guides, and bearings.
3. Remove pitch and dust from the upper and lower wheels using a stiff brush. Do not use solvents.
4. Apply a thin coat of automotive polish to the table top for a slick surface.
5. Replace blades and the wheel tires when worn.
WARNING: Replace the power cord immediately if it is worn, cut, or damaged in any way.
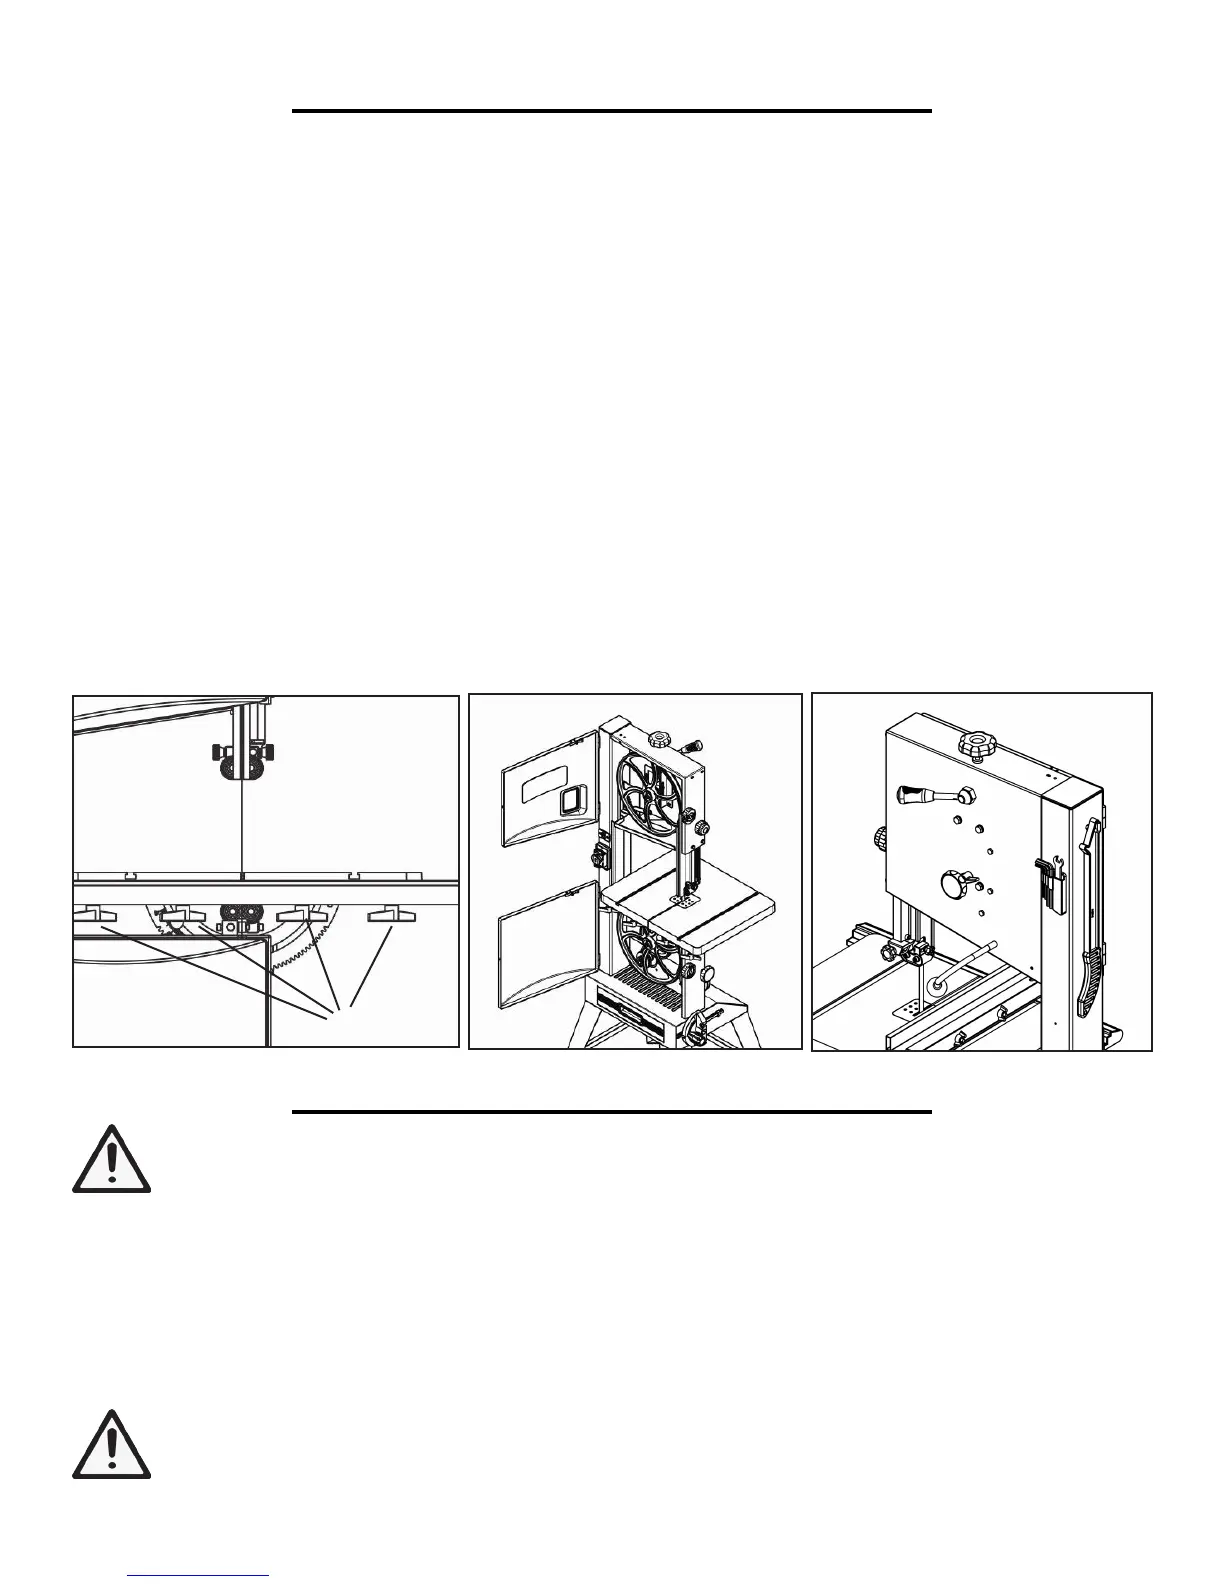
Fig. W
CHANGING THE BAND SAW BLADE
WARNING: The saw blade is dangerous. Be sure to wear gloves when handling the saw blade in any situation.
1. Loosen the four lock knobs for the guide rail. Remove the guard rail by loosening the four lock knobs located
underneath (Fig. W - 1).
2. Open the upper cover and the lower cover. Set the upper blade guide to its lowest position.
3. Loosen the quick release lever until the bandsaw blade has sufficient enough slack.
4. Remove the bandsaw blade from the machine. Fit a fresh bandsaw blade and center the bandsaw blade on the
rubber tracking on each of the bandsaw wheels.
5. Tighten the quick release lever. After manually spinning the wheels to make sure the blade has been centered
properly, replace the guide rail to its original lever and close the upper and lower cover.
6. Align the saw blade, adjust the blade tension and adjust the upper and lower blade guides before operation.
1
Fig. X
Fig. Y