OPERATION
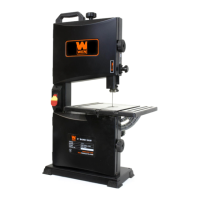
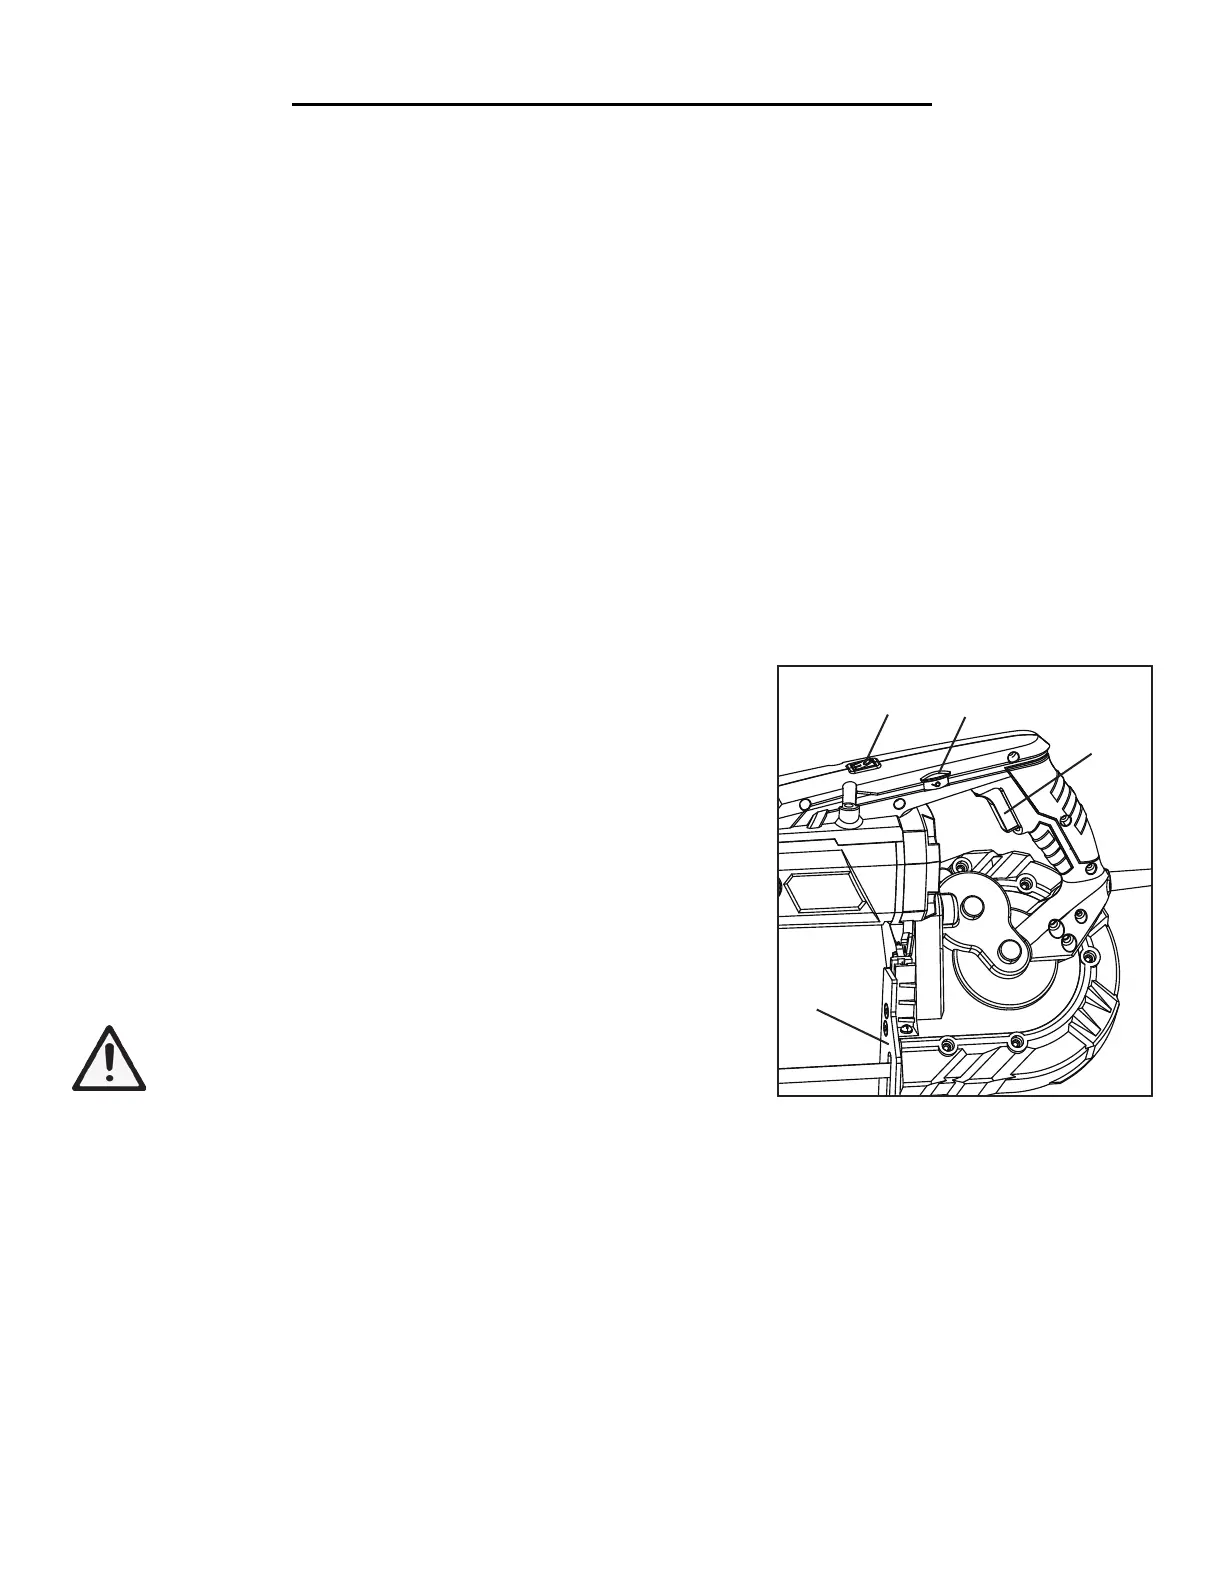
1. Hold the tool firmly with both hands on the insulated handles. With
the workpiece secured, set the guide bar (Fig. 3 - 4) against the work-
piece, keeping blade at a 90° angle to the workpiece.
2. Press the ON/OFF trigger (Fig. 3 - 1) to turn on the band saw. Use
the speed dial (Fig. 3 - 2) to set the blade speed to a suitable value. The
blade runs between 60 - 420 feet per minute. You can turn on the LED
light to illuminate the cutting area using the LED light switch (Fig. 3 - 3).
3. Wait a few seconds to allow the blade to reach full speed before start-
ing the cut.
WARNING: The blade is exposed on the underside of the
OPERATION
Fig. 3
WORK AREA & WORKPIECE SET UP
1. Designate a work area that is clean and well lit. The work area must not allow access by children or pets to prevent
distraction and injury. Do not operate in wet environment or near flammable materials.
2. Use suitable detectors to find hidden utility lines or call the local utility company for assistance. Contact with elec-
tric lines can lead to fire or electrical shock; damaging a gas line can result in an explosion; penetrating a water pipe
will cause property damage or an electrical shock.
3. Route the power cord along a safe route to reach the work area without creating a tripping hazard or exposing the
power cord to possible damage by the saw. The power cord must reach the work area with enough extra length to
allow free movement while working.
4. Secure loose workpieces using a vise or clamps (not included) to prevent movement while working. Do not
work materials containing asbestos (asbestos is considered carcinogenic). Dust from material such as paint contain-
ing lead, some wood species, minerals and metal may be harmful (contact with or inhalation of the dust may cause
allergic reactions and/or respiratory diseases to the operator or bystanders). Wear a dust mask and work with a
dust extraction device to reduce the risk of personal injuries from saw dust.
11
saw; hold the band saw away from your body.
4. To start a cut, use minimal force to guide the blade into the workpiece to create a groove. Then, allow the rest of
the blade to cut into the workpiece. Guide the tool to prevent blade from moving from side-to-side during cutting.
NOTE: Do not apply too much force on the tool. The weight of the tool itself will create enough force to make
the cut; let the tool do the work. Forcing or leaning on the tool may twist or break the blade, damaging the saw
and possibly causing injury.
5. As you reach the end of your workpiece, finish off the cut by slowly rasing the tool slightly, bringing the blade up
and away from the workpiece. Be careful to keep your feet clear of where the cut-off piece will fall.
6. Turn off and wait for the blade to stop. Do not put the tool down until it has come to a complete stop. Moving
parts can grab the surface and pull the tool out of your control. Unplug the power plug, clean, then store the tool
indoors out of the reach of children.
1
2
3
4

 Loading...