1514
ASSEMBLY & ADJUSTMENTS
WARNING: Do not plug in or turn on the tool until it is fully assembled according to the instructions. Read
through and become familiarized with the following procedures of handling and adjusting your miter saw. Failure
to follow the safety instructions may result in serious personal injury.
SQUARING THE FENCE WITH THE BLADE
To make accurate cuts, the fence must be perpendicular
to the saw blade.
1. Lower the saw arm down to the lower position and
lock the release knob. See section titled, "Raising/Low-
ering the Saw Arm" on page 12.
2. Slide the saw arm to the back and tighten the slide
lock knob. See section titled, "Setting Up Arm Slide" on
page 12.
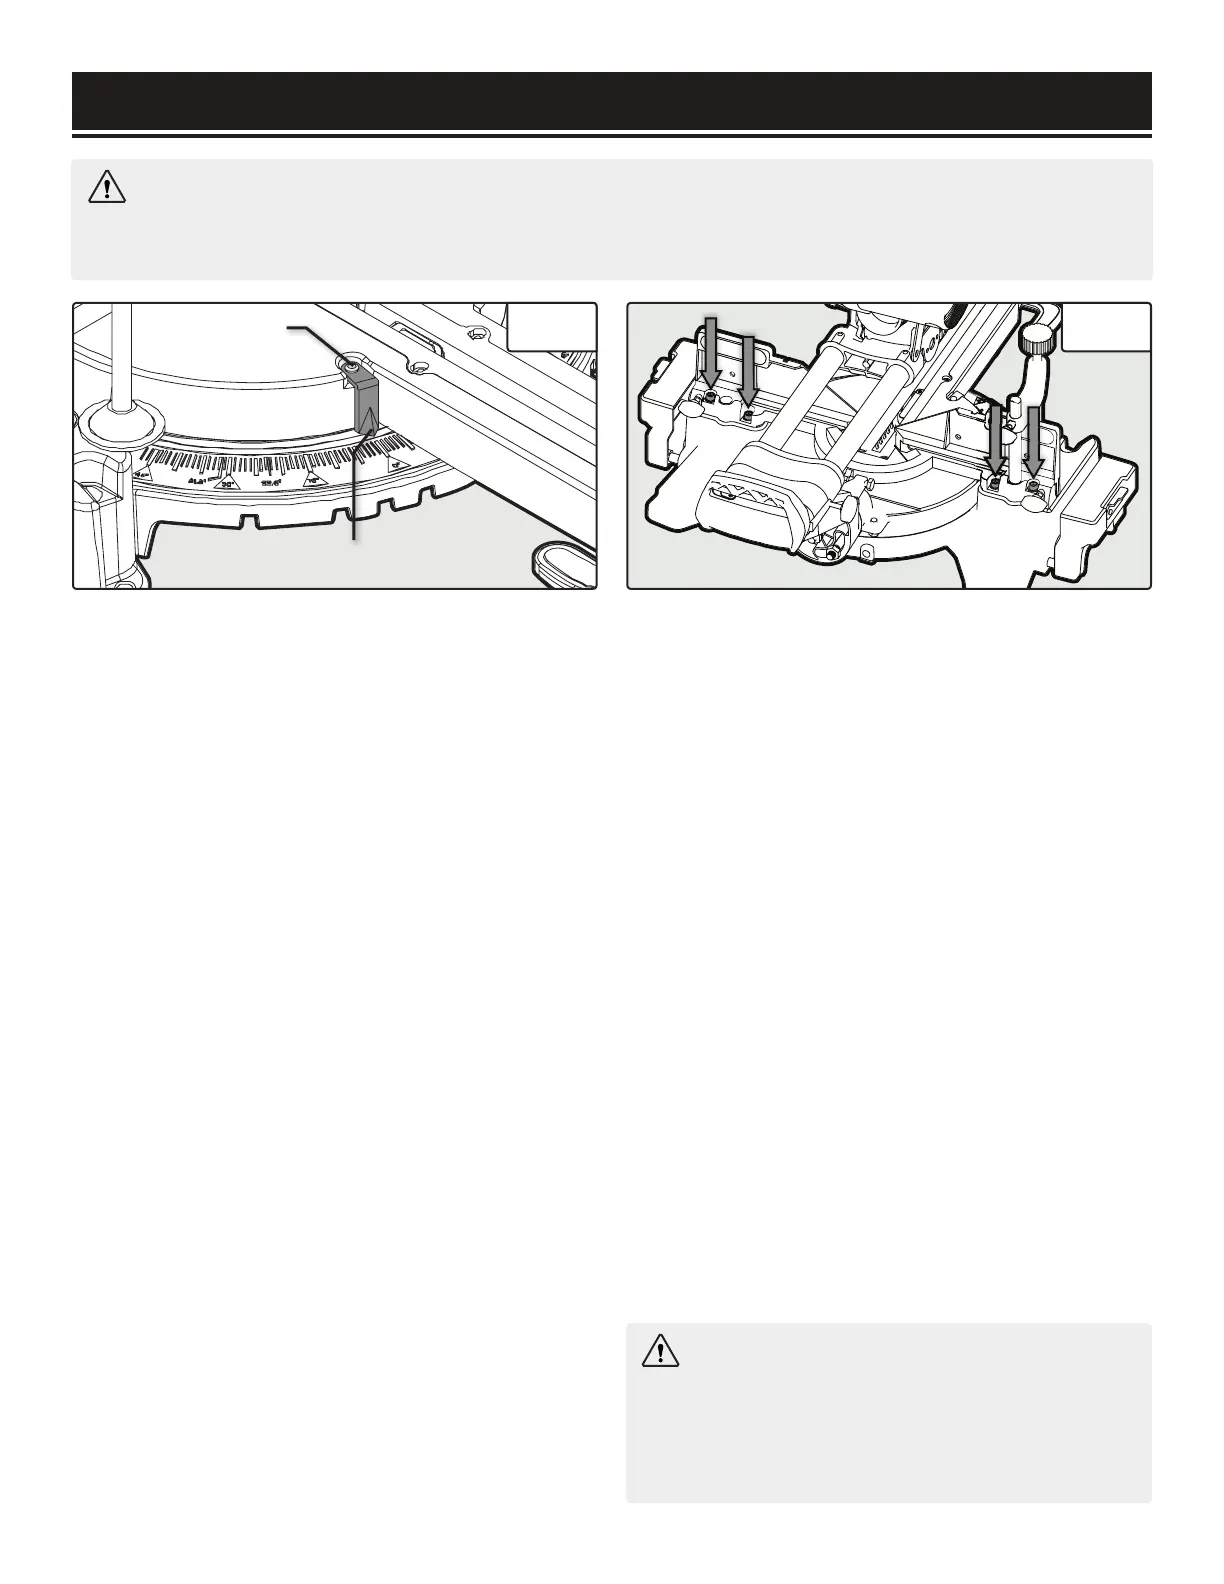
3. Set the miter table indicator (Fig. 9 - 2) to 0° and
tighten the miter lock knob. Place a combination square
(not included) against the fence and alongside the saw
blade (should be in contact with the surface of the blade,
not the teeth).
4. Slightly loosen the four fence adjusting bolts on the
back of the fence (Fig. 10 - arrows) with the included hex
wrench. Adjust the fence position until it is 90° with the
blade. Tighten the four bolts to secure the fence.
5. Make a test cut. Repeat step 4 until your test cut is
accurate.
SETTING THE MITER SCALE INDICATOR
1. Loosen the screw (Fig. 9 - 1) holding the miter scale
indicator.
2. Adjust the direction of the indicator (Fig. 9 - 2) so that
it accurately points to 0° on the miter scale. Tighten the
screw.
2
1
Fig. 10 Fig. 9
SQUARING THE TABLE WITH THE BLADE
To make accurate cuts, the table must be perpendicular
to the saw blade.
1. Lower the saw arm down to the lower position and
lock the release knob. See section titled, "Raising/Low-
ering the Saw Arm" on page 12.
2. Slide the saw arm to the back and tighten the slide
lock knob. See section titled, "Setting Up Arm Slide" on
page 12.
3. Set the miter table indicator (Fig. 9 - 2) to 0° and
tighten the miter lock knob. Set the bevel angle indicator
to 0° (Fig. 11 - 6, p. 16) and tighten the bevel lock lever.
4. Place a combination square (not included) against the
table and alongside the saw blade (should be in contact
with the surface of the blade, not the teeth). Wearing
work gloves, rotate the blade by hand and check the
blade-to-table alignment at several points. The edge of
the combination square and the saw blade should be
parallel. If the saw blade tilts away from the combina-
tion square, continue on with the steps on the following
page.
Instructions continue on the next page.
WARNING: To prevent serious injury, after mak-
ing any adjustments to the cutting angle, make sure
the both sides of the fence are clear of the blade's
cutting path. With the power OFF, move the blade
through its full range of motion to check this.
 Loading...