For Service Technician Use Only
DIAGNOSTICS
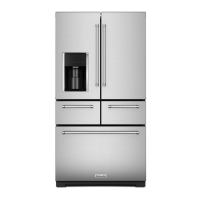
French-Door Boom Mount Refrigerator
n
1-29
Key components for the water supply and dispensing include: the
isolaon vavle, water valve, interconnecng wiring, water tubing,
Dispenser UI, Water Paddle Switch, and interconnecng wiring.
NOTE: This test also operates the Isolaon Valve.
• Ensure display reads “on” for about 5 seconds, then reads
“oFF”
• Check that water dispenses from the Dispenser.
If display did not read “on”
• Replace Dispenser UI.
If water dispensed, check inputs:
• Press Water Paddle. Ensure Display reads “1”
If display does not read “1” ensure all wiring connectors are
ght.
If all connectors are ght, replace the Water Paddle, or
switch, as appropriate.
• Press “Measured Fill” on the Dispenser UI. Ensure Display
reads “1”
If display does not read”1” while buon is pressed, Ensure all
wiring connectors are ght.
If all connectors are ght, Replace the Dispenser UI.
If water did not dispense in Service Test 96:
• Check connuity of the Isolaon Valve and Water Valve.
• Check all wiring connectors are ght,
• Check for blockages in water tubing.
Key components for ice producon and dispensing include:
Isolaon Valve, Dispenser U, Door Ice Maker
water valve, Fill Tube Heater, and Freezer Ice Maker water valve
and ll tube heater (some models).
Ice Box Thermistor, Ice Box Fan, FC Thermistor.
Ice Bucket Switch, Ice Maker including the
Ice Tray Thermistor, and IM Motor, and IM Motor Switch.
Ice Dispensing: Auger Motor and Ice Door Motor.
Run the appropriate Service Tests for the aected Ice Maker. It
is best to check the thermistors rst. This will provide accurate
temperature condions to troubleshoot with.
• Ensure none of the thermistors are Open “OP” or Shorted
“SH”. Replace any faulty thermistors.
• NOTE: To replace the Door Ice Box Thermistor or Ice Tray
thermistor, replace the Ice Maker.
If the Ice Box is not at the proper temperature, check the supply
of cold air to the Ice Box.
Ensure LED Display shows “on”
• Check that the fan is operang
If fan is not operang:
• Check all wiring connectors ght (FIGURE 17).
• Check integrity of wiring between control board and fan.
(Connuity or Voltage check as appropriate)
If wiring check indicates bad wiring:
• Replace wiring harness
If wiring checks OK, or if fan is sll not operang:
• Replace fan.
If LED Display does not show “on”:
• Replace GF2 board
If temperatures in the Ice Box are appropriate, check wheher or
not there is ice/water in the Ice Tray. If no water is present, test
the Ice Maker Water Supply. If Ice is present, proceed to the next
secon, Ice Maker Harvest Test.
or
This test also operates the Isolaon Valve.
• Ensure display reads “on” for about 5 seconds, then reads
“OFF”
• Check that water is dispensed into the Ice Maker.
If display did not read “on”
• Replace Dispenser UI (Door Ice Maker).
• Replace GF2 board (Freezer Ice Maker).
If water did not ll the Ice Maker:
or
• Ensure the diplay shows “on”
• Leave in Test for about 15 minutes
• Re-run Service Test 97 or 98 to test the appropriate Ice Maker
Fill Valve.
If Water sll does not dispense:
• Perform resistance checks on Fill Tube Heater
• Perform resistance checks on Isolaon and Ice Maker Fill
Valves.
• Check all wiring connectors are ght.
• Check for blockages of the water tubing.
The Ice Maker Harvest Test checks the funconality of the Ice
Maker motor and Motor Posion Switch.