PAGE 8
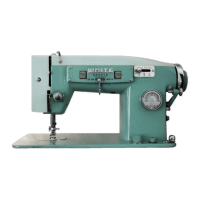
Removing Bobbin Case From Machine—
Lift the hinged plate at the left
end of the machine bedplate.
Look down and slightly to the
right: You will see the
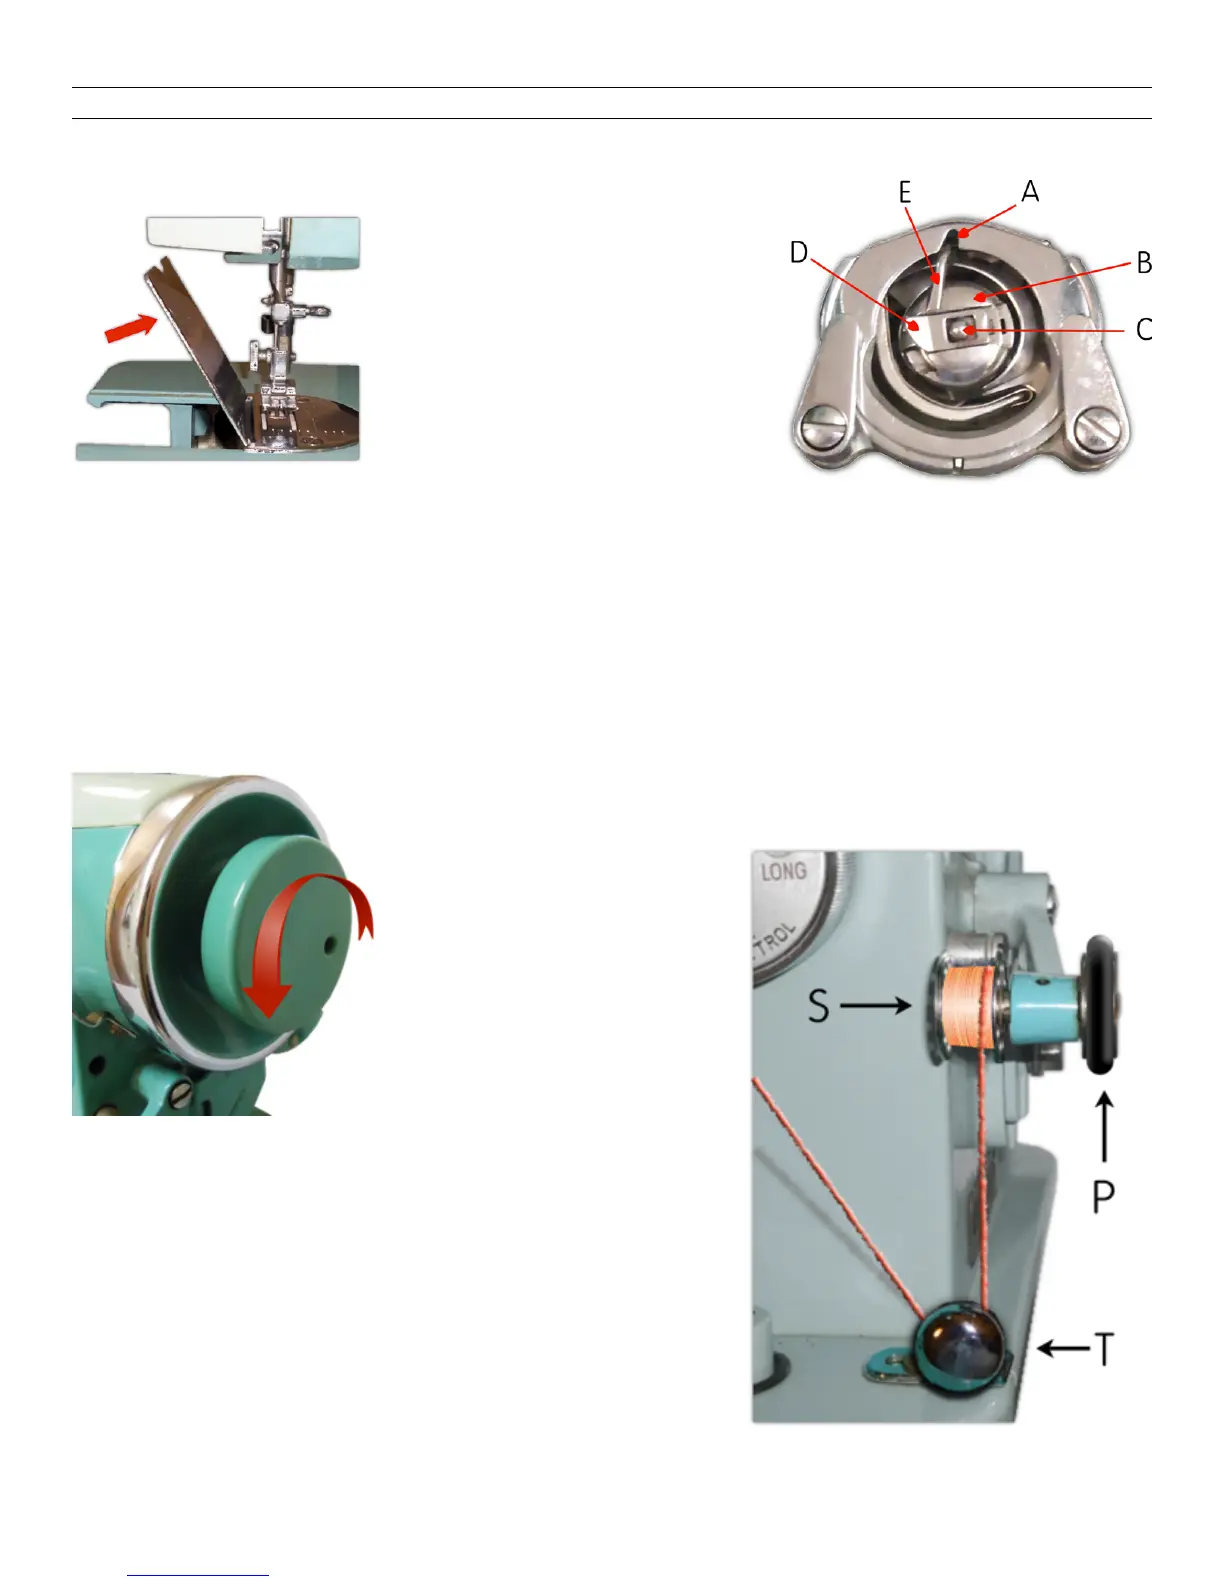
assembly pictured (right). With
the fingernail of your left hand,
first, finger under rear edge of
the latch (D), pull straight out
and use the raised latch as a finger grip to remove the
bobbin case containing the bobbin.
To Replace Bobbin Case in Machine
Reverse the above procedure. When sliding the case onto the shuttle center stud (C),
be sure that the threaded “finger” (E) is directly upright so it will enter the shuttle race
notch (A) as you push the case (B) into sewing position, finally releasing the latch (D)
to hold it in place.
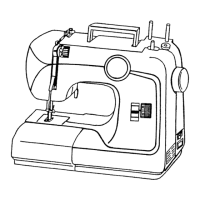
— Winding (Refilling) A Bobbin
Turn the balance wheel clutch counter-clockwise so that the
wheel turns freely without tuning the entire machine. From a
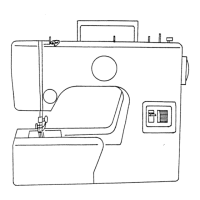
spool on the machine,
lead thread through the
rear and front guides atop
the machine, then
diagonally right and down
between the tension discs
(T) as shown (right).
Holding the empty bobbin
in the other hand, lead
the thread through a hole
in the side of the bobbin’s edge. Slide the bobbin
onto the spindle (S), fitting the notch in the hub of
the bobbin over the small pin on the spindle. Push
the rubber pulley (P) against the machine wheel and
run the machine slowly, holding the thread-end
loosely until winding action pulls it from your fingers.
The winder shuts off automatically when the bobbin
is filled. Remove the bobbin from the spindle and
break off (or cut) the thread-end you held at the
start. Turn the wheel clutch clockwise firmly to re-engage the sewing mechanism.