PAGE 10
Adjusting the Tensions for Properly Balanced Stitching
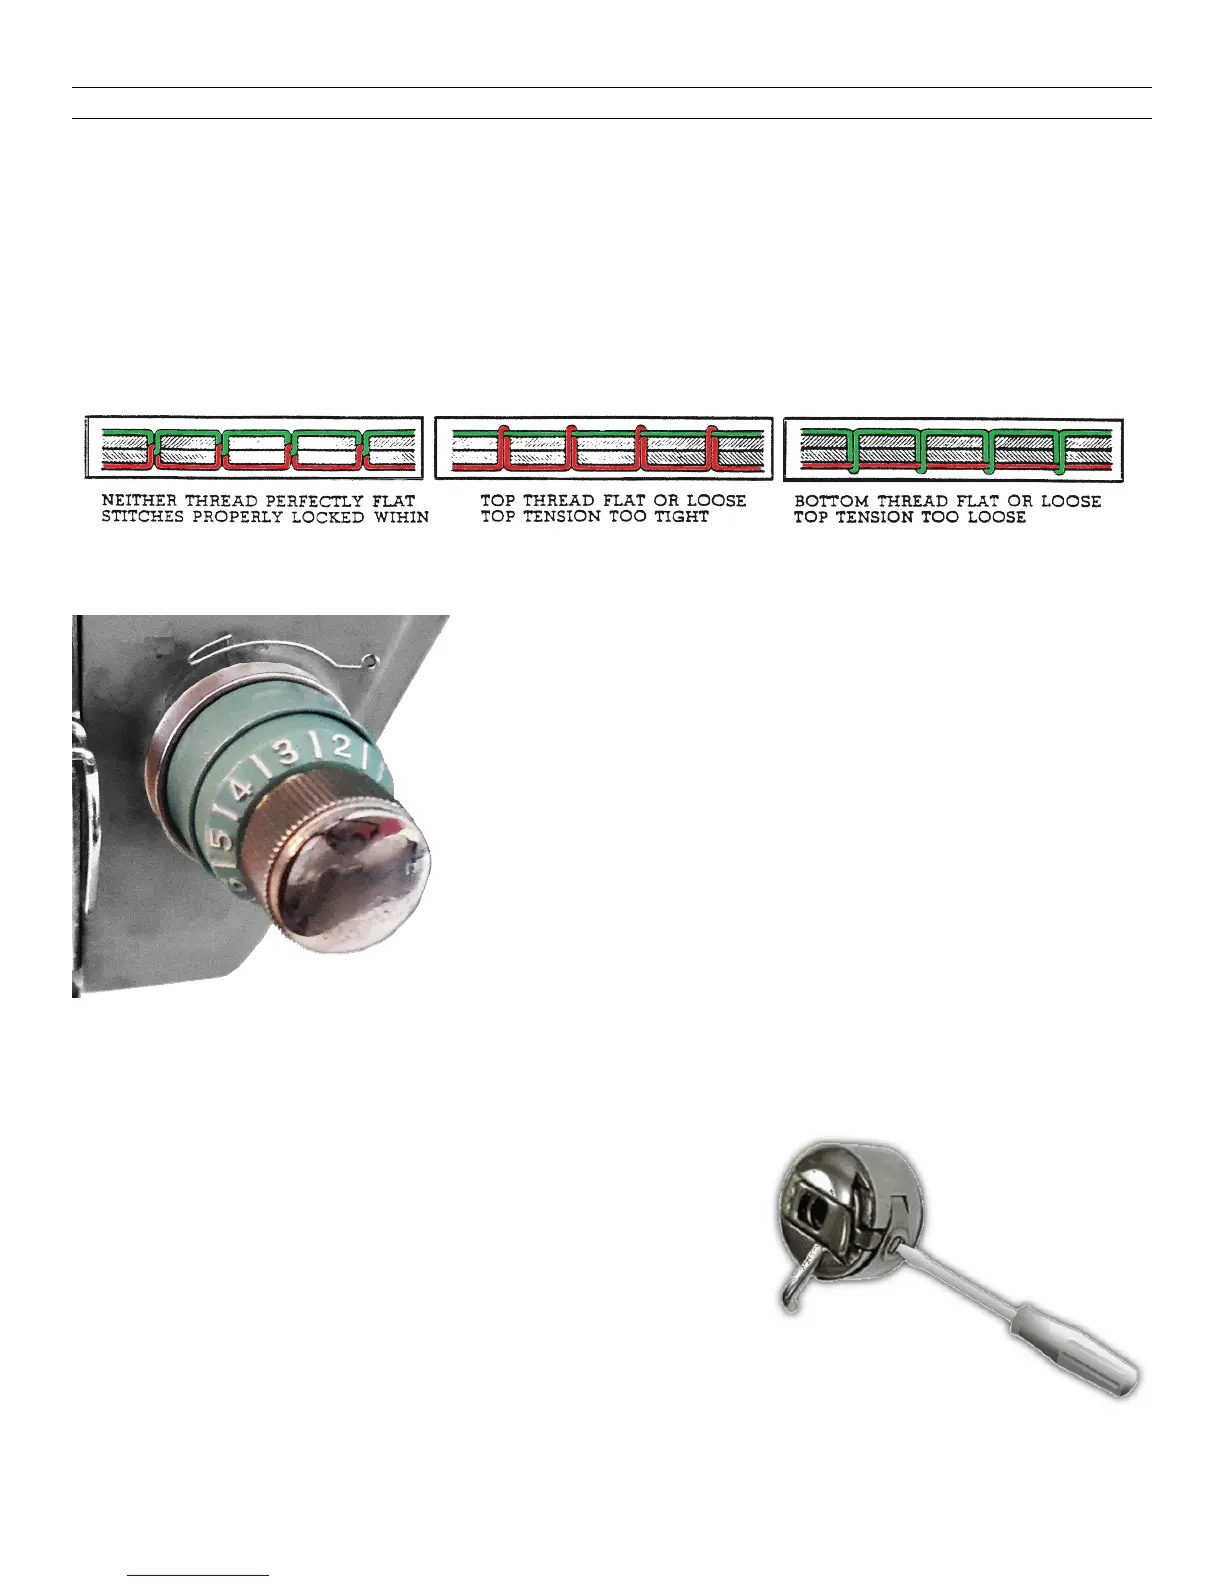
The shaded portions of the drawings below represent the fabric enlarged many, many
times to illustrate the lock-stitch principle — how and where both threads should
entwine WITHIN the fabric thickness.
Hold the finished side of the material upward when inspecting stitching.
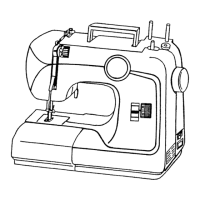
— To Tighten or Loosen Top Tension
First, be sure that the Presser Foot is DOWN —
resting on the fabric. (When raised, the top thread
tension is automatically released.) To TIGHTEN the
needle thread tension, turn the numbered dial
(picture left) CLOCKWISE. To relieve tension, turn
the dial counter-clockwise. The higher the number at
which the dial is set, the heavier the tension on the
needle thread. Before attempting any tension
adjustments be doubly sure that the machine is
completely and properly threaded and that the
Presser Foot is DOWN. If the tension adjustment of
the needle thread does not produce properly balanced stitching, only then do you
consider adjusting the tension on the bobbin case (lower) thread.
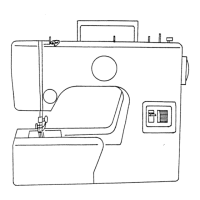
To Loosen or Tighten Bobbin Thread Tension —
This adjustment is rarely necessary unless you have
sewing calling for very unusual thread in the bobbin;
for instance, elastic thread. To adjust the tension on
the bobbin thread, merely turn the small screw in the
outer rim of the Bobbin Case (picture right). Turn the
screw a little at a time as you pull thread to test the
tension on it. Turn the screw CLOCKWISE to
INCREASE the tension — the other way ease it.