Built In Heater Installation
DO NOT BLOCK
VENT OPENING
The Advantage Insert may be framed
directly into a wall. Below are two (2)
examples of this. The exhaust installation
requirements are the same as for a
Freestanding stove. Refer to “Installing
your Freestanding Stove” for information
about installing and proper hook-up of
the exhaust.
Stove Dimensions for the Advantage Plus Insert that will be Enclosed within the frame work
are HEIGHT (20 1/4”) WIDTH (24”) DEPTH (13 1/2” + OR – 1/4”).
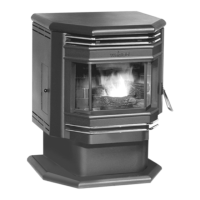
#2) This example shows the
exhaust vented vertical off a
cleanout Tee. This shows a
Chase to enclose the pipe.
** The Framing opening for
this installation needs to be:
HEIGHT= 22 1/2”
WIDTH = 39 3/4”
DEPTH = 24”
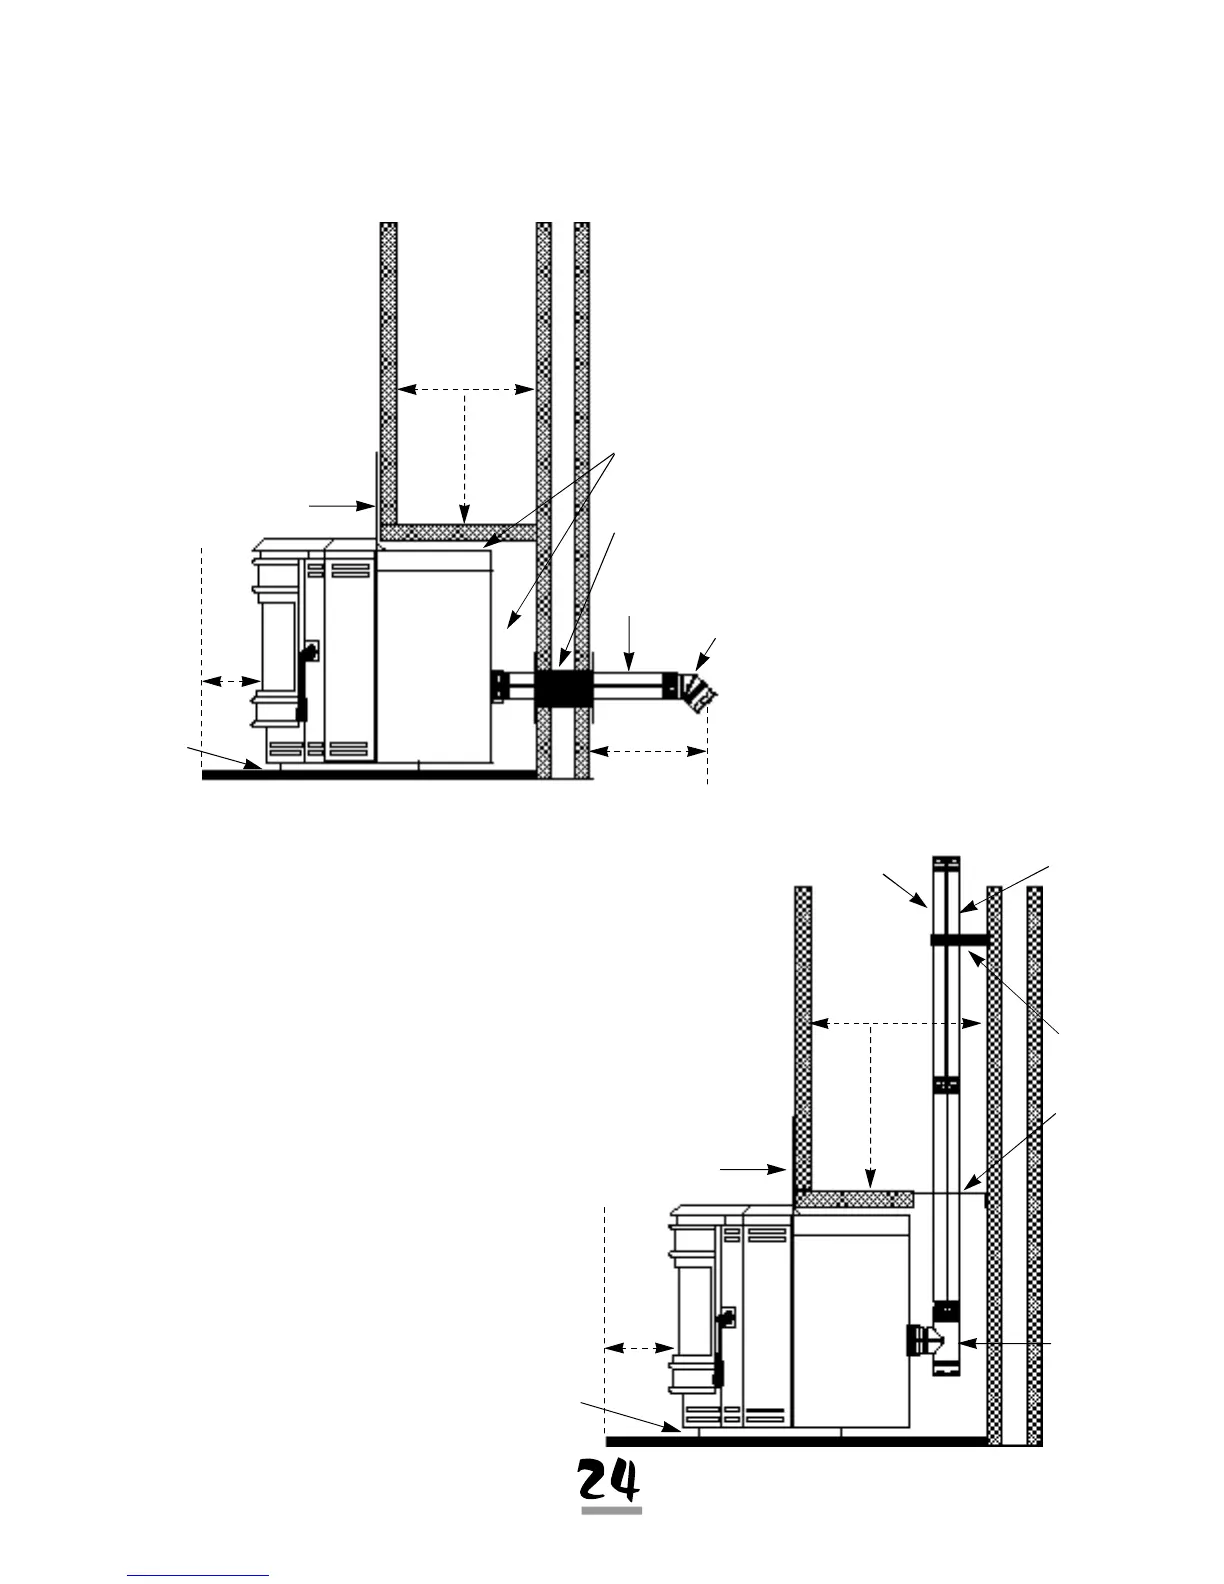
#1) This example
shows the exhaust
directly venting to the
outside horizontally to
the rear of the stove.
** The Framing open-
ing for this installation
needs to be:
HEIGHT= 24”
WIDTH = 34”
DEPTH = 14”
Wood Frame
6”
Min.
12”Min.
Shroud
1”
Minimum
Air Gap
Wall
Thimble
Type “L”
Vent Pipe
45 Degree
Elbow OR
End Cap
Wood Frame
3”
Minimum
Air Gap
Pipe
Stand-off
Bracket
Fire
Stop
Clean
Out
Tee
Type “L”
Vent Pipe
Shroud
6”
Min.
DO NOT BLOCK
VENT OPENING
NOTE: For Built-In Installations You Must
Order Enclosure Kit #11950055.