Wiltronics Research Pty Ltd 24
561 DC1V1
APPENDIX D. ESTABLISHING A SERIAL CONNECTION WITH A PC
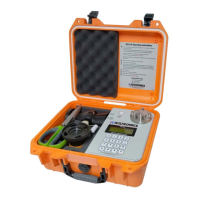
In order to download parameters and data from the ME2100 meter it is necessary to first connect the ME2100
to a PC via its USB serial port. This is done using the USB cable (with A-type and B-type connectors) which is
supplied with the ME2100..
Section D.1 details establishing the physical interface.
Section D.2 details using ME2100 Manager software to establish communications.
Note that “click” refers to a mouse left-click unless otherwise specified.
The ME2100 meter has a USB type-B connector and is supplied with a suitable cable to connect to a
PC's USB port. An FTDI USB Serial Port interface is used in the ME2100.
Power up the ME2100 and connect it to the PC using the USB (A-type to B-type connectors) cable provided.
Assuming that the serial cable was correctly installed, then proceed to section D.1.2.
For MS Windows 7, 8 and 10, the operating system should “discover” the connected USB device and proceed to
load an appropriate driver. Normally, MS Windows will have the driver either readily available in the driver cache
(typically already on the PC's hard disk) and there should be no problems, or will obtain the driver from the
Internet if connected. The operating system should load the driver immediately. If there is an issue, then the
necessary driver is supplied on the memory media flash drive that came with the ME2100 meter.
Plug the flash drive into a USB port and follow the operating system dialogue box prompts to enable the
operating system to find the driver on the memory media. NOTE that it may require either one or two drivers
to be loaded, depending on existing drivers available in the operating system.
Assuming that the driver was correctly installed, then proceed to section D.1.2.
If the driver failed to load then see section D.1.3.
Now that a COM port is available, it is necessary to determine which COM port designator (COM number) it has
been allocated (ie. whether COM1 or COM2, etc).
On the PC, select either “Start → Control Panel” or right-click Start (Windows icon in the lower left of the desktop
screen) and select “Device Manager”. In the case of using the Control Panel, in the window that appears, a
number of items are displayed. Locate the “System” item and left-double-click it to bring up a tabbed page
window. This may require that you have logged in as a system administrator. Click the “Hardware” tab.
Click the “Device Manager” button. (In MS Windows 10 run the Control Panel app, select System and
Security, then select System in the main list, then in the left pane select Device Manager).
Once in the Device Manager window, there should appear a list of hardware device types. One of these items is
“Ports (COM & LPT)”. Double click it to expand it (or click [+] or the arrow next to it once.
D.1 Connecting the USB Serial Communications Hardware.
D.1.1 Establishing the USB Serial Port Hardware Connection.
D.1.2 Determining which Serial COM Port to use.
Continued Next Page