Do you have a question about the Wimius P60 and is the answer not in the manual?
Provides essential advice on projector placement, ventilation, and maintenance to ensure optimal performance and longevity.
Details various methods for installing the projector, including ceiling and table mounting for front or rear projection.
Guides users on correcting initial unclear images by adjusting focus and keystone settings.
Instructs on selecting the desired input source (HDMI, AV) from the projector's home page for proper signal detection.
Explains the process of connecting the projector to a wireless network via WiFi for various functionalities.
Details how to select and confirm the projection position for different mounting scenarios.
Covers the advanced keystone correction features for horizontally and vertically adjusting the projected image.
Lists the projector's available interfaces, including HDMI, USB, AV, and audio ports, for connecting devices.
Provides instructions on connecting external devices such as laptops or TV sticks to the projector using HDMI cables.
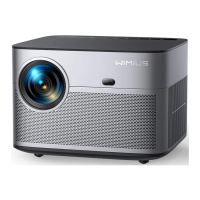
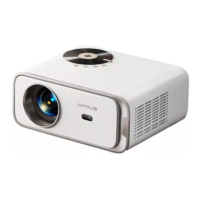
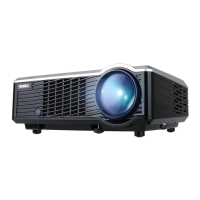
This document serves as a user manual for the WiMiUS P60 projector, providing comprehensive instructions for its operation, installation, and troubleshooting. The projector is designed for versatile use, offering various projection modes and connectivity options to enhance the user's viewing experience.
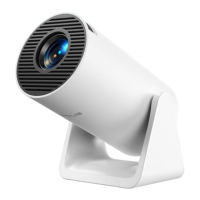
The WiMiUS P60 is a projector capable of displaying images and videos from a variety of sources onto a screen. It supports multiple input methods, including HDMI, USB, and AV, making it compatible with devices such as smart phones, iPads, Fire TV sticks, TV boxes, DVD players, and computers. The projector is equipped with features for image adjustment, wireless connectivity, and audio output, aiming to provide a flexible and high-quality projection solution.
Installation and Setup: The projector offers flexible installation methods, allowing it to be placed on a stable desk or hanged on the ceiling using a special hanger frame. Users can choose between front projection (desk or ceiling mount) and rear projection (desk or ceiling mount) based on their environment and requirements. For optimal image quality, it is recommended to keep the projector's lens axially symmetrical to the screen. If this is not possible, the keystone correction function can be used to adjust the projection image. The manual provides detailed instructions for adjusting the tilt base and locating the screw holes for ceiling mounting.
Starting the Projector: To start the projector, simply press the power key on the remote or the projector itself. The indicator light will turn green, signaling that the device is on.
Image Adjustment: Upon first use, the image may appear unclear. This can be corrected by adjusting the focus ring on the right side of the projector. Rotating the focus ring or lens slowly will help achieve the clearest image. If the image remains blurry, adjusting the projection distance is recommended. The projector also features a 4D keystone function, which allows users to adjust the projection screen to a rectangular shape, correcting for vertical and horizontal distortions. This advanced keystone correction includes both 4-sided trapezoidal and 4-corner trapezoidal adjustments, enabling precise image alignment.
Digital Zoom: The digital zoom feature allows users to scale the projection screen from 50% to 100%. This can be done uniformly by turning on both the "Custom zoom" and "Scaling" buttons, or separately for horizontal and vertical dimensions by turning on "Custom Zoom" and turning off "Scaling."
Input Signal Source Selection: The projector's home page provides options to select the desired input signal source, such as HDMI1, HDMI2, or AV.
USB Disk Input Mode: Users can play movies, music, photos, or office suite files directly from a USB disk. After inserting the USB disk into one of the two USB input ports, users can navigate through the "Video," "Music," "Picture," or "Office" options on the home page. Selecting a desired file or folder and pressing the "OK" button will initiate playback. The "Office" option supports reading and presenting files like PPT and PDF directly from the USB key.
Wireless Connectivity (WiFi Setting): The projector supports wireless screen mirroring for both iOS and Android devices.
Bluetooth Setting: The projector allows for Bluetooth connectivity with external audio devices. From the home page, users can select the "Bluetooth" option, open the Bluetooth function, and scan for nearby Bluetooth devices. Once the desired device is found, it can be selected for automatic pairing and connection. The P60 projector is compatible with Bluetooth headsets, speakers, and AirPods, but not Bluetooth keyboards or phones.
Projector Image Setting (Projection Mode): The projection mode can be adjusted from the settings menu. Users can select "Projection Position" and use the arrow keys to choose and confirm the desired projection position.
Signal Lines Connection: The WiMiUS P60 projector features six interfaces: two HDMI ports, two USB ports, a 3.5mm headphone output, and an AV output. This allows for connection to various devices such as PCs, phones, DVD players, soundbars, and gaming consoles (e.g., PS4).
General Tips for Longevity:
Remote Control Care:
Safe Shutdown: To safely shut down the projector, press the power button on the projector or remote, unplug the power cord, and then cover the lens. Store the projector in a cool and dry place.
Troubleshooting: The manual includes a troubleshooting section to address common issues:
| Brightness | 6000 Lumens |
|---|---|
| Resolution | 1920 x 1080 |
| Native Resolution | 1920 x 1080 |
| Contrast Ratio | 10000:1 |
| Lamp Life | 100, 000 hours |
| Aspect Ratio | 16:9 |
| Operating System | Android |
| Wi-Fi | Yes |
| Bluetooth | Yes |
| Connectivity | HDMI, USB, AV |
| Keystone Correction | ±50° |
| Projection Distance | 1.5-6 meters |
| Speaker | 10W |
| Maximum Resolution | 4K Ultra HD |