18
For the Installer
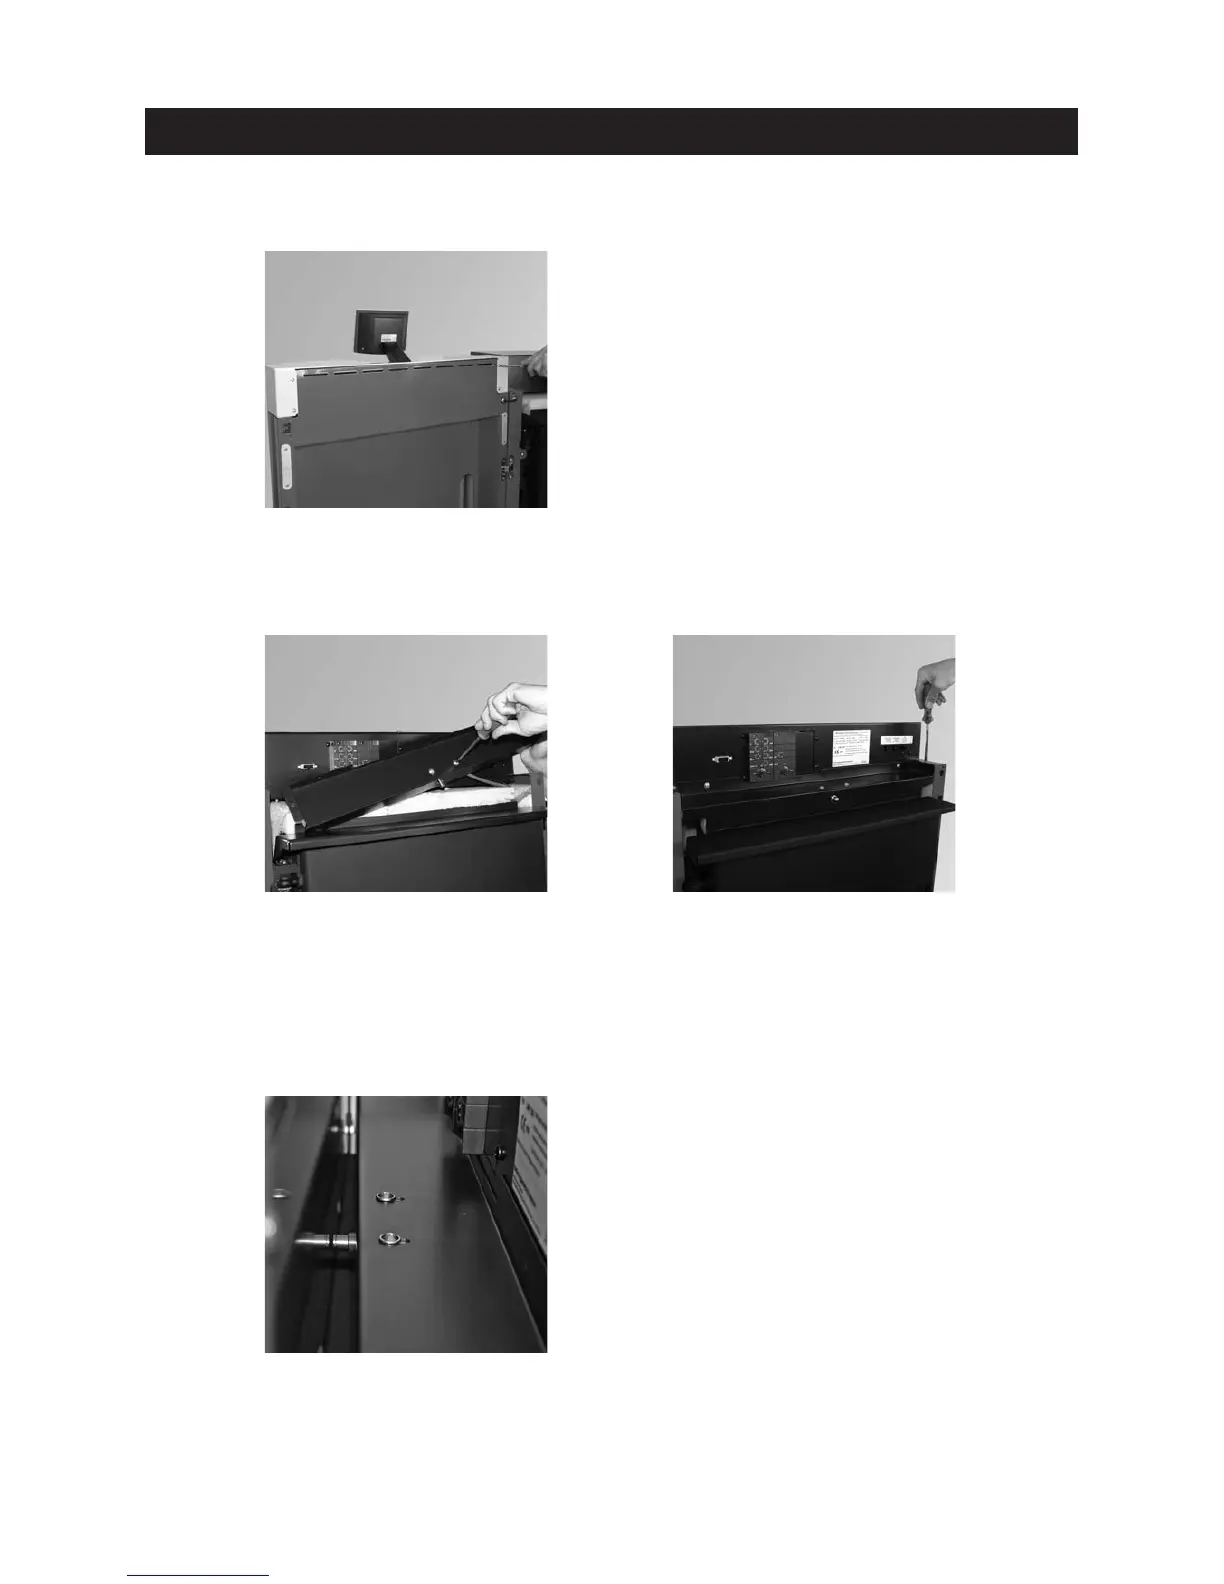
Attach cladding door cover to cladding door and use 4 screws to secure – Fig. 32.
Fig. 32 Securing cladding door cover in 4 places
Fig. 33 Screwing cladding door switch in
cover
Fig. 34 Fitting cover
Fig. 35 Setting cladding door switch
Secure cladding door switch in cladding door switch cover with 2 screws – Fig. 33.
– Screw cladding door switch cover on side walls (2 x) and control panel (2 x) – Fig. 34.
– When closing the cladding door, the cladding door switch must be set such that there is still sufficient shift-
ing travel after switching (audible clicking) before the cladding door is totally closed. If necessary, use screw-
driver to reset – Fig. 35.