SECTION 3 -
DRIVING YOUR MOTOR HOME
3-8
• Lift the rear end of the cover upward and slide
rearward, then pull the cover from the
opening.
NOTE:On some models the beverage tray (if
equipped) may need to be removed to
provide additional clearance to extract
the engine cover.
If the beverage tray has a drawer, it must
be removed to expose the fasteners that
hold the tray to the motor cover.
• To reinstall the engine cover, position the
front end of the cover first, then lower the rear
end. It is important to be sure the front edge is
pushed completely forward to the radiator
cover to ensure an air-tight seal.
• Press the rear end of the cover down and turn
the hex wrench to the right (clockwise) until
the latch pulls the cover downward and stops.
• Reinstall the two side screws (if equipped).
ENGINE COOLING SYSTEM
Do not remove the radiator cap while engine
and radiator are still hot. Always check coolant
level visually at the see-through coolant
reservoir.
NOTE: Your chassis engine cooling system is
filled with special extended-life coolant
that is not the same as common anti-
freeze available at retail outlets.
The coolant system MUST be refilled or
topped up with the same type of coolant
as equipped to maintain the special long-
life properties.
Refer to your chassis manual for information
and precautions on filling, servicing and
checking the fluid level.
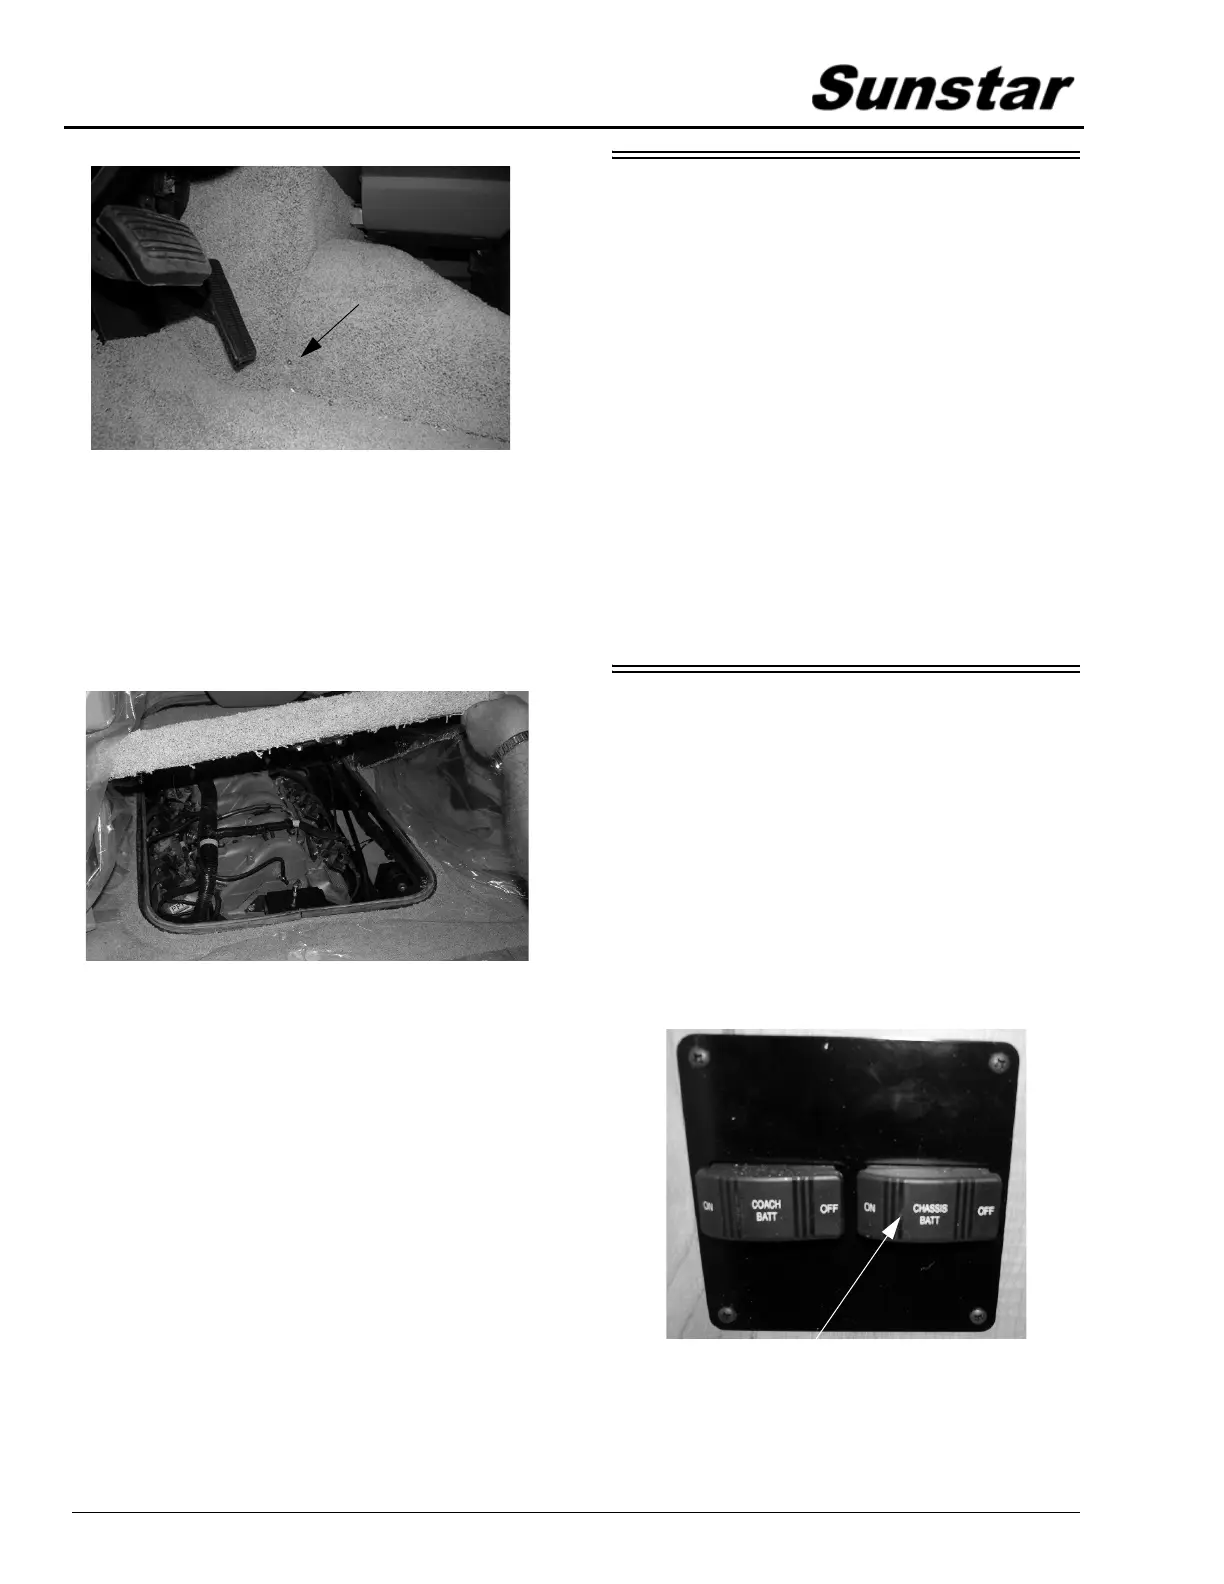
CHASSIS BATTERY
DISCONNECT SWITCH
- If Equipped
The chassis battery disconnect switch
disconnects most chassis electrical loads from
the chassis (starting) batteries to avoid discharge
by constant draws such as engine computers,
radio clock, sensors, etc. (except the electric
entrance step). This feature is intended to help
conserve battery charge during storage.
Turn the switch to the OFF or ON positions to
disconnect or reconnect the chassis batteries.
(Typical View)
Remove screws on both sides of
engine cover.
(Typical View)
Chassis Battery Disconnect Switch
(located inside the entrance door)