EasyManua.ls Logo

WizCom Technologies Pen Scanner User Manual

WizCom Technologies Pen Scanner
24 pages
To Next Page IconTo Next Page
To Previous Page IconTo Previous Page
Page #16 background image
WizCom InfoScan™ 1.00 User Guide
16
Tutorial 2 – QuickLink
This tutorial will take you through the basic usage of the
QuickLink
function
which involves Pen-PC Communications.
Important: Before performing this tutorial, you must have already run the one
time procedure Set Up Product on PC from the WizCom InfoScan™ CD-
ROM (see Set Up Product on PC on page 10).
Step 1: Prepare the PC
1. Turn your PC on.
2. Close any applications that are running on your computer. The icons of
applications that are running appear in the notification area of the taskbar
(located at the bottom right corner of the Windows screen). It is
especially important to close applications that use the serial port or USB
ports of your computer, such as PDAs or digital camera applications.
3. Activate the WizCom InfoScan Desktop application that you have
already installed during the CD-ROM procedure Set Up Product on PC:
o If, during installation, you chose to add the Desktop to your
computer’s startup, the Desktop will automatically start running when
you start your computer. To maximize the Desktop window, click on
the Desktop icon in the taskbar. If the Desktop window does not
appear, select the Show Window option from the pop-up menu.
o If the Desktop application does not run when you start up your
computer, or if you have closed the application, you can start it by
clicking the Windows Start menu and selecting Programs\WizCom
InfoScan Desktop\
WizCom InfoScan Desktop.
4. Connect the cable to your Pen and PC (the same way you did during the
CD-ROM procedure Set Up Product on PC).
Step 2: Prepare the Pen
1. Press to turn the Pen on. If the Pen Main Menu is not
displayed, press until you are back at the Pen Main Menu.
The Pen display will show:
The Pen Main Menu
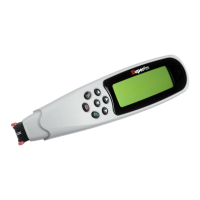
Question and Answer IconNeed help?

Do you have a question about the WizCom Technologies Pen Scanner and is the answer not in the manual?

WizCom Technologies Pen Scanner Specifications

General IconGeneral
TechnologyOptical Character Recognition (OCR)
InterfaceUSB
CompatibilityWindows, macOS
DimensionsApprox. 15 x 3 x 3 cm
WeightApprox. 50 grams
Supported LanguagesMultiple languages (varies by model)

Summary

Familiarizing Yourself with the Pen

The Pen Buttons (keypad)

Details the function of the Pen's Power, Enter, Escape, and Arrow buttons.

Scanning

Explains the process of scanning text by rolling the Pen over printed material.

How to Scan

Provides step-by-step instructions for scanning text using the device.

Scanning with the Trainer

Guides users on using the transparent trainer for initial scan practice.

Scanning without the Trainer

Offers instructions for scanning text without the aid of the transparent trainer.

Scanning Limitations

Details the limitations of the scanning feature, including font size, color, and background constraints.

Tips for Good Scanning

Offers advice and best practices for achieving optimal scanning results.

Editing Text (without Scanning)

Explains how to use the Character Bar for manual text input, bypassing the scanning function.

The Character Bar

Describes the Character Bar interface and its role in manual text entry.

Accessing the Character Bar

Details the steps required to access and use the Character Bar within the Notes application.

What is on the Pen

Lists and briefly describes the preloaded applications and language features of the Pen.

The Notes application

Describes the Notes application for scanning and storing text files.

The Scan to PC application

Explains the Scan to PC application for transferring scanned text directly to a computer.

Scanning Languages

Details the supported languages for scanning printed text with the Pen.

Interface Languages

Specifies the languages available for the Pen's menus and system messages.

Set Up Product on PC

To run the set up procedure

Outlines the specific steps to initiate and complete the PC setup process from the CD-ROM.

Tutorial 1 – Notes

Step 1: Turn the Pen on

Instructs users on how to power on the Pen device.

Step 2: Set Scanning Language

Guides users on selecting and setting the desired scanning language in the Pen's preferences.

Step 3: Start the Notes application

Details how to launch and navigate to the main menu of the Notes application.

Step 4: Create a new file and open it

Explains the process of creating a new file within the Notes application and opening it for use.

Step 5: Scan a sentence into the open file

Instructs users on how to scan a two-line sentence into the currently open file.

Step 6: Scroll to a scanned word you wish to translate

Guides users on navigating scanned text to select a word for translation.

Step 7: View the Translation (in the Dictionary Screen)

Details how to view the translation of a selected word in the Dictionary Screen.

Step 8: Return to the open file

Instructs users on how to navigate back to the currently open file from other screens.

Step 9: Return to the Pen Main Menu

Guides users on exiting the Notes application and returning to the Pen's main menu.

Tutorial 2 – QuickLink

Step 1: Prepare the PC

Details the necessary steps to prepare the computer for the QuickLink tutorial.

Step 2: Prepare the Pen

Guides users on powering on the Pen and navigating to the Main Menu for the tutorial.

Step 3: QuickLink the Notes Files to the Desktop Application

Instructs users on initiating the QuickLink process to transfer Notes files to the desktop.

Select Pen Name

Explains the dialog box for selecting or creating a Pen Name during the initial QuickLink setup.

Press Next.

Instructs the user to proceed by clicking the 'Next' button in the dialog.

Press Finish.

Guides users to complete the Pen Name selection by clicking 'Finish'.

If NOT First Time:

Describes the dialogs shown for subsequent QuickLink operations after initial setup.

Step 4: View the Sent Notes File in the Desktop Application

Instructs users on how to locate and view the transferred Notes file within the desktop application.

Tutorial 3 – Scan to PC

Step 1: Prepare the PC

Details the necessary steps to prepare the computer for the Scan to PC tutorial.

Step 2: Prepare the Pen

Guides users on powering on the Pen and navigating to the Main Menu for the tutorial.

Step 3: Scan a sentence and send it to the PC

Instructs users on scanning a sentence and sending it to an open application on the PC.

Step 4: Return to the Main Menu

Guides users on exiting the Scan to PC application and returning to the Pen's main menu.

Product Specification

Pen specification

Details the Pen's hardware specifications: CPU, memory, scanner, display, battery, dimensions, and compliance.

PC specification

Outlines the necessary PC system requirements and hardware for compatibility.

Worldwide Limited Warranty

WEEE

Related product manuals