COMMISSIONING
Greenstar Si Compact
ErP
- 6 720 813 278 (2015/07) 39
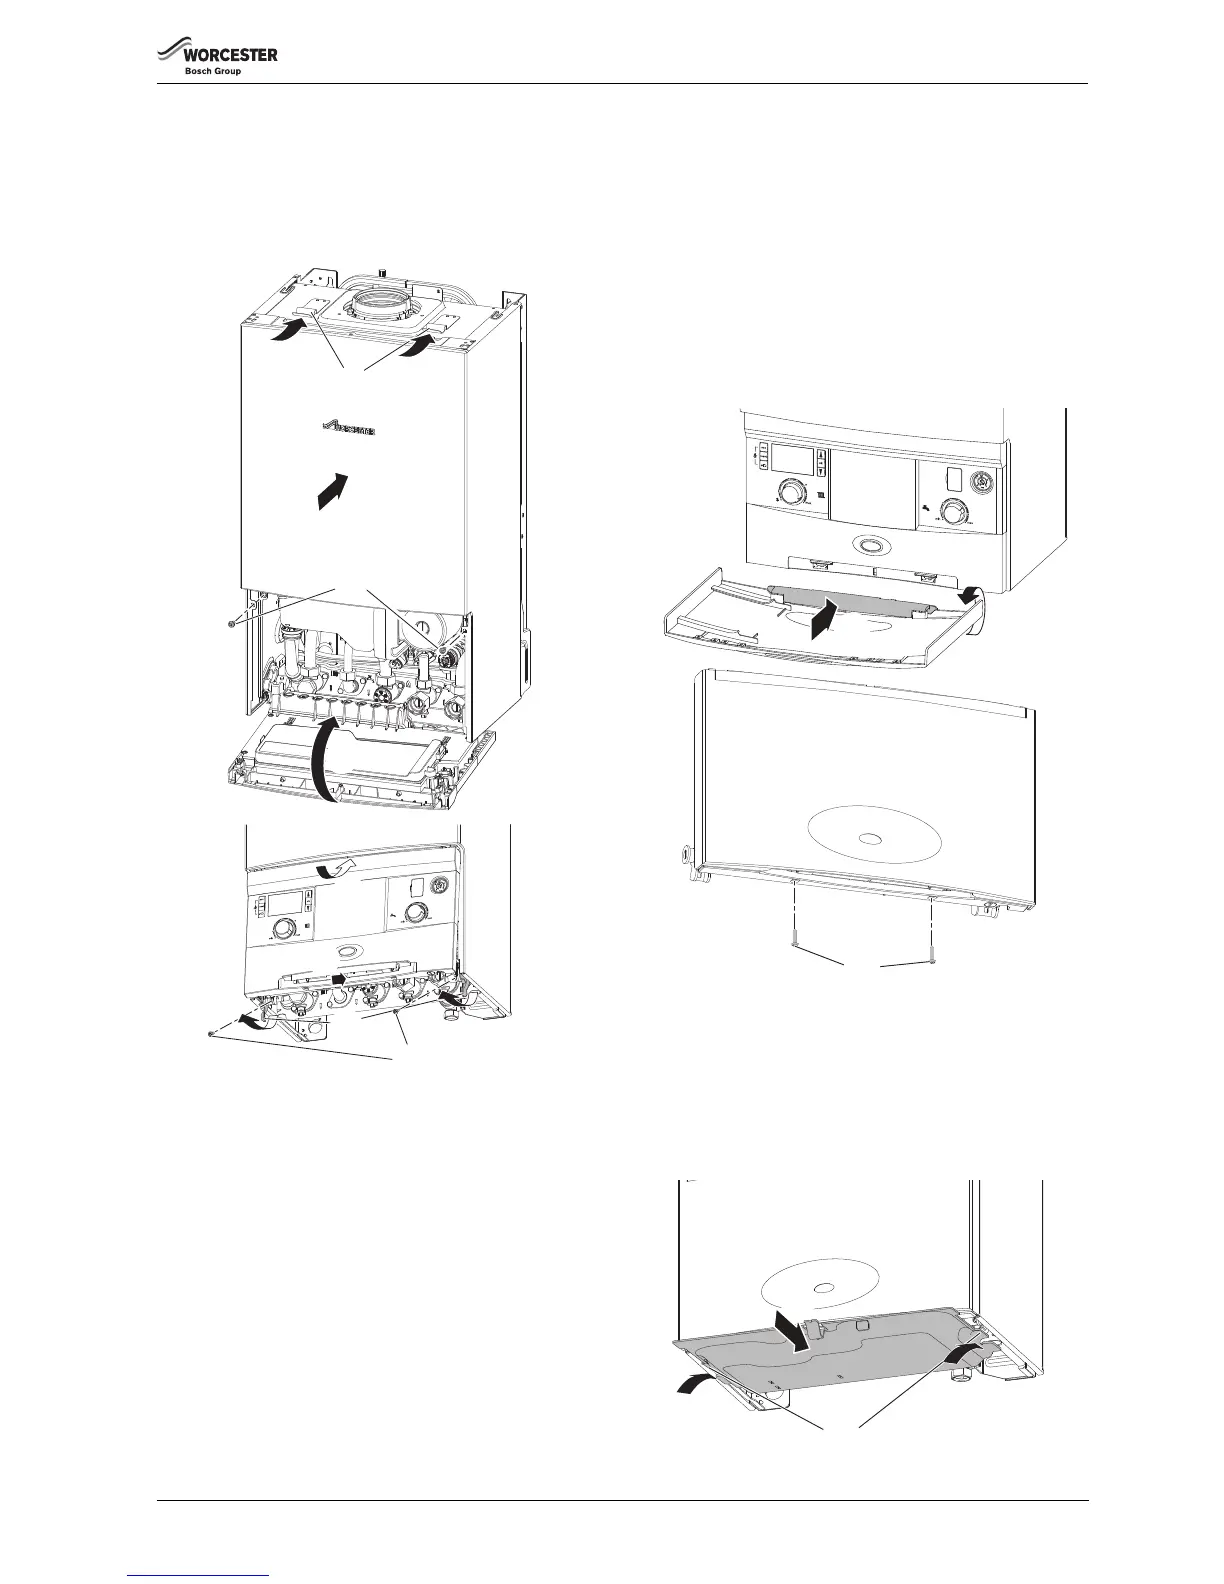
6.8 FINISHING COMMISSIONING
6.8.1 Replacing the boiler case
1. Replace the boiler case.
2. Make sure that the securing points on top of the case are properly
located.
3. Tighten the bottom two screws (2).
Fig. 60 Fitting case
6.8.2 SECURING THE CONTROL PANEL
4. Raise the control panel.
5. Push the control panel up to engage the top edge under the case.
6. Lift the catches with your fingers.
7. Press the bottom of the control panel back to engage with the catches
8. Secure the catch retaining screws underneath the boiler.
6.8.3 FITTING THE FASCIA FLAP
1. Rotate the hinge to be in-line with the flap and present the flap
assembly up to the fascia.
2. Push the pegs on the hinge into the three slots in the front of the fascia
and close the flap.
3. Secure the flap to the fascia with the two screws provided in the PRV
elbow pack.
Fig. 61 Installing the fascia flap
6.8.4 INSTALLING BOTTOM PANEL
1. The bottom panel slides onto two ledges either side of the boiler
frame.
2. Hold the panel up against the underside of the boiler. Please note the
second plastic tab should be offered up to the boiler guides and not
the rear tabs. Slide towards the rear, until there is no more movement.
3. Slide the panel forward until it is fully engaged.
Fig. 62 Bottom panel installation
6720646608-19.2Wo
1.
3.
2.
4.
5.
6.
8.
7.