SERVICE AND SPARES
Greenstar Si Compact
ErP
- 6 720 813 278 (2015/07) 51
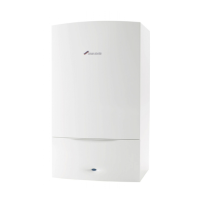
2. Undo the front two castellated nuts/springs and remove and retain
along with the front two bolts (1).
Slacken the two rear castellated nuts/springs, but do not remove.
Fig. 96 Burner housing
3. Pull the burner housing up and forward to remove.
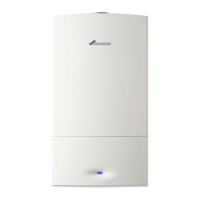
To remove the burner and gasket.
1. Lift the gasket (1) and burner mesh (2) from the heat exchanger body.
▶ When fitting the burner, ensure that the convex side of the burner
faces down into the heat exchanger.
▶ Always fit a new gasket (1) when re-assembling the heat exchanger.
Fig. 97 Burner and gasket
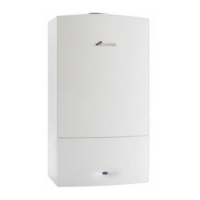
TIGHTENING DOWN THE BURNER HOUSING
1. Tighten the burner housing castellated nuts [1] down gradually and
evenly and in a rotating sequence.
2. Tighten the castellated nuts down until they “bottom out” on the heat
cell, as indicated by the arrow on the figure below.
▶ Fit the spring clip [2] to secure the castellated nuts, if the hole does
not line up with a space, back the nut off slightly until the hole does
align with the slot.
Fig. 98 Castellated nuts
[1] Castellated nut
[2] Spring clip
[3] Washer
[4] Burner housing bolts
[5] Tension springs
7.8.15 HEAT EXCHANGER
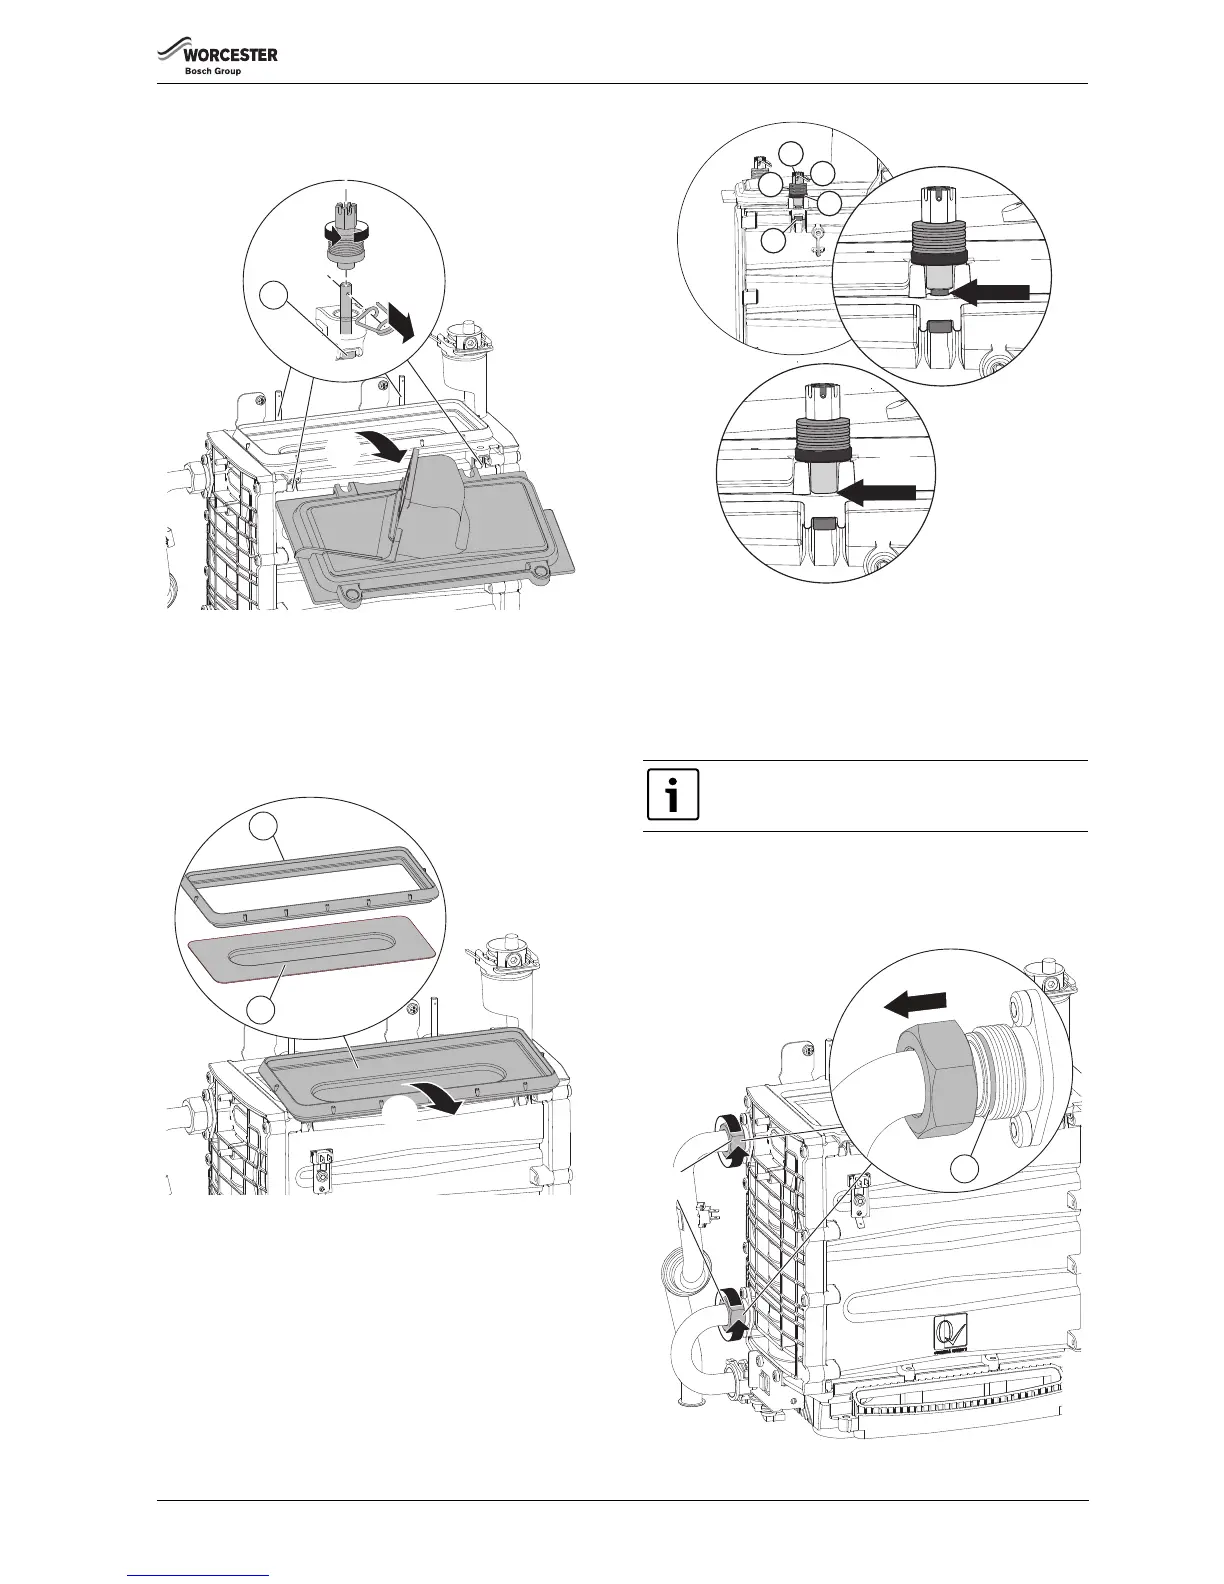
HEAT EXCHANGER DISCONNECTION
1. Undo the flow and return connections.
2. Pull both the flow and return pipes away from the heat exchanger.
▶ Replace the fibre washers (1) when replacing the heat exchanger.
Fig. 99 Heat exchanger disconnection