2. Configure the settings.
• Enable Wi-Fi Direct—Enables the printer to broadcast its own
Wi-Fi Direct network.
• Wi-Fi Direct Name—Assigns a name for the Wi-Fi Direct
network.
• Wi-Fi Direct Password—Assigns the password for negotiating
the wireless security when using the peer-to-peer connection.
• Show Password on Setup Page—Shows the password on the
Network Setup Page.
• Auto-Accept Push Button Requests—Lets the printer accept
connection requests automatically.
Note: Accepting push-button requests automatically is
not secured.
CCoonnnneeccttiinngg aa mmoobbiillee ddeevviiccee ttoo tthhee pprriinntteerr
Note: This feature is available only in some printer models.
Before connecting your mobile device, make sure that Wi-Fi Direct has
been configured. For more information, see Configuring Wi-Fi Direct.
CCoonnnneeccttiinngg UUssiinngg WWii--FFii DDiirreecctt
Note: These instructions apply only to Android mobile
devices.
1. From the mobile device, go to the settings menu.
2. Enable Wi-Fi, and then tap Wi-Fi Direct.
3. Select the printer Wi-Fi Direct name.
4. Confirm the connection on the printer control panel.
CCoonnnneeccttiinngg UUssiinngg WWii--FFii
1. From the mobile device, go to the settings menu.
2. Tap Wi-Fi, and then select the printer Wi-Fi Direct name.
Note: The string DIRECT-xy (where x and y are two random
characters) is added before the Wi-Fi Direct name.
3. Enter the Wi-Fi Direct password.
CCoonnnneeccttiinngg tthhee PPrriinntteerr ttoo aa WWii--FFii NNeettwwoorrkk
Note: This feature is available only in some printer models.
Before you begin, make sure that:
• Active Adapter is set to Auto. From the control panel, navigate to
Settings > OK > Network/Ports > OK > Network Overview > OK >
Active Adapter > OK > Auto > OK.
• The Ethernet cable is not connected to the printer.
1. From the control panel, navigate to Settings > OK > Wireless >
OK > Setup On Printer Panel > OK > Choose Network > OK.
2. Select a Wi-Fi network, and then type the network password.
Note: For Wi-Fi-network-ready printer models, a prompt
to set up the Wi-Fi network appears during initial setup.
Clearing Jams
AAvvooiiddiinngg JJaammss
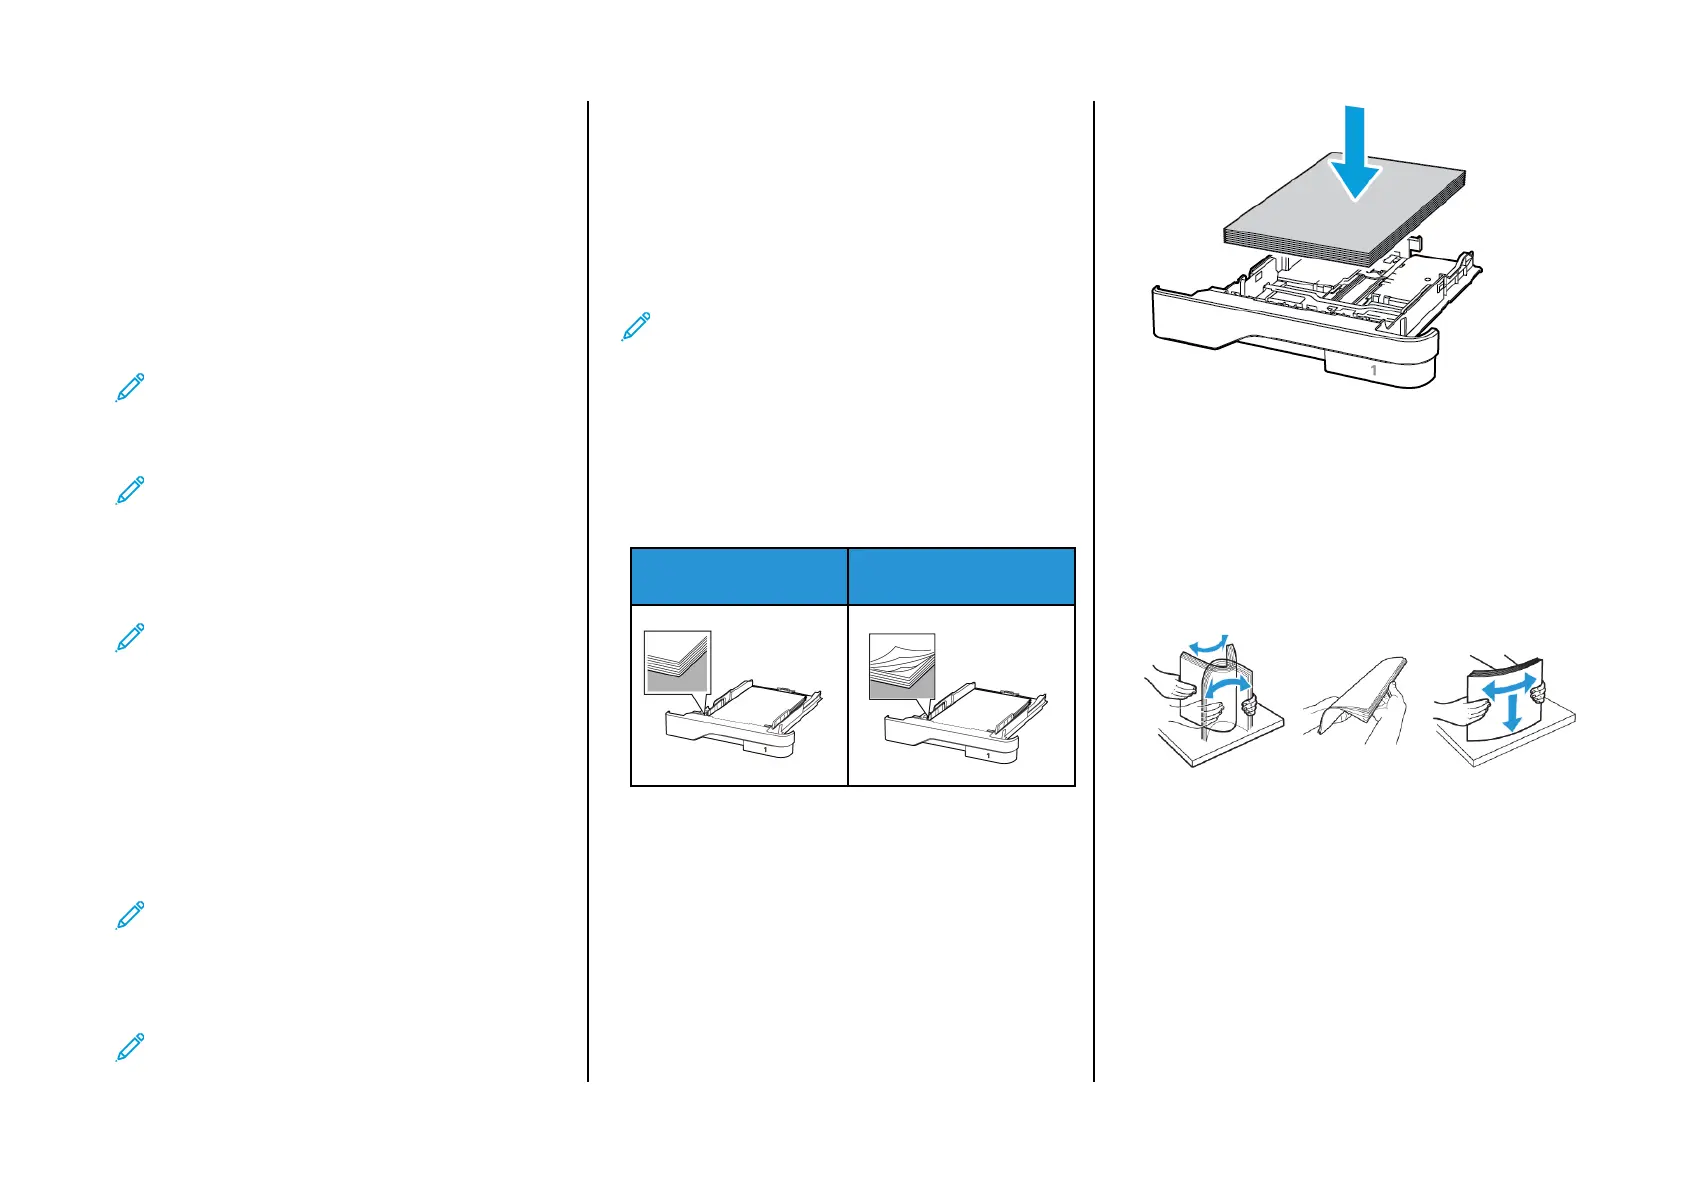
LLooaadd PPaappeerr PPrrooppeerrllyy
• Make sure that the paper lies flat in the tray.
Correct loading of paper Incorrect loading of paper
• Do not load or remove a tray while the printer is printing.
• Do not load too much paper. Make sure that the stack height is
below the maximum paper fill indicator.
• Do not slide paper into the tray. Load paper as shown in the
illustration.
• Make sure that the paper guides are positioned correctly and are
not pressing tightly against the paper or envelopes.
• Push the tray firmly into the printer after loading paper.
UUssee RReeccoommmmeennddeedd PPaappeerr
• Use only recommended paper or specialty media.
• Do not load paper that is wrinkled, creased, damp, bent, or curled.
• Flex, fan, and align the paper edges before loading.
• Do not use paper that has been cut or trimmed by hand.
• Do not mix paper sizes, weights, or types in the same tray.
• Make sure that the paper size and type are set correctly on the
computer or printer control panel.
• Store paper according to manufacturer recommendations.
IIddeennttiiffyyiinngg JJaamm LLooccaattiioonnss
• When Jam Assist is set to On, the printer flushes blank pages or
pages with partial prints after a jammed page has been cleared.
Check your printed output for blank pages.
• When Jam Recovery is set to On or Auto, the printer reprints
jammed pages.
4