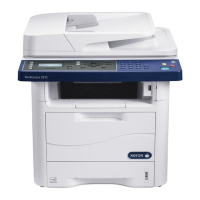
Installation and Setup
36 Xerox
®
WorkCentre
®
EC7836/EC7856 Color Multifunction Printer
User Guide
Installation and Setup Overview
Before printing, your computer and the printer must be plugged in, turned on, and connected. Configure
the initial settings of the printer, then install the driver software and utilities on your computer.
You can connect to your printer directly from your computer using USB, or connect over a network using an
Ethernet cable or wireless connection. Hardware and cabling requirements vary for the different
connection methods. Routers, network hubs, network switches, modems, Ethernet cables, and USB cables
are not included with your printer and must be purchased separately. Xerox recommends an Ethernet
connection because it is typically faster than a USB connection, and it provides access to Xerox
®
CentreWare
®
Internet Services. It also provides access to email, workflow scanning, and server fax services.
For details on configuring the printer settings, see the System Administrator Guide at
www.xerox.com/office/EC78XXdocs.
Physically Connecting the Printer to the Network
Use a Category 5 or better Ethernet cable to connect the printer to the network. An Ethernet network is
used for one or more computers and supports many printers and systems simultaneously. An Ethernet
connection provides direct access to printer settings using Xerox
®
CentreWare
®
Internet Services.
To connect the printer:
1. Connect the power cord to the printer, and plug the cord into an electrical outlet.
2. Connect one end of a Category 5 or better Ethernet cable to the Ethernet port on the printer. Connect
the other end of the Ethernet cable to a correctly configured network port on a hub or router.
3. Turn on the printer.
Note: For details on configuring wireless network settings, see the System Administrator Guide at
www.xerox.com/office/EC78XXdocs.
Connecting to a Telephone Line
1. Ensure that the printer is turned off.
2. Connect a standard RJ11 cable, No. 26 American Wire Gauge (AWG) or larger, to the Line port on the
back of the printer.
3. Connect the other end of the RJ11 cable to an operating telephone line.
4. Enable and configure the Fax functions.
For details, see Selecting Fax Options on page 164, Selecting Server Fax Options on page 175, or Selecting
Internet Fax Options on page 181.