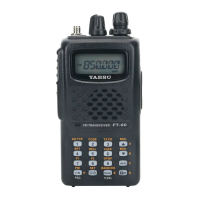
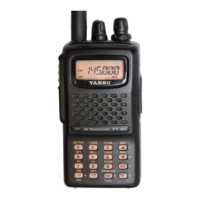
11FT-60R/E Technical Supplement
TX Power Output
1. Tune the frequency to 440.050 MHz, then set the trans-
mit power level to “LOW.”
2. Press the
[
F/W
]
key, then press the
[
BAND
(
BAND DN
)]
key to set the alignment parameter to “
A2 PWR.xxxA2 PWR.xxx
A2 PWR.xxxA2 PWR.xxx
A2 PWR.xxx.”
3. With in five second of appearing the “
A2 PWR.xxxA2 PWR.xxx
A2 PWR.xxxA2 PWR.xxx
A2 PWR.xxx” on
the display, press the PTT switch to activate the trans-
mitter, adjust the DIAL knob so that the wattmeter read-
ing is 0.5 Watts (±0.05 Watt).
4. Increase the Transmit power level to “MID.”
5. Press the
[
F/W
]
key to recall the alignment parameter
“
A2 PWR.xxxA2 PWR.xxx
A2 PWR.xxxA2 PWR.xxx
A2 PWR.xxx.”
6. With in five second of appearing the “
A2 PWR.xxxA2 PWR.xxx
A2 PWR.xxxA2 PWR.xxx
A2 PWR.xxx” on
the display, press the PTT switch to activate the trans-
mitter, adjust the DIAL knob so that the wattmeter read-
ing is 2.0 Watts (±0.1 Watt).
7. Increase the Transmit power level to “HIGH.”
8. Press the
[
F/W
]
key to recall the alignment parameter
“
A2 PWR.xxxA2 PWR.xxx
A2 PWR.xxxA2 PWR.xxx
A2 PWR.xxx."
9. With in five second of appearing the “
A2 PWR.xxxA2 PWR.xxx
A2 PWR.xxxA2 PWR.xxx
A2 PWR.xxx” on
the display, press the PTT switch to activate the trans-
mitter, adjust the DIAL knob so that the wattmeter read-
ing is 5.0 Watts (±0.1 Watt).
10. Tune the frequency to 146.050 MHz, then set the trans-
mit power level to “LOW.”
11. Press the
[
F/W
]
key to recal the alignment parameter
“
A2 PWR.xxxA2 PWR.xxx
A2 PWR.xxxA2 PWR.xxx
A2 PWR.xxx.”
12. With in five second of appearing the “
A2 PWR.xxxA2 PWR.xxx
A2 PWR.xxxA2 PWR.xxx
A2 PWR.xxx” on
the display, press the PTT switch to activate the trans-
mitter, adjust the DIAL knob so that the wattmeter read-
ing is 0.5 Watts (±0.05 Watt).
13. Increase the Transmit power level to “MID.”
14. Press the
[
F/W
]
key to recall the alignment parameter
“
A2 PWR.xxxA2 PWR.xxx
A2 PWR.xxxA2 PWR.xxx
A2 PWR.xxx.”
15. With in five second of appearing the “
A2 PWR.xxxA2 PWR.xxx
A2 PWR.xxxA2 PWR.xxx
A2 PWR.xxx” on
the display, press the PTT switch to activate the trans-
mitter, adjust the DIAL knob so that the wattmeter read-
ing is 2.0 Watts (±0.1 Watt).
16. Increase the Transmit power level to “HIGH.”
17. Press the
[
F/W
]
key to recall the alignment parameter
“
A2 PWR.xxxA2 PWR.xxx
A2 PWR.xxxA2 PWR.xxx
A2 PWR.xxx” again.
18. With in five second of appearing the “
A2 PWR.xxxA2 PWR.xxx
A2 PWR.xxxA2 PWR.xxx
A2 PWR.xxx” on
the display, press the PTT switch to activate the trans-
mitter, adjust the DIAL knob so that the wattmeter read-
ing is 5.0 Watts (±0.1 Watt).
TX Deviation
1. Tune the frequency to 440.050 MHz, then set the trans-
mit power level to “LOW.”
2. Inject a 1 kHz audio tone at a level of 80 mV (–20 dBm)
from the audio generator.
3. Press the
[
F/W
]
key, then press the
[
BAND
(
BAND DN
)]
key to set the alignment parameter to “
A3 DEV.xxxA3 DEV.xxx
A3 DEV.xxxA3 DEV.xxx
A3 DEV.xxx.”
4. With in five second of appearing the “
A3 DEV.xxxA3 DEV.xxx
A3 DEV.xxxA3 DEV.xxx
A3 DEV.xxx” on
the display, press the PTT switch to activate the trans-
mitter, adjust the DIAL knob so that the deviation meter
reading is 4.2 kHz (±0.2 kHz) (EXP version: 4.5 kHz ±
0.2 kHz).
5. Tune the frequency to 146.050 MHz, then set the trans-
mit power level to “LOW.”
6. Press the
[
F/W
]
key to recall the alignment parameter
to “
A3 DEV.xxxA3 DEV.xxx
A3 DEV.xxxA3 DEV.xxx
A3 DEV.xxx.”
7. With in five second of appearing the “
A3 DEV.xxxA3 DEV.xxx
A3 DEV.xxxA3 DEV.xxx
A3 DEV.xxx” on
the display, press the PTT switch to activate the trans-
mitter, adjust the DIAL knob so that the deviation meter
reading is 4.2 kHz (±0.2 kHz) (EXP version: 4.5 kHz ±
0.2 kHz).
DCS TX Deviation
1. Tune the frequency to 440.050 MHz, then activate the
DCS, and set the transmit power level to “LOW.”
2. Press the
[
F/W
]
key, then press the
[
BAND
(
BAND DN
)]
key to set the alignment parameter to “
A4 DCS.xxxA4 DCS.xxx
A4 DCS.xxxA4 DCS.xxx
A4 DCS.xxx.”
3. With in five second of appearing the “
A4 DCS.xxxA4 DCS.xxx
A4 DCS.xxxA4 DCS.xxx
A4 DCS.xxx” on
the display, press the PTT switch to activate the trans-
mitter (with no microphone input), adjust the DIAL
knob so that the deviation meter reading is 0.7 kHz
(±0.05 kHz).
4. Tune the frequency to 146.050 MHz, then activate the
DCS, and set the transmit power level to “LOW.”
5. Press the
[
F/W
]
key to recall the alignment parameter
to “
A4 DCS.xxxA4 DCS.xxx
A4 DCS.xxxA4 DCS.xxx
A4 DCS.xxx.”
6. With in five second of appearing the “
A4 DCS.xxxA4 DCS.xxx
A4 DCS.xxxA4 DCS.xxx
A4 DCS.xxx” on
the display, press the PTT switch to activate the trans-
mitter (with no microphone input), adjust the DIAL
knob so that the deviation meter reading is 0.7 kHz
(±0.05 kHz).
Alignment