8
CRX-E300
CRX-E300
2
2
1
1
3
3
4
Top Cover
トップカバー
Front Panel
フロントパネル
Hook
フック
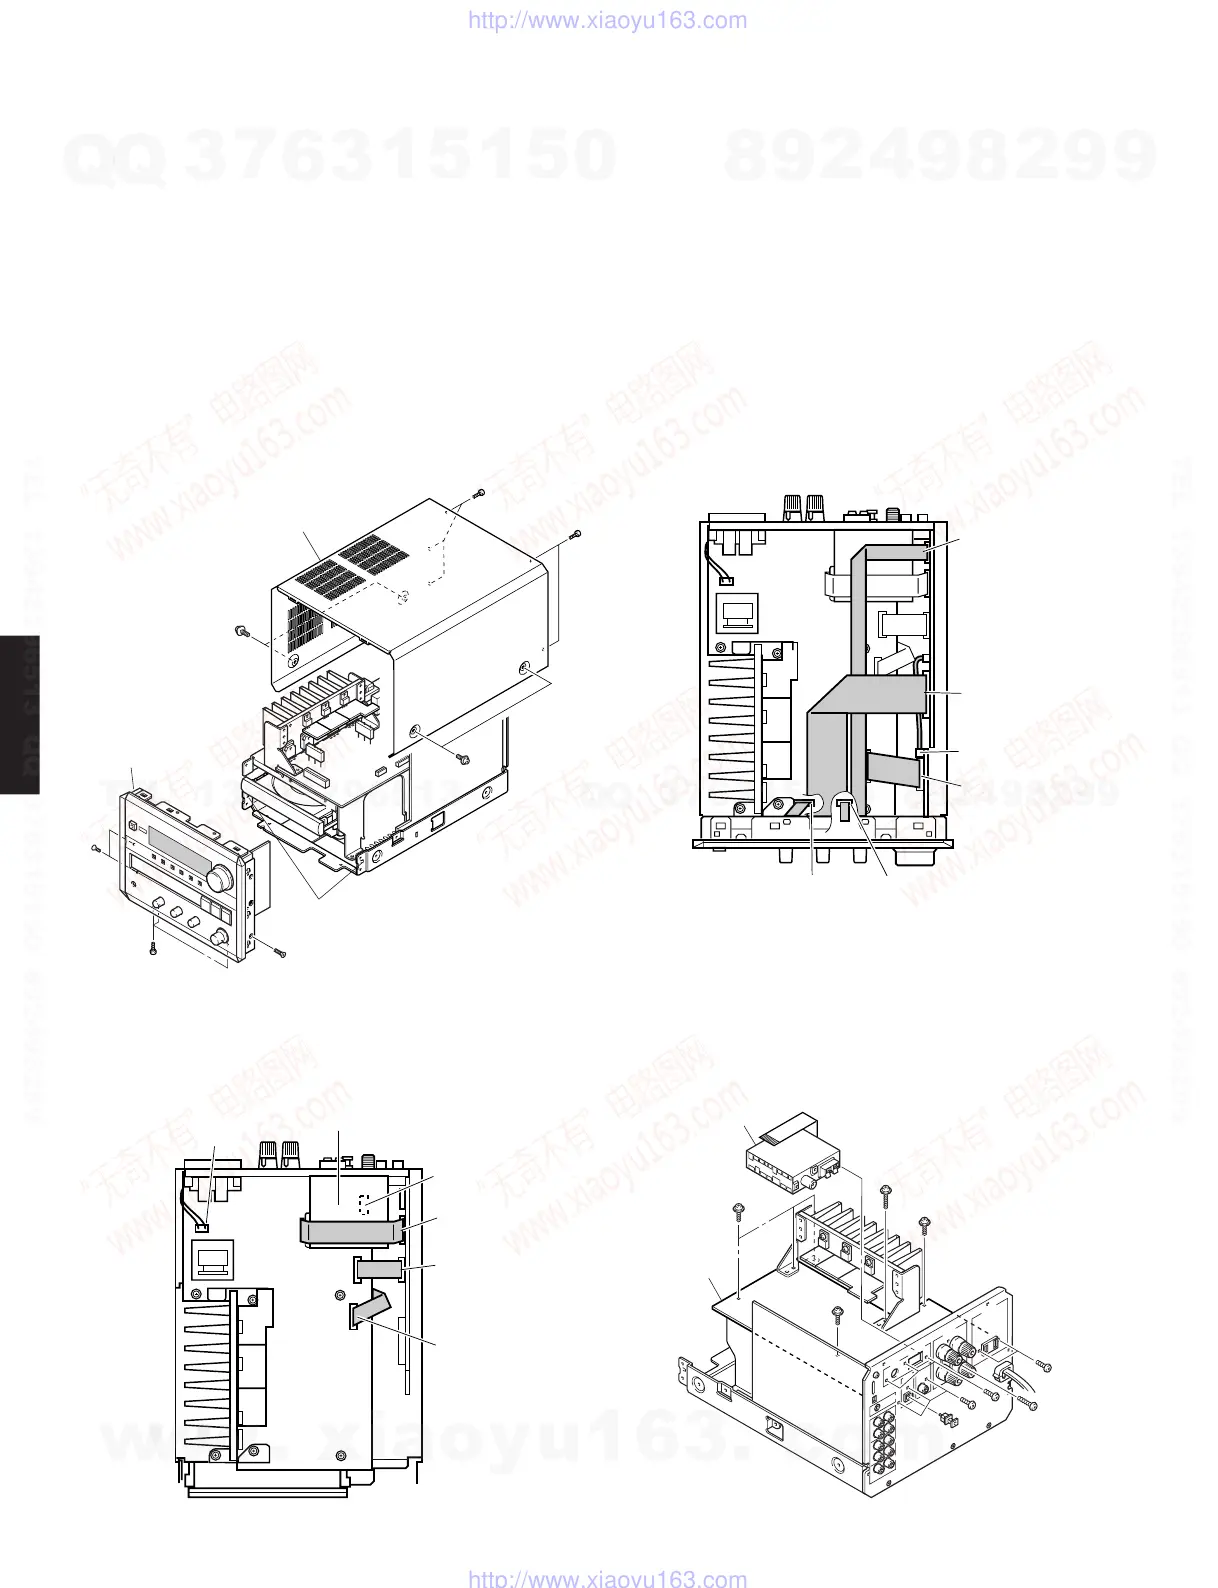
(Remove parts in the order as numbered.)
Disconnect the power plug from the AC outlet.
1. RemovalofTopCover
a. Remove 4 screws (1) and 5 screws (2) in Fig. 1.
b. Lift the Top Cover at the rear and move it rear-ward
slantingly.
2. RemovalofFrontPanelUnit
a. Disconnect cables from Connectors (CB752, CB751,
CB413, CB406, CB303, CB302) in Fig. 2.
b. Remove 3 screws (3) and 3 screws (4) in Fig. 1.
c. Detouch the 2 hooks and then pull the Front Panel Unit
forward in Fig. 1.
Fig. 1 Fig. 2
CB302
CB303
CB751
CB752
CB413CB406
■ DISASSEMBLY PROCEDURES/分解手順
9
8
5
7
6
>
A
A
A
Tuner
チューナー
Main (1) P.C.B
Fig. 4
(番号順に部品を取り外してください。)
AC電源コンセントから、電源プラグを抜いてください。
1. トップカバーの外し方
a. ①のネジ4本、②のネジ5本を外します。(図1)
b. トップカバーを持ち上げながら後方へ外します。
2. フロントパネルユニットの外し方
a. コネクター(CB752、CB751、CB413、CB406、
CB303、CB302)からケーブルを外します。(図2)
b. ③のネジ3本、④のネジ3本を外します。(図1)
c. パネル両サイドのフックを外して、フロントパネルユ
ニットを前方に引き出します。(図1)
3. RemovalofTuner
a. Disconnect a cable from Connector (CB305) in Fig. 3.
b. Remove 3 screws (5) and then remove the Tuner in
Fig. 4.
3. チューナーの外し方
a. コネクター(CB305)からケーブルを外します。(図3)
b. ⑤のネジ3本を外し、チューナーを取り外します。(図
4)
Fig. 3
CB305
CB306
CB416
CB417
CB412
Tuner
チューナー
w
w
w
.
x
i
a
o
y
u
1
6
3
.
c
o
m
Q
Q
3
7
6
3
1
5
1
5
0
9
9
2
8
9
4
2
9
8
T
E
L
1
3
9
4
2
2
9
6
5
1
3
9
9
2
8
9
4
2
9
8
0
5
1
5
1
3
6
7
3
Q
Q
TEL 13942296513 QQ 376315150 892498299
TEL 13942296513 QQ 376315150 892498299
http://www.xiaoyu163.com
http://www.xiaoyu163.com