RX-V361/HTR-6030/DSP-AX361
16
RX-V361/HTR-6030/
DSP-AX361
0
00
A
M
A
IN
(1
) P
.C
.B
.
G105
ST101
G103
G104
Ground lead
リード線
Ground lead
リード線
Rear panel
リアパネル
Ground lead
リード線
Rear panel
リアパネル
V2854400
CB408
CB202
DSP P.C.B.
OPERATION (1) P.C.B.
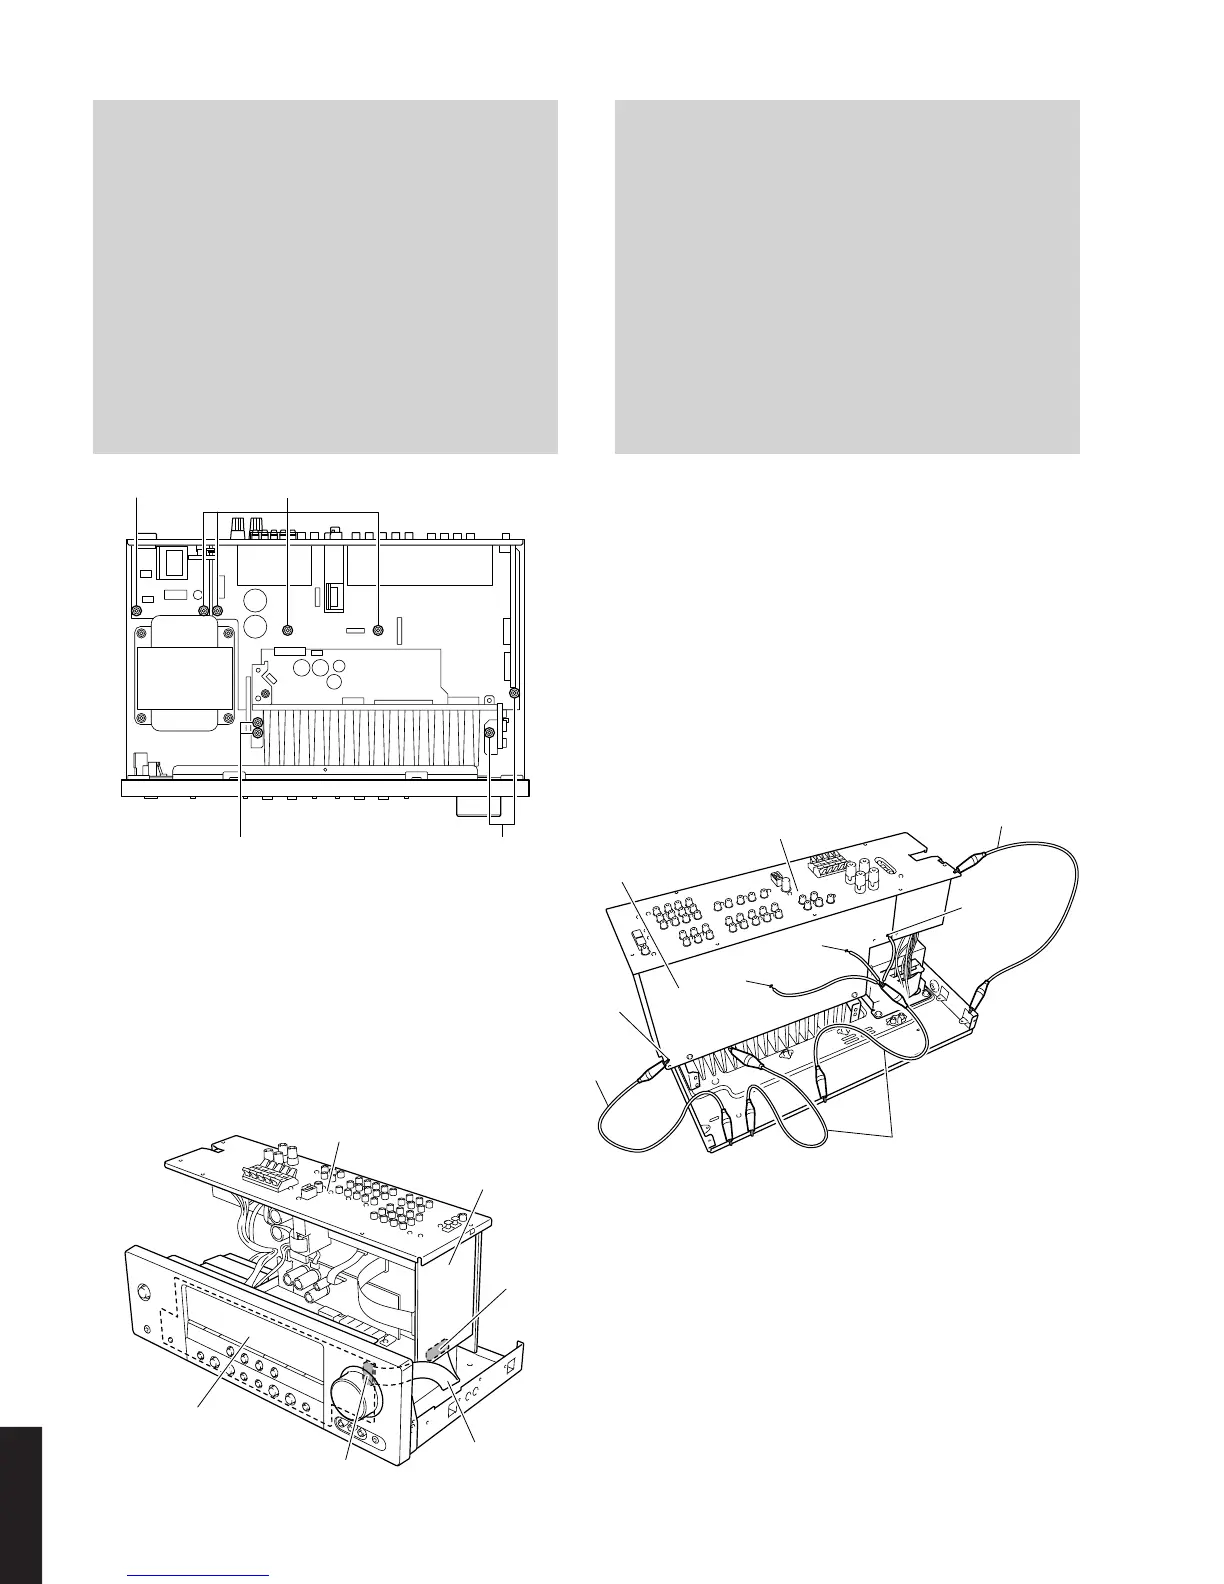
When checking the P.C.B.
a. Remove the Top cover. (Fig. 1)
b. Remove 3 screws (7). (Fig. 3)
c. Remove 5 screws (0) and 4 screws (A). (Fig. 4)
d. Place the P.C.B. upright. (Fig. 5)
e. The rear panel and P.C.B. removed from the chassis
does not work because its grounding is loose.
Be sure to connect the ground of heat sink, rear panel
and MAIN (1) P.C.B. (G103, G104, G105 and ST101)
to the chassis with a ground lead or the like. (Fig. 5)
• Be sure to use the extension cable for servicing for the
following section. (Fig. 6)
DSP P.C.B. CB408_OPERATION (1) P.C.B. CB202:
V2854400 (17P, 300mm)
P.C.B.をチェックする場合
a. トップカバーを外します。(Fig.1)
b.
7
のネジ3本を外します。(Fig.3)
c.
0
のネジ5本、
A
のネジ4本を外します。(Fig.4)
d. P.C.B.を立ち上げて置きます。(Fig.5)
e. シャーシから外したリアパネルおよびP.C.B.はアース
が浮いて動作しませんので、ヒートシンク、リアパネ
ルおよびMAIN(1)P.C.B.のG103、G104、G105、
ST101のアースをリード線等でシャーシに接続してく
ださい。(Fig.5)
・ 次の区間は、サービス用延長ケーブルを使用してくだ
さい。(Fig.6)
DSPP.C.B.CB408OPERATION(1)P.C.B.CB202:
V2854400(17P、300mm)
Fig. 4
Fig. 5
Fig. 6
 Loading...