21
RX-V463/HTR-6140/DSP-AX463
6. Turn off the power of this unit and disconnect the
power cable from the AC outlet.
* When the displayed firmware version and checksum
are different from written firmware version and
checksum, follow the steps from 1 to 13 of “Operation
Procedures” again.
● Confirmation of model name
(U, C, T, K, G, E, F models)
After replacement of DSP P.C.B. or writing of the firm-
ware, make sure to activate the self-diagnostic function
and change the “M6 Model ID” setting to the same model
name as this unit (RX-V463 or HTR-6140).
1. Connect the power cable of this unit to the AC
outlet.
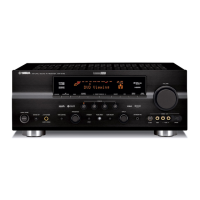
2. Press the “STANDBY/ON” key while simulta-
neously pressing the “STRAIGHT” and “AUDIO
SELECT” keys. (Fig. 8)
The self-diagnostic function is activated.
3. Select the self-diagnostic function menu “M6.
Model ID”.
6. 本機の電源を切り、電源コードをACコンセントか
ら抜きます。
※ 表示されたファームウェアのバージョンおよび
チェックサムが、書き込んだファームウェアの
バージョンおよびチェックサムと異なる場合、操
作手順の1から13までをもう一度やり直してくだ
さい。
● モデル名の確認
このモデルには適用されません。
"PRESET/TUNING " key "PRESET/TUNING " key
Fig. 8
4. Press “PRESET/TUNING<” or “PRESET/TUNING>”
key and select the model name.
"STRAIGHT" key"STANDBY/ON" key "AUDIO SELECT" key
M6.RX-V463 M6.HTR-6140
Fig. 9
5. Turn off the power of this unit and disconnect the
power cable from the AC outlet.

 Loading...


