11
DTX-PRO Owner’s Manual
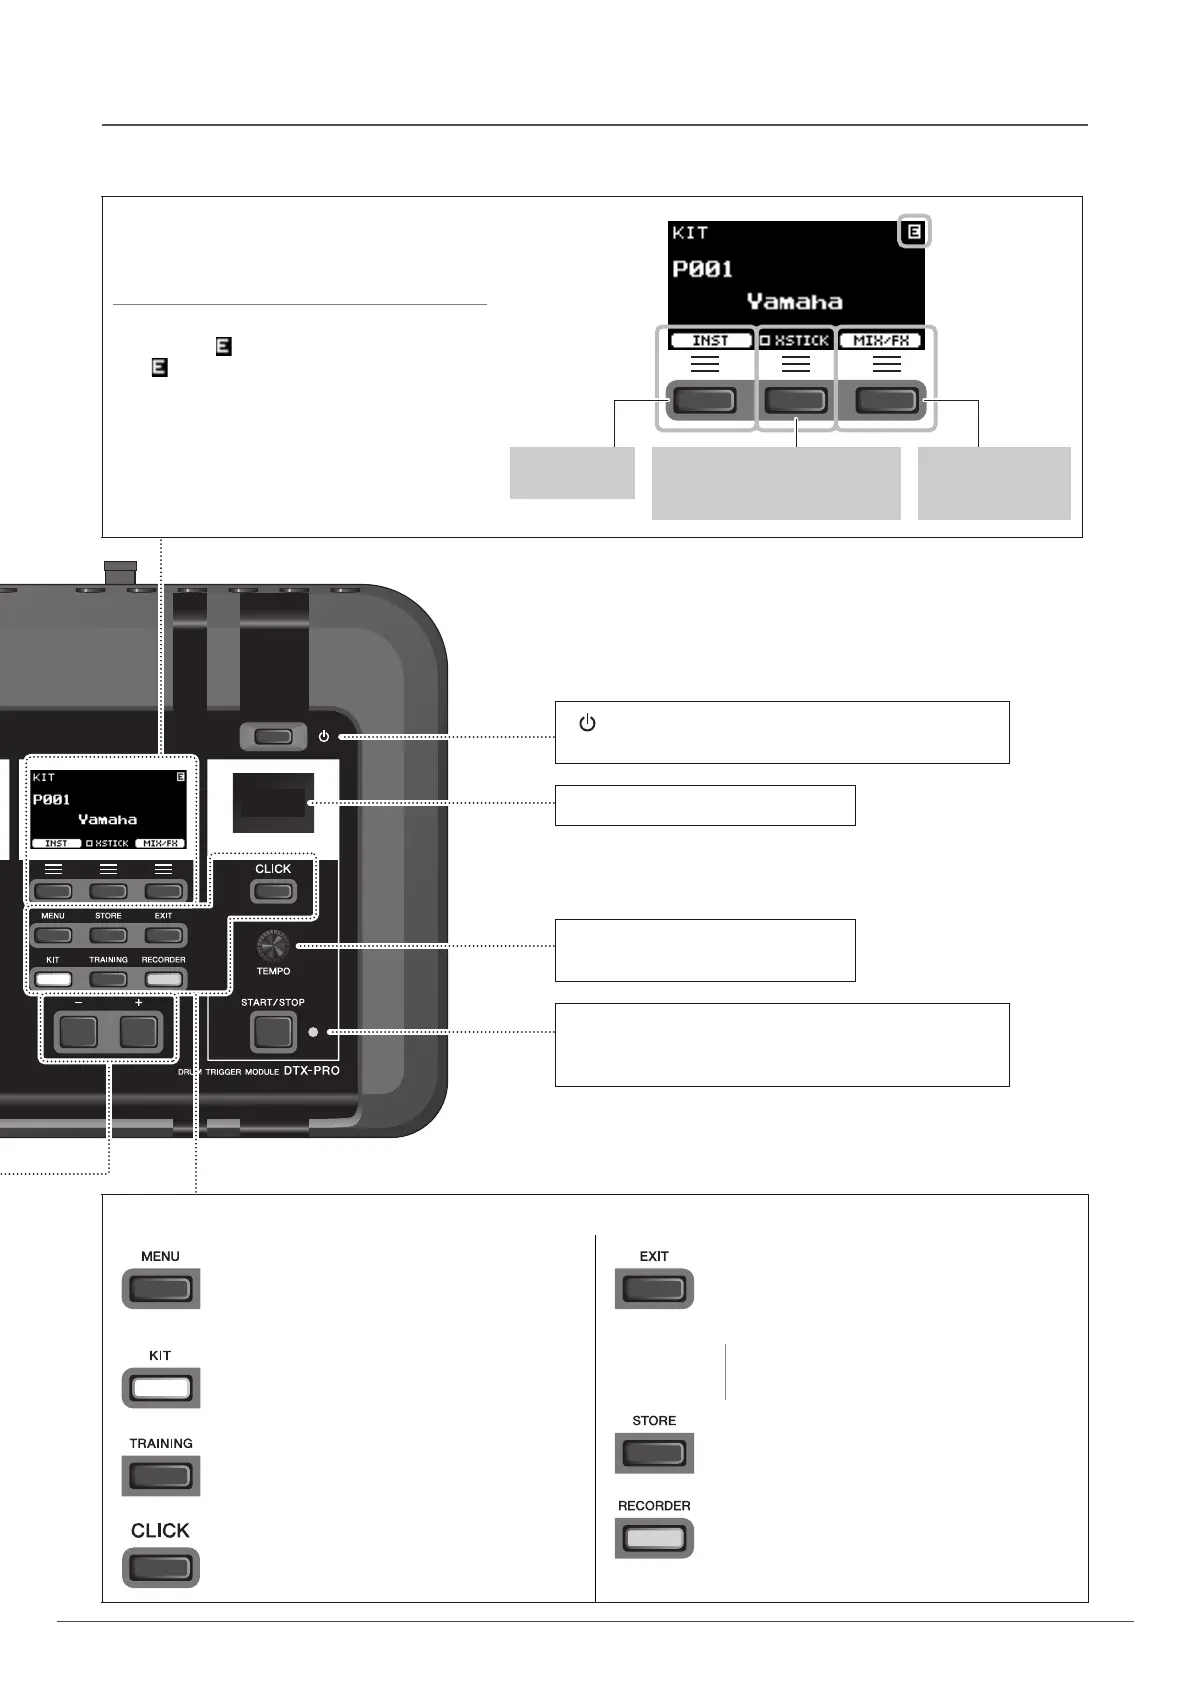
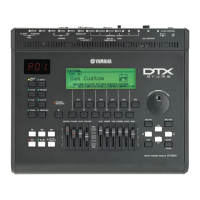
Panel Controls and Functions
Display
Function Buttons 1–3 ([F1], [F2], [F3])
Selects the functions that appear at the bottom of
each screen.
NOTICE
About the “ ” mark:
The mark appears in the upper right of the
screen when the Kit or click settings have been
changed. This is to remind you that the settings
have changed but have not yet been saved (Store).
The mark disappears when you store the settings
(page 37). When you select another screen without
first storing the settings, the changes will be lost.
Cross stick setting (page 25)
May not be shown depending on
the pad type
INST screen
(page 35)
MIXER and
EFFECT screens
(page 31)
How to read
the KIT screen
[ ] (Standby/On) switch (page 17)
Switches the power between standby (off) and on.
Click Tempo Display
[TEMPO] knob (page 39)
Adjusts the tempo.
[START/STOP] (Click Start / Stop) button
Starts or stops the click (metronome). The indicator flashes
in sync with the click tempo.
Buttons for showing screens
[MENU] button
Accesses the advanced settings screen. For more
detailed information, refer to the Reference Man-
ual (PDF).
[KIT] button
KIT screen (page 29)
[TRAINING] button
TRAINING screen (page 48)
[CLICK] button
CLICK (metronome) screen (page 40)
[EXIT] button
Cancels the action or returns to the screen one
level higher. Press several times to return to the
KIT screen.
NOTE
This button can also be used as a Panic Button to
stop the KIT sounds.
[STORE] button
STORE screen (page 37)
Stores Kit or Click settings that you have created.
[RECORDER] button
RECORDER (record and playback) screen
(page 42)
The button flashes while recording.