REAR BRAKE
4-36
b. Loosen the bleed screw and push the
brake caliper pistons into the brake caliper
with your finger.
c. Tighten the bleed screw.
d. Install the brake pads and a brake pad
spring.
▲▲▲▲▲▲▲▲▲▲▲▲▲▲▲▲▲▲▲▲▲▲▲▲▲▲▲▲▲▲
3. Install:
• Lock washer “1”
• Brake pad retaining bolts “2”
4. Bend the lock washer tabs along a flat side
of the bolts.
5. Install:
• Brake caliper
• Brake caliper bolts
6. Check:
• Brake fluid level
Below the minimum level mark “a” → Add
the recommended brake fluid to the
proper level.
Refer to “CHECKING THE BRAKE
FLUID LEVEL” on page 3-12.
7. Check:
• Brake pedal operation
Soft or spongy feeling → Bleed the brake
system.
Refer to “BLEEDING THE HYDRAULIC
BRAKE SYSTEM” on page 3-11.
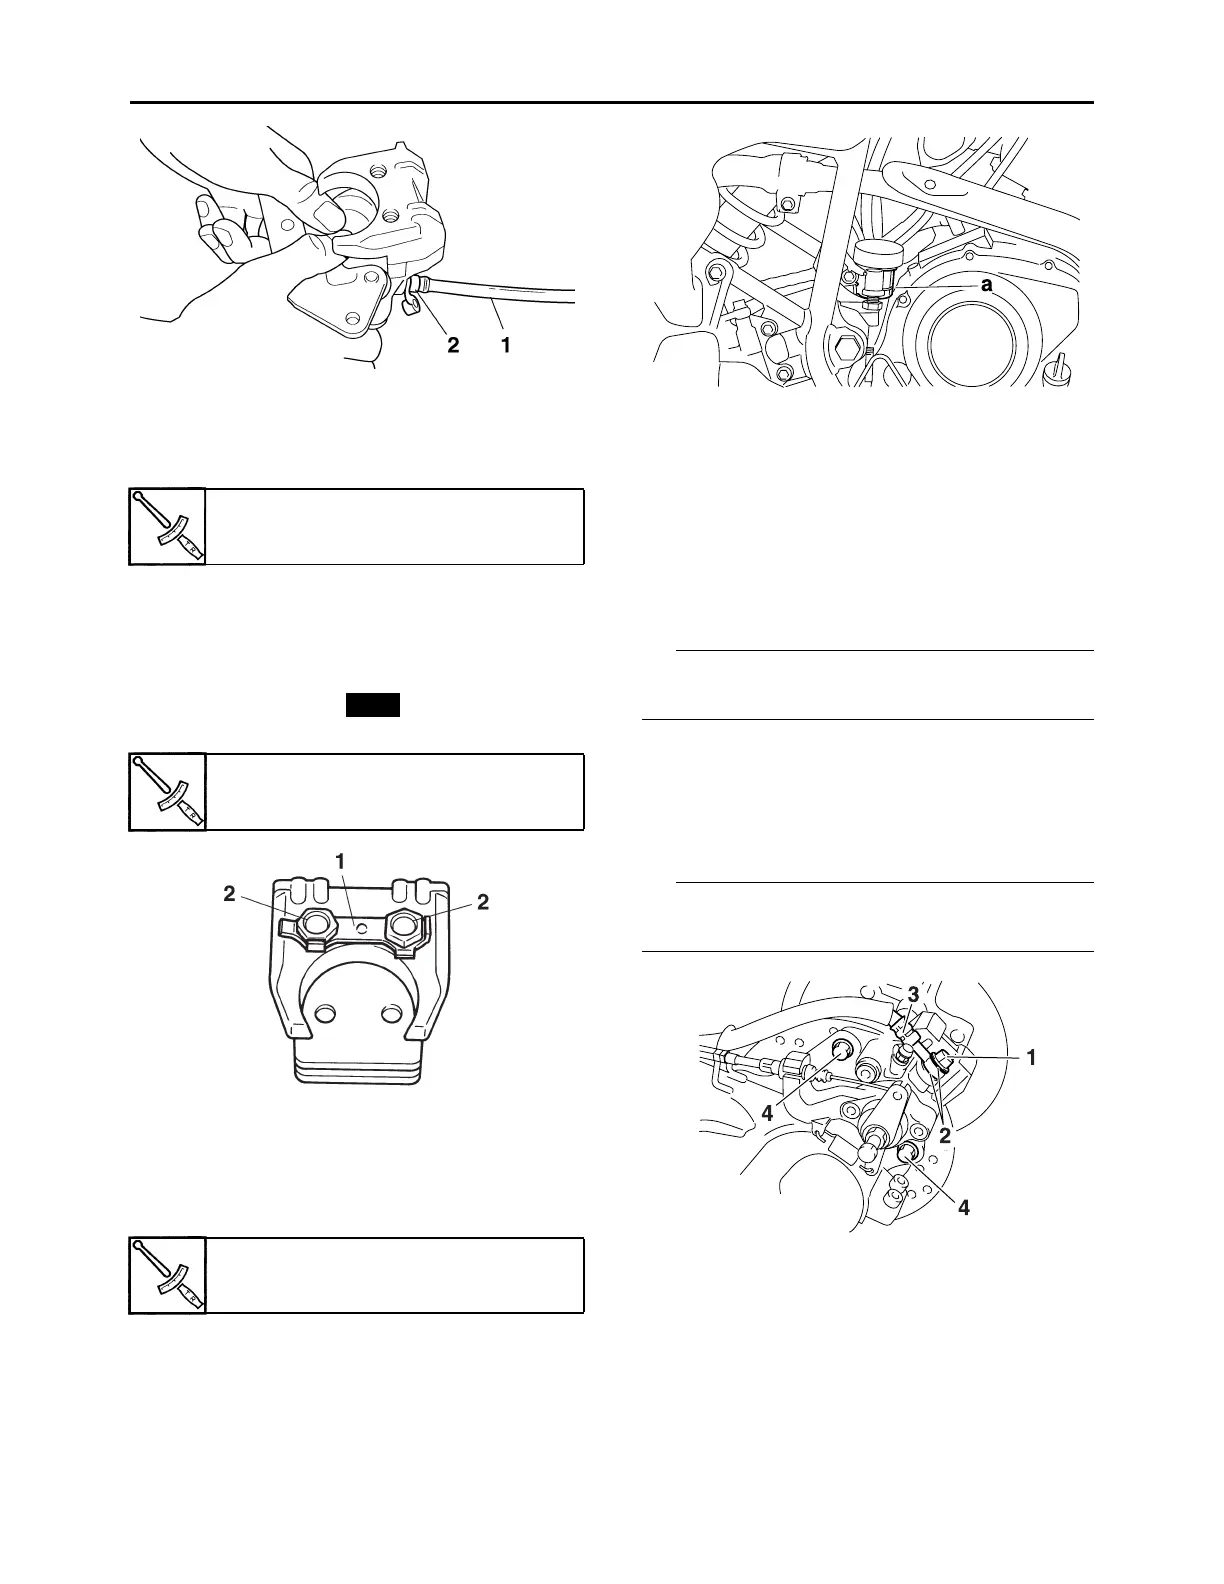
EAS22590
REMOVING THE REAR BRAKE CALIPER
TIP
Before disassembling the brake caliper, drain
the brake fluid from the entire brake system.
1. Remove:
• Union bolt “1”
• Copper washers “2”
• Brake hose “3”
• Brake caliper bolts “4”
TIP
Put the end of the brake hose into a container
and pump out the brake fluid carefully.
EAS22601
DISASSEMBLING THE REAR BRAKE CALI-
PER
1. Remove:
• Brake caliper piston
• Brake caliper piston dust seal “1”
• Brake caliper piston seal “2”
Bleed screw
6 Nm (0.6 m·kgf, 4.3 ft·lbf)
Brake pad retaining bolt
17 Nm (1.7 m·kgf, 12 ft·lbf)
Brake caliper bolt
34 Nm (3.4 m·kgf, 25 ft·lbf)
New
 Loading...