PERIODIC MAINTENANCE
3-13
EAS29190
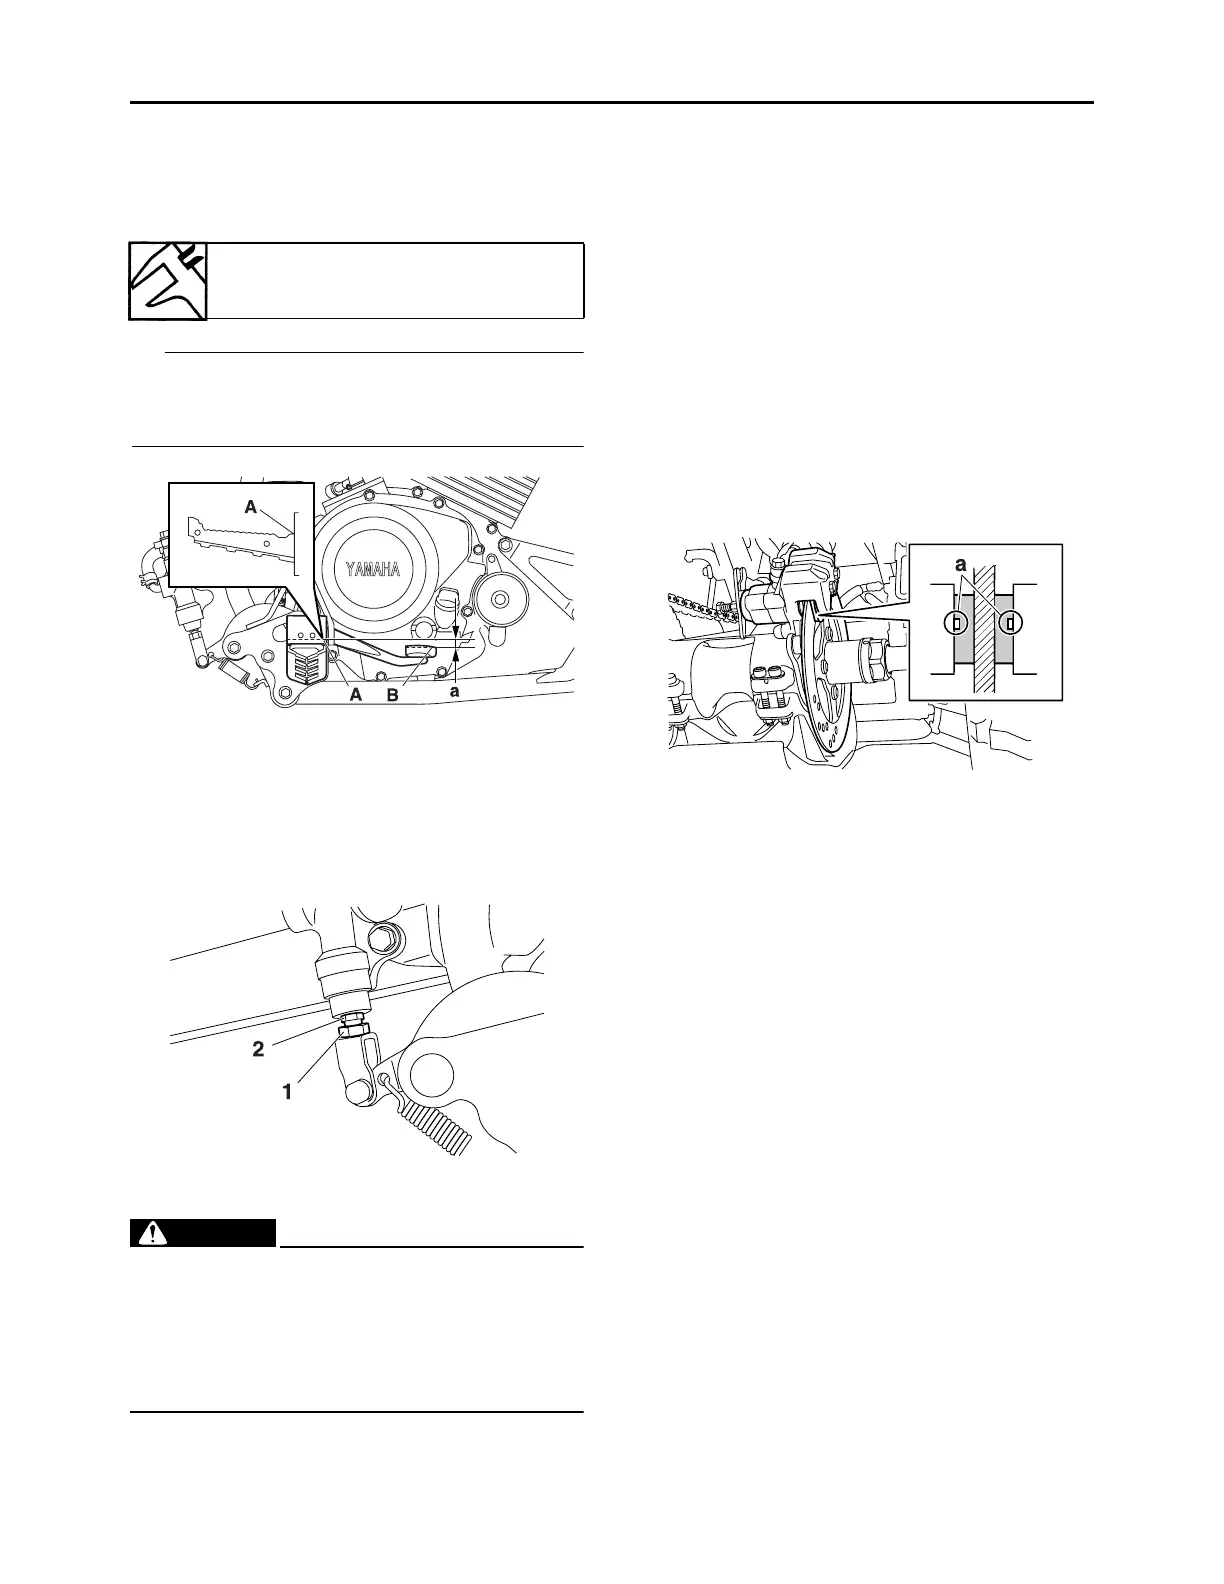
ADJUSTING THE BRAKE PEDAL
1. Check:
• Brake pedal height “a”
Out of specification → Adjust.
TIP
The brake pedal height “a” is measured from
the root of the foot rest “A” to the brake pedal
surface “B”.
2. Adjust:
• Rear brake pedal height
▼▼▼▼▼▼▼▼▼▼▼▼▼▼▼▼▼▼▼▼▼▼▼▼▼▼▼▼▼▼
a. Loosen the locknut “1”.
b. Turn the adjusting bolt “2” until the brake
pedal height is within the specified limits.
c. Tighten the locknut.
WARNING
EWA4D3F003
After this adjustment is performed, lift the
rear wheels off the ground by placing a
block under the engine, and spin the rear
wheels to ensure there is no brake drag. If
any brake drag is noticed perform the
above steps again.
▲▲▲▲▲▲▲▲▲▲▲▲▲▲▲▲▲▲▲▲▲▲▲▲▲▲▲▲▲▲
3. Adjust:
• Rear brake light switch
Refer to “ADJUSTING THE REAR
BRAKE LIGHT SWITCH” on page 3-25.
EAS21260
CHECKING THE REAR BRAKE PADS
The following procedure applies to all of the
brake pads.
1. Operate the brake.
2. Check:
• Rear brake pad
Wear indicators “a” almost touch the
brake disc → Replace the brake pads as
a set.
Refer to “REAR BRAKE” on page 4-30.
EAS21280
CHECKING THE FRONT BRAKE HOSES
The following procedure applies to all of the
brake hoses, brake pipe and brake hose
clamps.
1. Remove:
•Seat
• Front fender
Refer to “GENERAL CHASSIS” on page
4-1.
2. Check:
• Brake hose “1”
• Brake pipe “2”
Cracks/damage/wear → Replace.
Brake pedal height
6.9 mm (0.27 in)
 Loading...