CYLINDER HEAD
5-10
▲▲▲▲▲▲▲▲▲▲▲▲▲▲▲▲▲▲▲▲▲▲▲▲▲▲▲▲▲▲
3. Check:
• Timing chain tensioner cap bolt
• Timing chain tensioner rod
Damage/wear → Replace the timing
chain tensioner assembly.
EAS24230
INSTALLING THE CYLINDER HEAD
1. Install:
• Dowel pins
• Cylinder head gasket
2. Install:
• Cylinder head
• Washers
• Cylinder head bolts
TIP
• Apply Yamaha bond No.1215 (Three bond
No.1215®) to the threads of the cylinder
head bolts “5”, “6”.
• Lubricate the contact surfaces of the cylinder
head bolts and on both contact surfaces of
washers with engine oil.
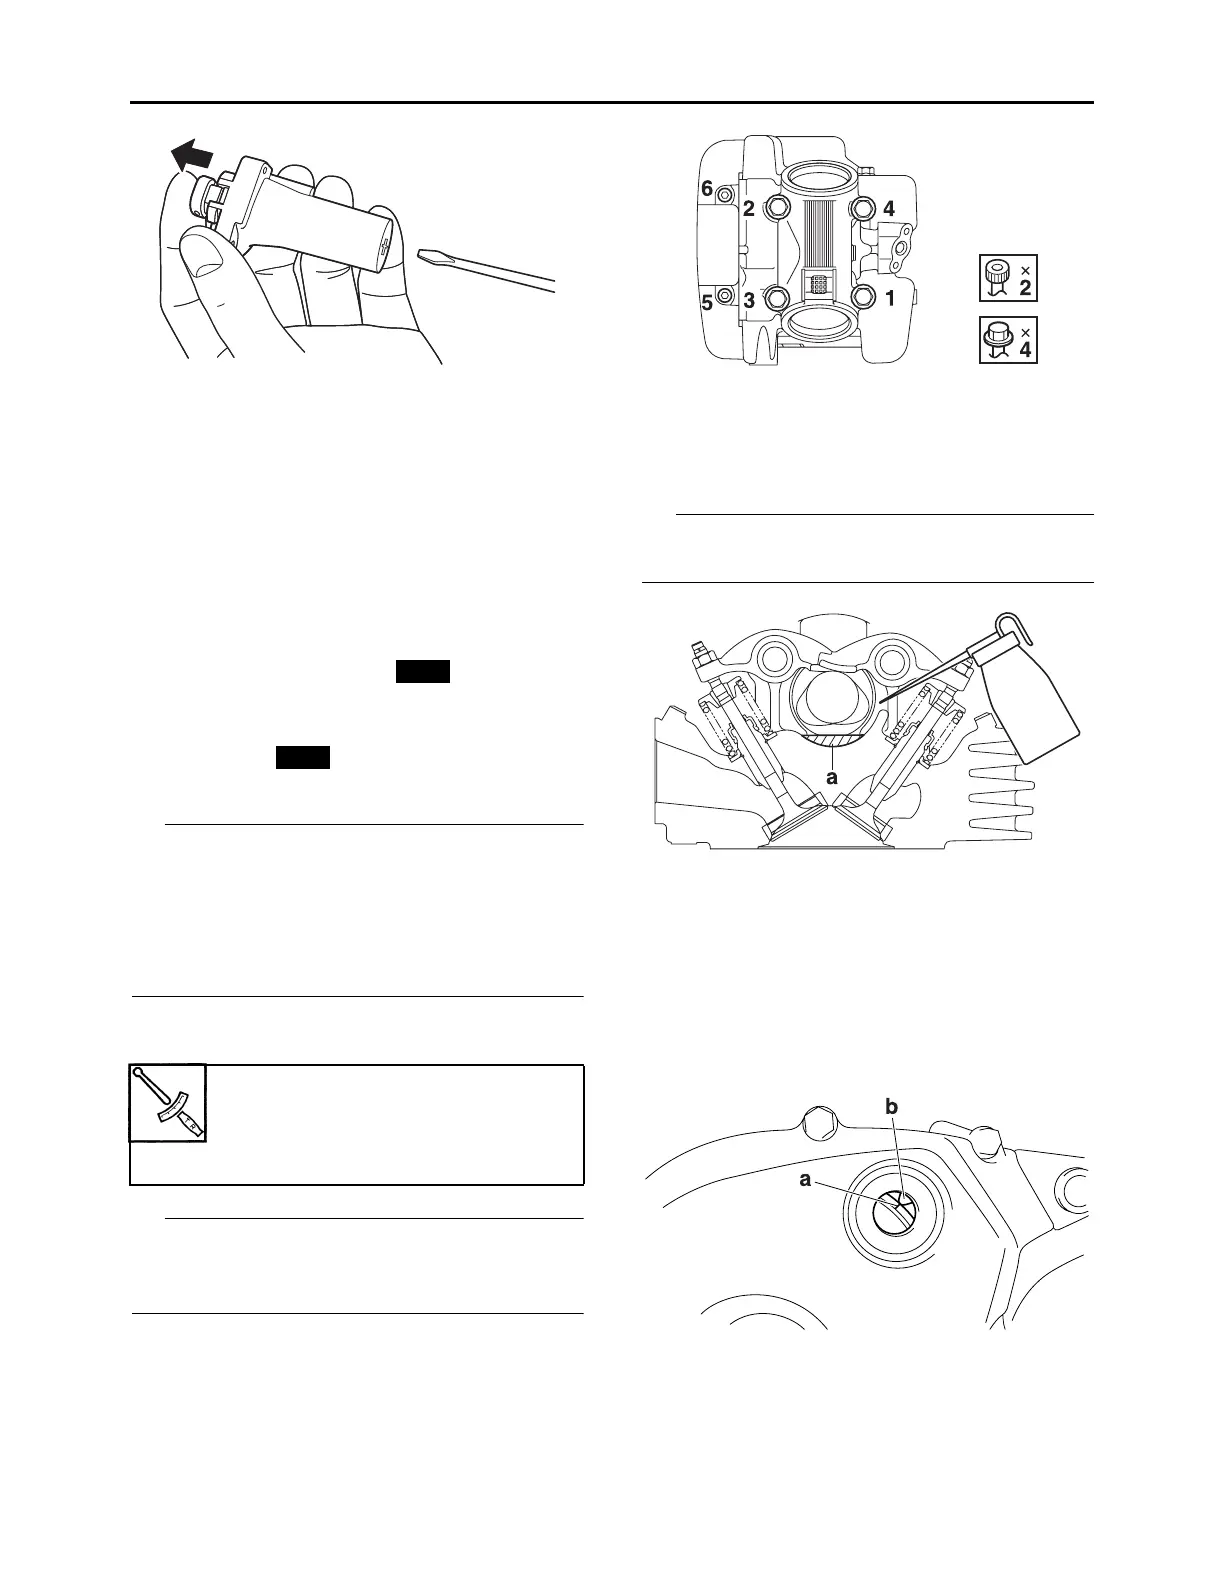
3. Tighten:
• Cylinder head bolts
TIP
Tighten the cylinder head bolts in the proper
tightening sequence as shown and torque
them in two stages.
4. Fill:
• Cylinder head
Engine oil (5 ml or more) into the space
“a”.
TIP
Be sure to add engine oil every time the cylin-
der head is removed.
5. Install:
• Camshaft sprocket “1”
• Timing chain “2”
▼▼▼▼▼▼▼▼▼▼▼▼▼▼▼▼▼▼▼▼▼▼▼▼▼▼▼▼▼▼
a. Turn the crankshaft counterclockwise.
b. Align the “I” mark “a” on the generator rotor
with the stationary pointer “b” on the gener-
ator rotor cover.
c. Align the “I” mark “c” on the camshaft
sprocket with the stationary pointer “d” on
the cylinder head.
d. Install the timing chain onto the camshaft
sprocket, and then install the camshaft
sprocket onto the camshaft.
Cylinder head bolt “1”–“4”
22 Nm (2.2 m·kgf, 16 ft·lbf)
Cylinder head bolt “5”, “6”
10 Nm (1.0 m·kgf, 7.2 ft·lbf)
New
New

 Loading...