RX-V4600/DSP-AX4600
19
RX-V4600/
DSP-AX4600
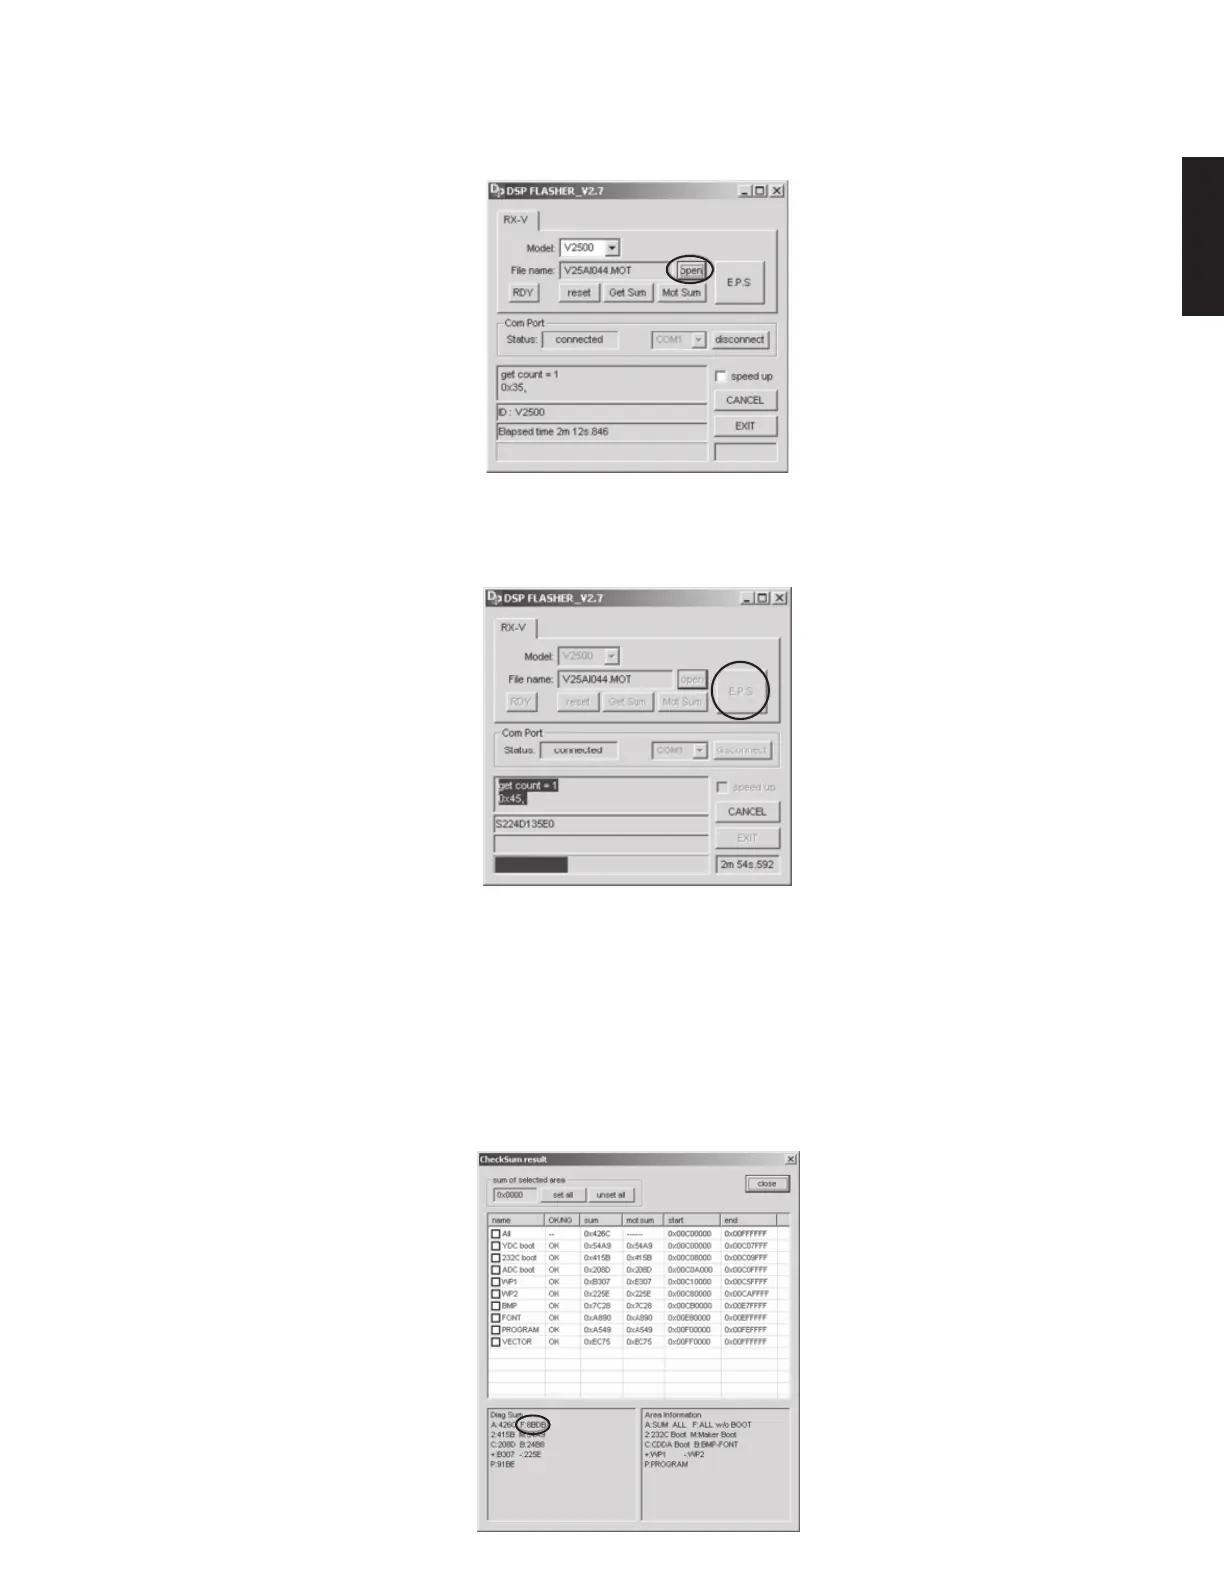
i. [EPS]ボタンを押すと書き込みが始まります。(Fig.10)
j. 書き込みが完了するとCheckSumresultの左下BOX
にチェックサムが表示されます(F:XXXX)。(Fig.11)
本体のダイアグを起動しチェックサムの値(F:Afterboot
area)と同じであることを確認します。
※ 値が違っている場合は、もう一度手順b.DSP
FLASHERを実行しますからやり直してください。
h.
書き込むファームウェアのファイルをドラッグアンドド
ロップするか、[OPEN]ボタンでファイルを選択します。
(Fig.9)
h. Drag and drop the file of the firmware to be written or
select the file using the [OPEN] button. (Fig. 9)
i. Pressing the [EPS] button will start writing. (Fig. 10)
j. When writing is completed, the checksum is displayed
in the box located at the lower left of "CheckSum result"
(F : XXXX). (Fig. 11)
Start the DIAG function of the main unit and check that
the checksum value (F : After boot area) is the same.
* If there is a difference, perform the procedure again
starting from step "b. Execute DSP FLASHER".
Fig. 9
Fig. 10
Fig. 11

 Loading...