1. Remove the toolbox cover and the side cover
from the left side as described in Chapter Fourteen.
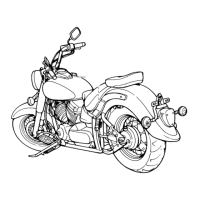
2. Release the hose clamp (Figure 96) and discon
-
nect the AIS pipe from its fitting on each cylinder
head.
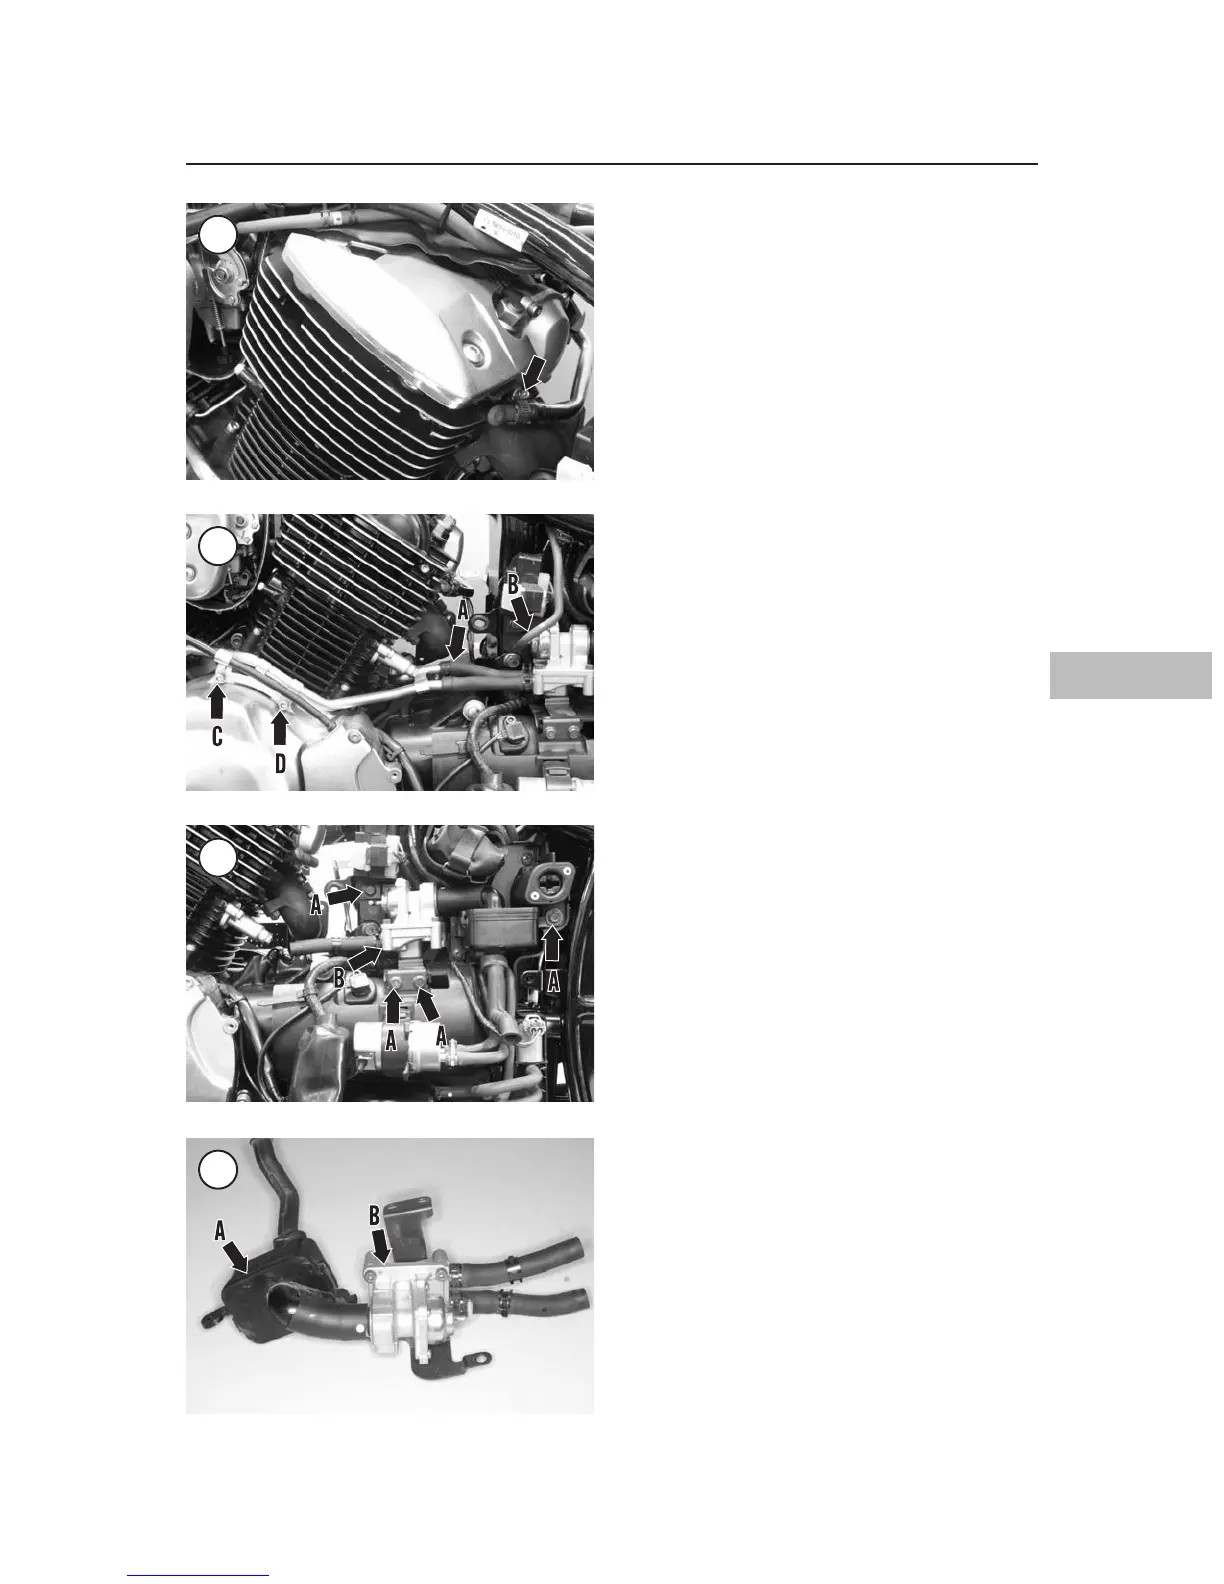
3. Release the clamp and disconnect the output
hose (A, Figure 97) on the AIS valve from each
AIS pipe. Mark each pipe and hose. They must be
reinstalled in their original positions during assem
-
bly.
4. Disconnect the vacuum line (B, Figure 97) from
the fitting on the air cut valve.
5. Remove the two alternator cover bolts (C and D,
Figure 97) and release the bracket from the alterna
-
tor cover. Lift the AIS pipes from the engine.
6. Remove the mounting screws (A, Figure 98)
and lower the AIS assembly (B) from the toolbox
panel.
7. Installation is the reverse of removal. Note the
following:
a. Make sure the lines are correctly routed as
shown in Figure 95.
b. Properly secure each hose to its respective fit-
ting.
c. Apply silicone sealant to the threads of the
rear alternator cover bolt (D, Figure 97).
Torque the two alternator cover bolts to 10
N•m (89 in.-lb.).
Inspection
1. Release the lock tabs and lift the AIS air filter
(A, Figure 99) from the air filter housing.
2. Inspect the air filter and housing for cracks or
damage.
3. Remove the mounting screws and lift the air cut
valve (B, Figure 99) and the reed valve from the
AIS valve housing.
4. Inspect the reed valve and the air cut valve. Re
-
place any component that is damaged.
5. Make sure the ports in the reed valve, air cut
valve and AIS filter are unobstructed. Clean them if
possible or replace the clogged component.
6. Inspect the air and vacuum lines for cracks or
signs of leaks. Replace any hose or pipe as neces
-
sary.
7. Inspect the hose connections for signs of leaks.
8. Measure the reed valve height as shown in Fig
-
ure 100. Replace the reed valve if its height exceeds
the specification in Table 3.
AIR/FUEL, EXHAUST AND EMISSION CONTROL SYSTEMS 233
8
96
97
98
99

 Loading...