5. Check the end of the piston (B, Figure 46) for
wear.
6. Check the primary cup (D, Figure 46) and sec
-
ondary cup (E) on the master piston for damage,
softness or swelling.
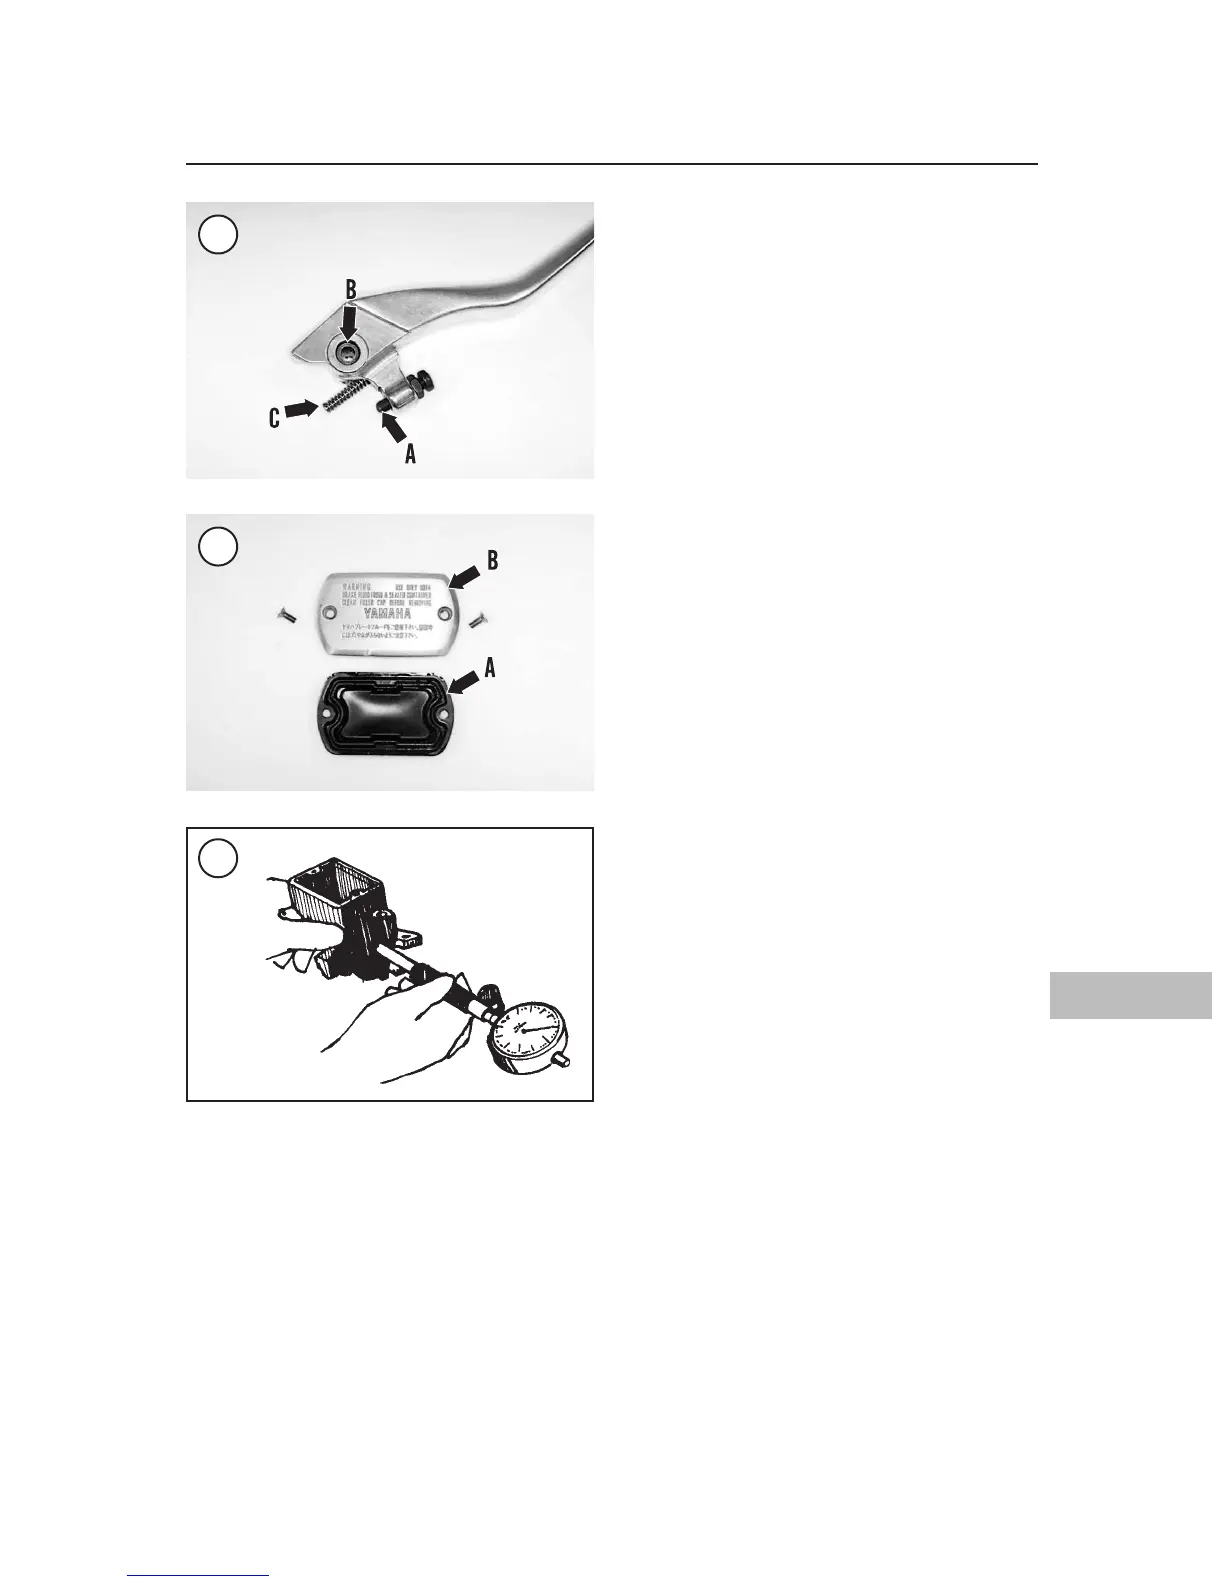
7. Check the end of the adjuster screw (A, Figure
50) for signs of wear. Replace the screw if neces
-
sary.
8. Remove and inspect the brake lever bushing (B,
Figure 50). Replace the bushing if it is worn or
elongated.
9. Remove the compression spring (C, Figure 50)
from the hand lever. Replace the spring if it is worn
or shows signs of fatigue.
10. Check the reservoir diaphragm (A, Figure 51)
and cover (B) for damage and deterioration. Re
-
place if necessary.
11. Inspect the threads in the master cylinder brake
port. If the threads are damaged or partially
stripped, replace the master cylinder body.
12. Measure the inside diameter of the master cyl
-
inder bore with a bore gauge (Figure 52). Replace
the master cylinder if the inside diameter equals or
exceeds the specification listed in Table 1.
REAR BRAKE CALIPER
Refer to Figure 53.
Removal
1. Securely support the motorcycle on level
ground.
2. Drain the brake fluid from the rear brake as de-
scribed in this chapter.
3. Remove the bolt and release the brake hose from
the cable holder (Figure 54) on the swing arm.
NOTE
Note the stop washer (A, Figure 55)
that sits between the hose fitting and
the caliper. This washer’s upper stop
sits against the outboard side of the
caliper indexing post and the brake
hose sits against the inboard side of
the washer’s lower stop. During as
sembly, the hose and stop washer
must be installed as shown.
4. Remove the banjo bolt (B, Figure 55) from the
caliper and separate the brake hose from the caliper.
Remove and discard the two washers. New washers
must be used during installation.
5. Insert the end of the brake hose into a reclosable
plastic bag so brake fluid will not leak onto the mo
-
torcycle.
6. Remove the brake pads as described in Steps 2-5
of Rear Brake Pad Replacement in this chapter.
7. Remove the caliper mounting bolts (C, Figure
55), and lift the caliper from the disc and caliper
bracket.
BRAKES 367
13
50
51
52
 Loading...