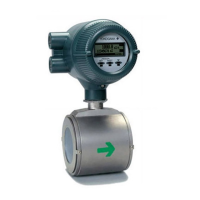
3.3.6 Nomial Diameter 15 mm (0.5 in.) to
125 mm (5.0 in.), Sanitary Type
The sanitary type can be mounted to the piping using a
clamp, a union, or a welded joint.
NOTE
Thissectiondescribestheremoteowtubeasan
example. The same procedure also applies to the
integralowmeter.
Sanitary adapters are engraved with character as
identication.
Table3.3.17 SanitaryAdapterIdentication
IdenticationCharacter Material for Adapter
No mark SUS304
F SUSF304
L SUS316L
FL SUSF316L
(1) Mounting Direction
Mounttheowmetersothattheowdirectionoftheuid
to be measured is in line with the direction of the arrow
markontheowmeter.
IMPORTANT
If it is impossible to match the direction of the arrow
mark, the direction of the electrical connection can
be changed. Refer to the applicable user’s manuals
which can be downloaded from our website.
Incasetheuidbeingmeasuredowsagainstthe
arrowdirection,changethevaluefrom“Forward”to
“Reverse”attheparameter[J20:FlowDirection]
(refer to Chapter 8).
(2) Mounting Procedure
(a) Clamp type
(process connection codes: HAB, HDB, and HKB)
1) Welding ferrule
Weld a ferrule to the piping.
IMPORTANT
When welding the ferrule, pay attention to the edge
preparation, level differences between the ferrule and
the piping, and the welding current to avoid deforming
thepipingorcausingstagnationportionoftheuid.
2) Installing gasket
Installagasketforclamptotinthegrooveonthe
ferrule.
3) Positioningowmeter
Positiontheowmeterbetweenthetwoferrules.
4) Tightening clamp
Install a clamp to cover the tapered parts of the
owmeter-sideadapterandtheferrule,and
tighten the clamp screw.
5) Conrmationofadaptermountingscrew
Afterinstallationofthemagneticowmeter,be
sure to retighten the adapter mounting screw
according to Table 3.3.18 or Table 3.3.19.
Besuretoconrmthatleakagefromadapter
connectionpointdoesnotoccurbyllingthepipe
oftheowtubewithuid.
NOTE
The ferrule, clamp, and gasket are not provided with
theowmeter,andmustbeprovidedbytheuser.
Gasket
Ferrule
Clamp
Adapter for clamp connection
Figure 3.3.6 Mounting Procedure for Clamp Connection
Type
(b) Union type
(processconnectioncodes:JDB,JKB,andJSB)
1) Welding sleeve
Pass the piping through a nut and then weld a
sleeve to the piping.
IMPORTANT
• Be sure to weld the sleeve after passing the piping
through the nut.
• When welding the sleeve, pay attention to the
edge preparation, level differences between the
sleeve and the piping, and the welding current to
avoid deforming the piping or causing stagnation
ofsomeoftheuid.
2) Installing gasket
Installagasketforuniontotinthegrooveonthe
sleeve.
3) Positioningowmeter
Move the nut closer to the piping temporarily and
positiontheowmeterbetweenthetwosleeves.
4) Tightening nut
Install the nut to cover the tapered parts of the
owmeter-sideadapterandthesleeve,and
tighten it using a wrench.
 Loading...


